Module Time periods
Time periods help with filtering and sorting
The "Time periods" module must be populated by the system administration. You find it in the system administration under:
Administration > Modules > Time periods
Time periods are freely definable and are intended to support filtering implementations within specific time ranges (for example: Semester a, b, c).
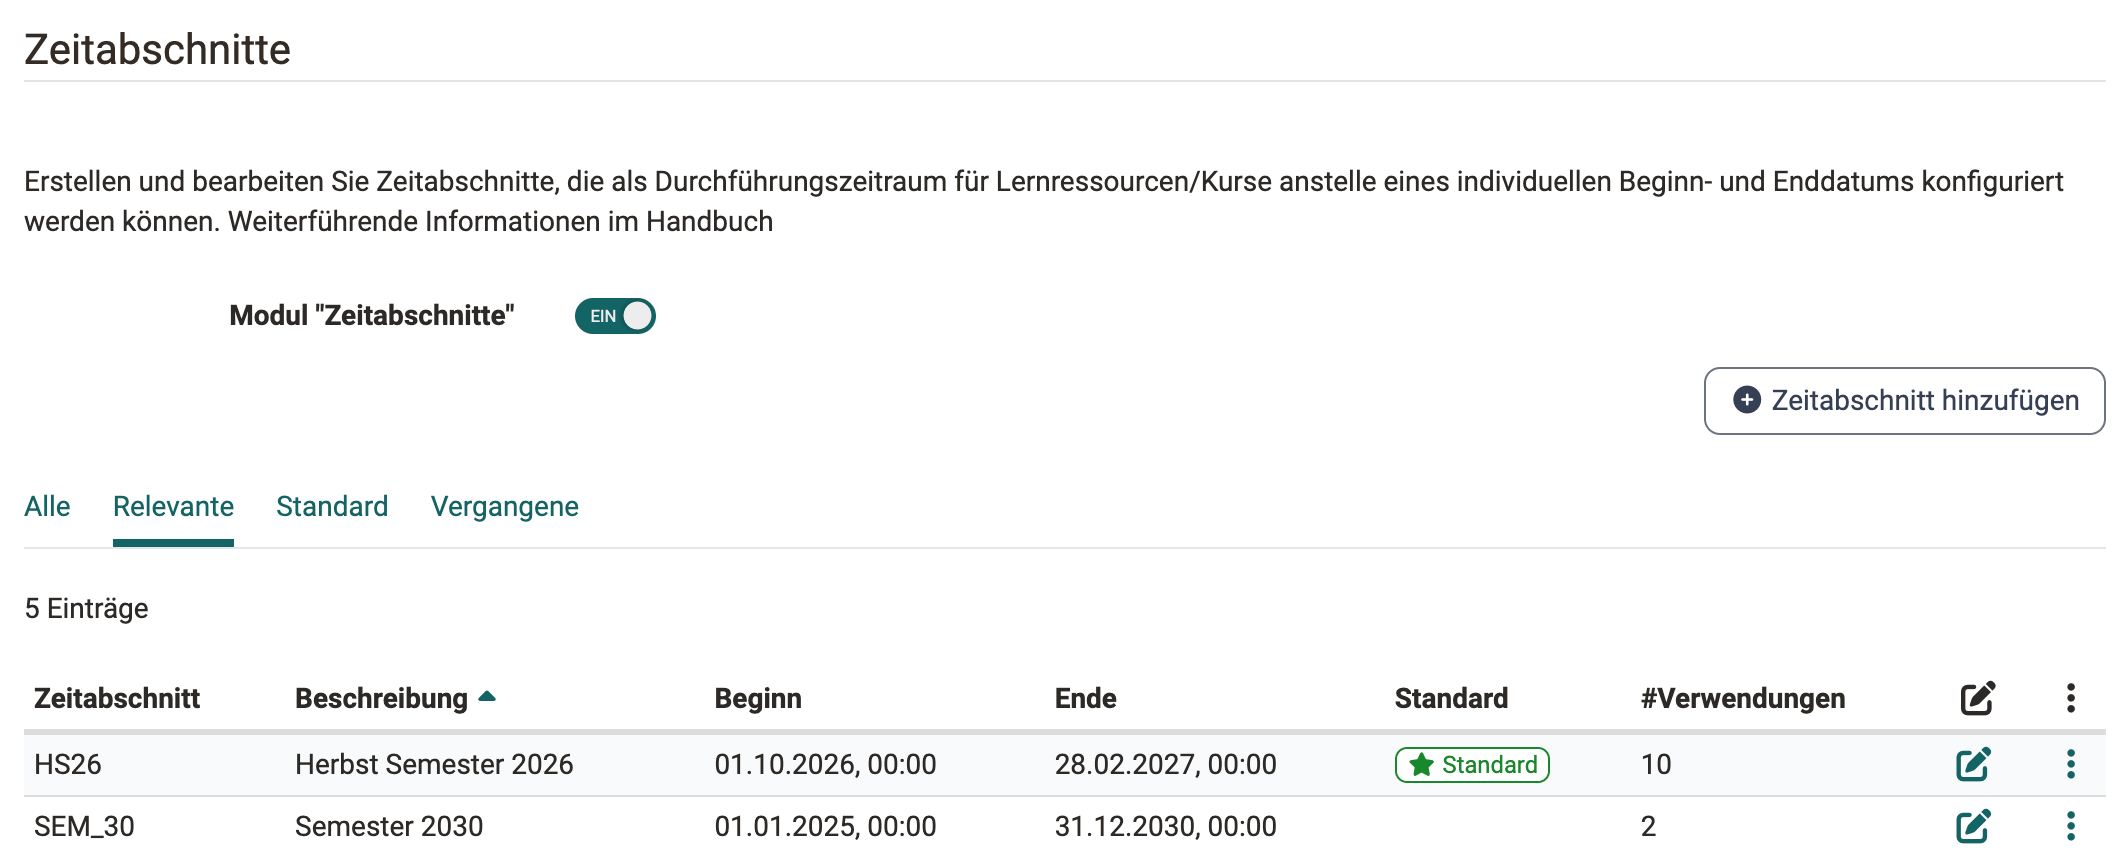
The "#Uses" column shows how many learning resources use the time period. Use the tabs to restrict the list to the relevant, the default or the past time periods.
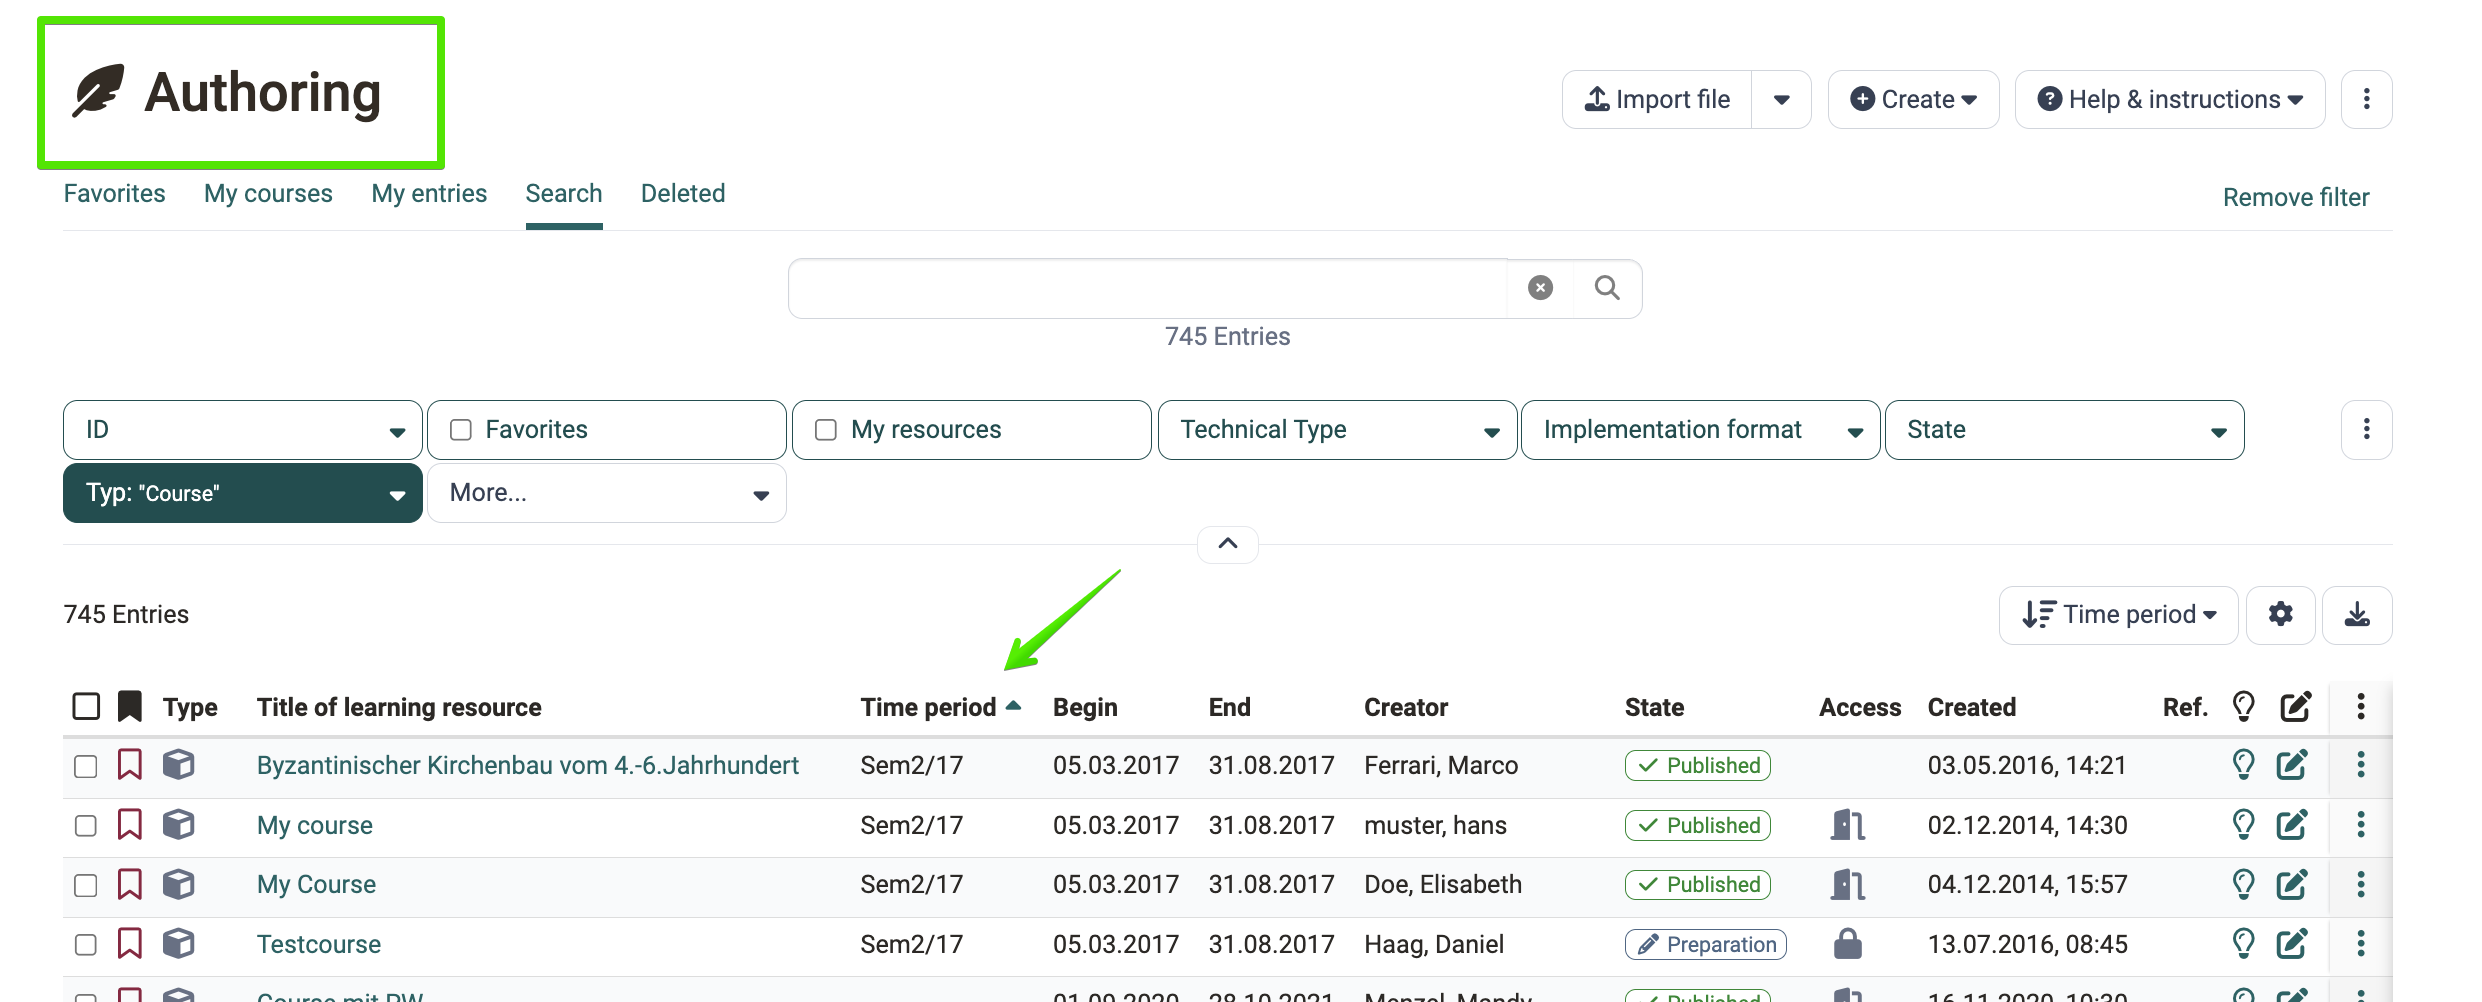
The time periods created here are available as a column in the Authoring area and can be sorted there.
Create and edit a time period
Click Add time period to create a time period. Use the pencil symbol in the row to edit an existing time period.
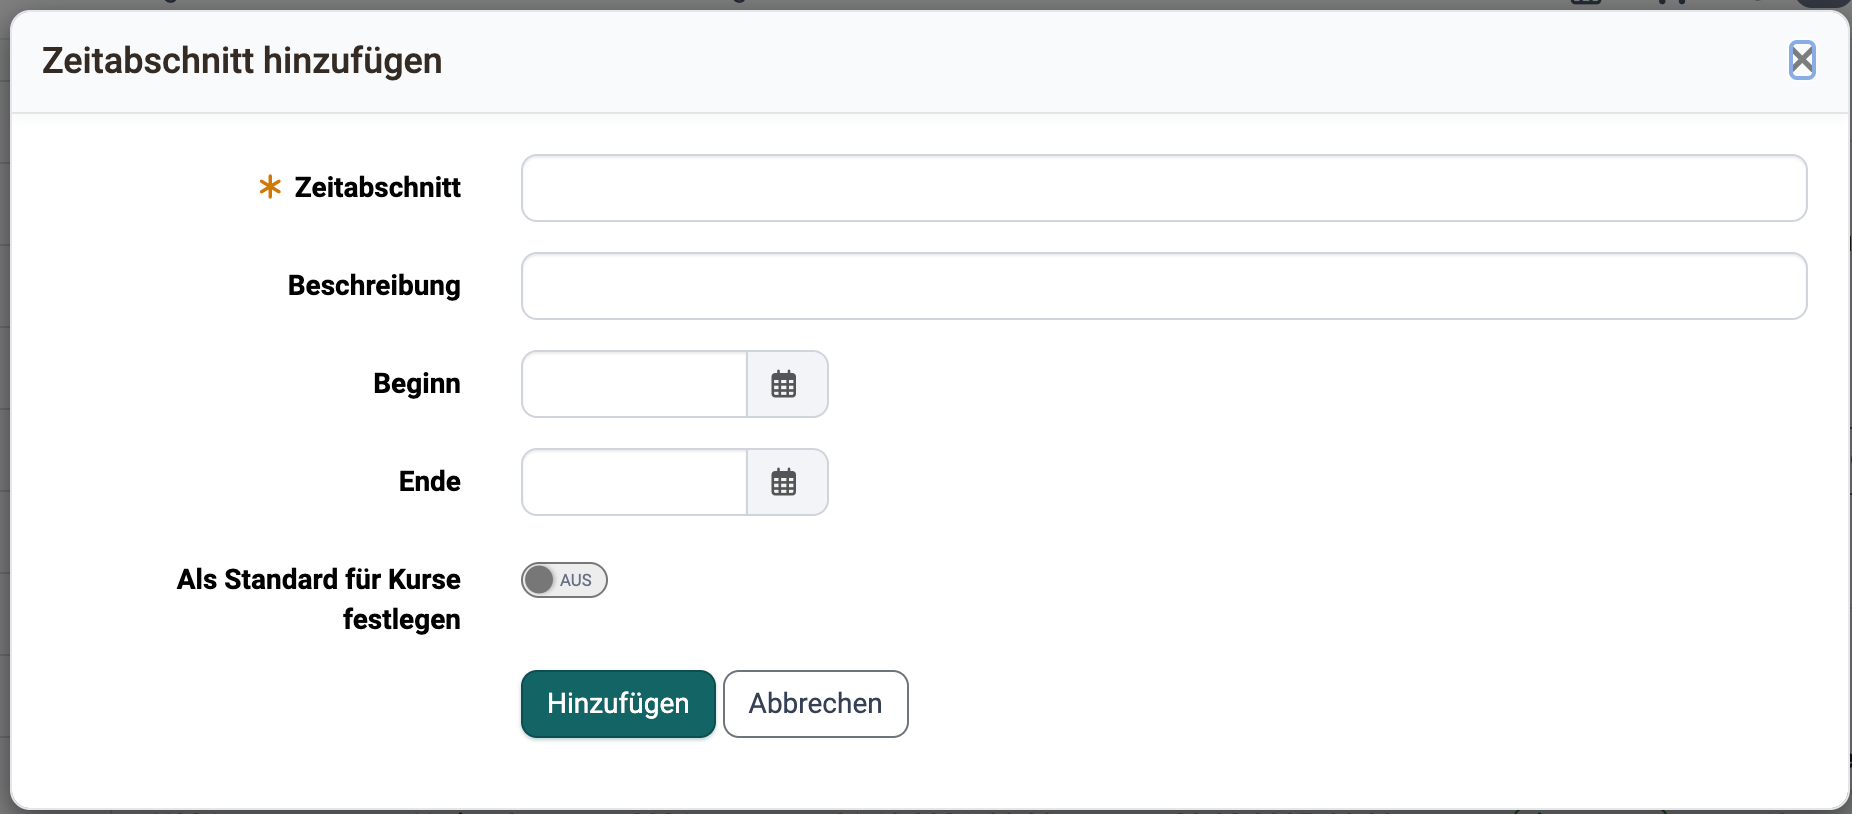
The dialog contains the following fields:
| Field | Meaning |
|---|---|
| Time period | Short label, for example "HS26". Mandatory entry, maximum 64 characters. |
| Description | Full name, for example "Autumn semester 2026". Optional, maximum 250 characters. |
| Begin | Start date of the time period. |
| End | End date of the time period. |
| Set as default for courses | The time period is preselected when a learning resource is created. There is only ever one default: setting it removes the mark from the previous default. |
Important
The short label in the Time period field is the mandatory entry. You may leave the Description field empty. Lists that sort by the description place entries without a description at the end.
Time period in the course
How authors select a time period as the execution period of a course.
Execution period in the course >
Further information
Mentioned on this page
Course Settings - Tab Execution >
Authoring - Overview >
Catalog 2.0 - Sorting/order >
Further reading
Module Taxonomy >
Module Catalog >