My portfolio binders
In the personal menu, every user has access to their own portfolio. The link "Go to my binders" takes you to all your own portfolio binders, where you can also create new binders.
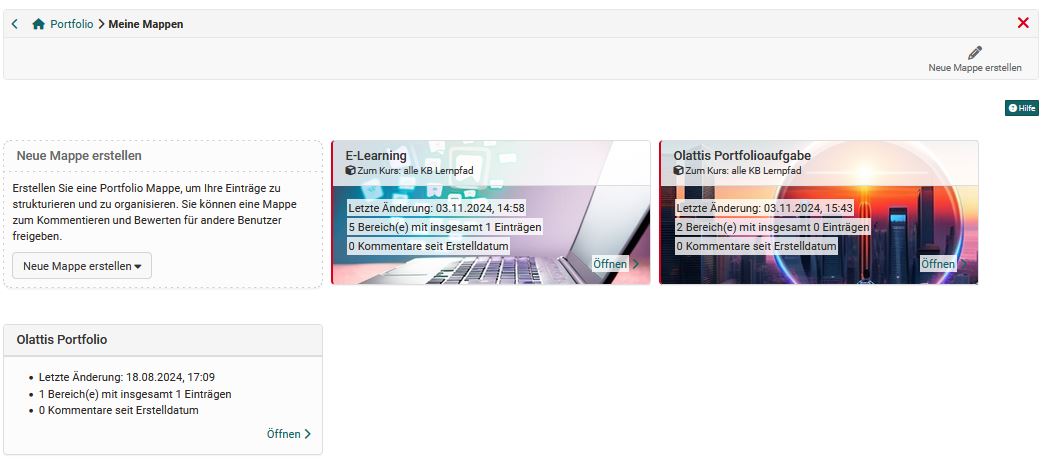
The two types of binders
There are basically two types of portfolio binders:
- Binders collected in a course
- Self-created, course-independent binders
Collected, prepared binders
You can recognize binders collected from a portfolio task in a course by the red border and the reference to the corresponding course. These binders are based on a "Portfolio 2.0 template" and are usually created by another person, mostly the teacher. The collection takes place in the course via the "Portfolio Task". Alternatively, it is also possible to book and collect portfolio templates independently of a course.
As soon as learners collect a portfolio binder, a copy of the template is created and the collected binder appears in the personal portfolio area under "My binders". Whoever opens this binder can select or collect the tasks stored there (free text or form type) and edit the portfolio activities provided by storing various artifacts (texts, files, images, etc.) or filling out a prepared form.
In the Portfolio Editor, a layout must always be selected first before it can be filled with content and artifacts, optionally also from the Media Center. Several layouts can also be used for a provided task.
Alternatively, already created portfolio entries can also be linked via the "Link content" button. Changes to the entries are then possible in all referenced locations.
Important
However, users cannot create new "sections" in a collected portfolio binder. Creating their own "entries" is also disabled by default.
Individual portfolio binders
All OpenOlat users can create individual, independent, personal portfolio binders with sections, entries and various types of content, for example to document and support their own learning process without a course context or a formal instructional framework.
In the "My binders" area, there are two places where new binders can be created.
a) Via the link "Create new binder" at the top right
This way, you quickly get a new, empty portfolio binder. All portfolio features are generally available, including the design of sections, editing the metadata, exporting the binder, deleting the binder and assigning access rights.
b) Via the dropdown menu in the box "Create new binder"
This provides an additional way to create a new binder.
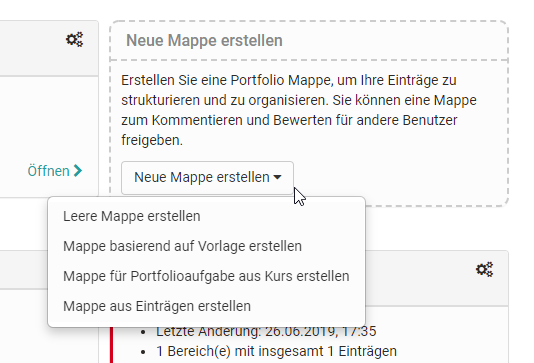
In addition to creating an empty binder as described under a), there are the following options:
- "New binder from template": A Portfolio 2.0 template for which the user has permission can be used as the basis.
- "New binder from course portfolio task": Portfolio tasks from the user's own courses are displayed here and one can be selected. This approach leads to the same result as collecting the portfolio task in the course.
- "Create binder from entries": Previously created entries can be bundled into a new portfolio binder. A wizard guides you step by step through the selection.
Important
The ability to create binders yourself can be restricted by your administrator.
The tabs of a portfolio binder
An opened binder shows the tabs "Overview", "Entries", "History" and "Access control".
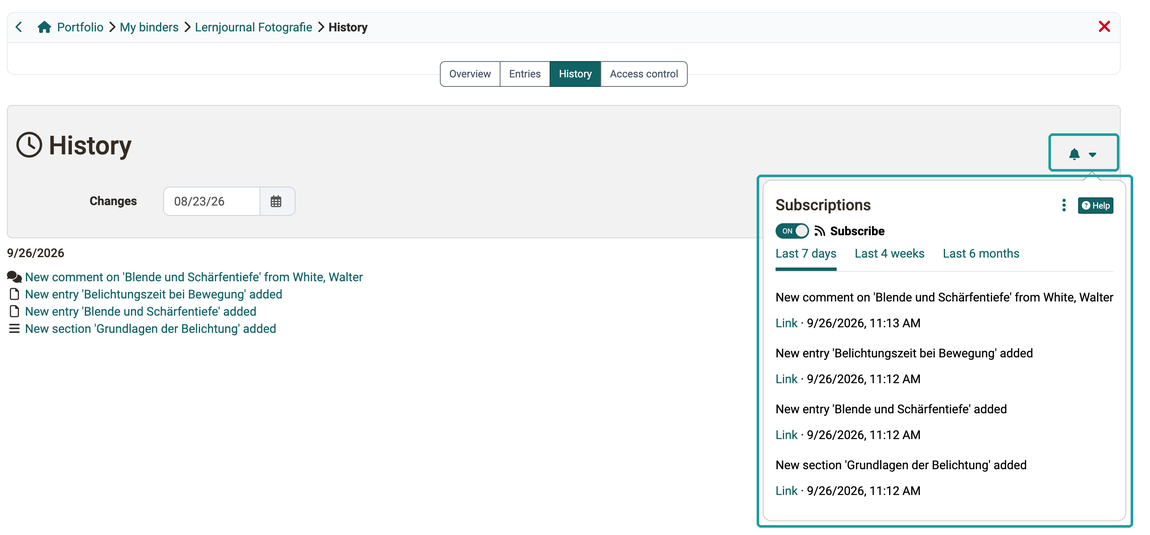
- In the History, all changes are listed in chronological order, with the most recent at the top. The bell icon at the top right next to the heading lets you be informed about these changes instead of checking the tab yourself: click it and switch on "Subscribe" in the pop-up window. You are notified of new comments on entries with the name of the person who wrote them, as well as new and changed entries, sections and evaluations, in each case only for content you are allowed to see in the binder. The notifications are collected under Subscriptions in the personal menu and, depending on your settings, are also sent by e-mail.
- Under Access control, you share sections and entries. For more information, see Collecting and editing.
Two further tabs appear depending on the binder and your rights:
- Templates, if you can pick up a task from a template in this binder.
- Grading, if the binder is assessable and you are allowed to view the assessment.
Important
Your administrator can switch off the tabs "Overview", "Entries" and "History".
Further information
Mentioned on this page
Portfolio template: Creation >
Course Element "Portfolio Task" >
The Portfolio Editor >
Media Center Concept >
Multiple use of entries >
e-Assessment Administration: ePortfolio >
User tools: Subscriptions >
Portfolio task and assignment: Collecting and editing >
Further reading
My entries >
Shared with me >
Shared by me >