Course Element "Wiki"
Profile
| Name | Wiki |
|---|---|
| Icon | |
| Available since | |
| Functional group | Communication and collaboration |
| Purpose | Collaborative content creation |
| Assessable | no |
| Specialty / Note |
Use a Wiki to easily create learning content together with your course participants. A wiki can be used for group work, as a documentation tool and generally for the cooperative creation of texts. The individual pages are implemented in the form of hypertext with linked pages.
in the course editor
With the "Wiki" course element, you integrate a wiki learning resource into your course. Just click on "Select, create or import Wiki" in the tab "Wiki learning content" to assign an already existing Wiki or to create a new one.
If you have already added a Wiki, its name will appear in the field. In order to change the assignment of a Wiki, click on "Replace Wiki" in the tab "Wiki learning content" before selecting another Wiki.
In the "Wiki learning content" tab, you can also define who is allowed to edit the wiki. Here you can set that not only owners but also maintainers and participants may edit Wiki articles. By default all course participants have read and write permission in a Wiki. Only the OpenOlat user who has created the page or OpenOlat users, who are registered as owners in a Wiki, will be allowed to delete Wiki pages.
Attention
If you can't find the "Wiki" course element in the course editor, it was disabled by a system administrator.
Working with Wiki (closed course editor)
If a Wiki is used in an OpenOlat course, the Wiki menu and other Wiki links automatically appear in the left course navigation. Use the "From A-Z" link to call up the table of contents with the display of all Wiki pages. This way you can see at a glance which pages have already been created.
In the main area, you can see the respective Wiki contributions (articles), edit the wiki pages (Edit page), hold discussions on the individual Wiki pages and view the editing history (versions/authors). You can also export a Wiki as a content package (CP) and be informed about changes.
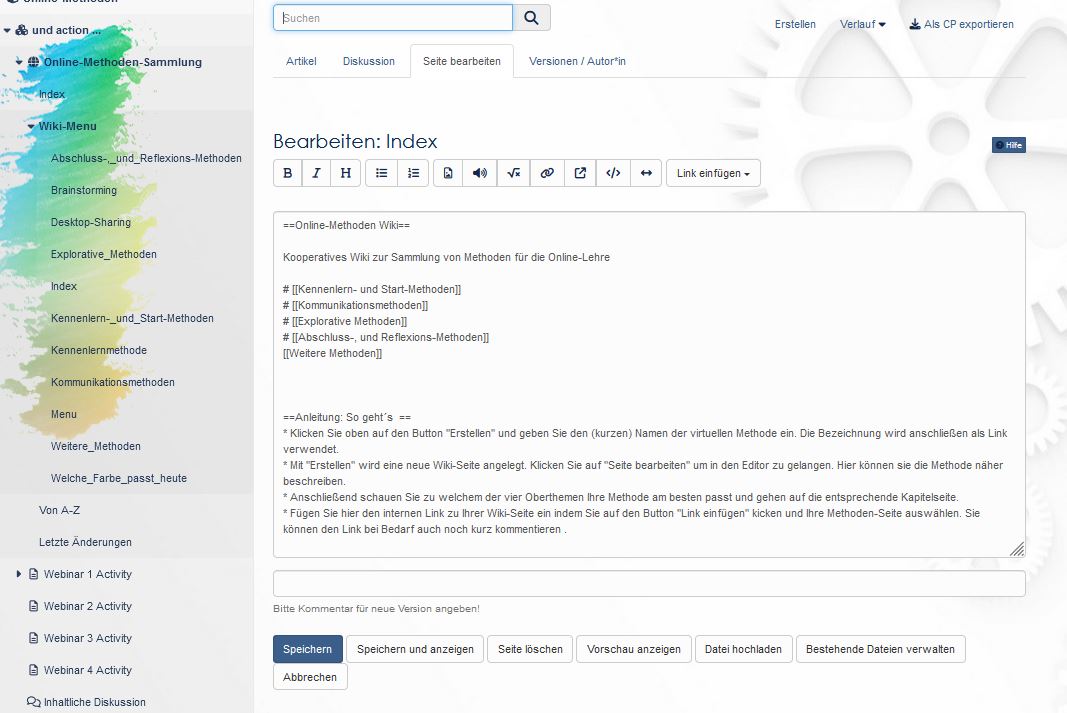
Creating new Wiki pages
A new Wiki page can be easily created using the "Create" button and then filled with content. It should be noted, however, that the page created in this way does not yet have a connection to the overall wiki structure. In order to establish a connection, appropriate links should be created in the "Wiki menu" and/or on the "Index" page of the Wiki.
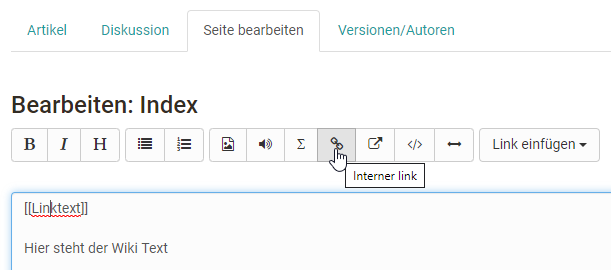
Another way to create a new Wiki page is to create a matching internal link on the page where the link to the new Wiki page should appear. For this purpose, you can either use the corresponding button of the Wiki Editor or enter the appropriate syntax directly. The Wiki syntax for new internal links is two opening square brackets + page name + two closing square brackets. So for example: [[link name]].
The corresponding page will then be created automatically the first time the link is called.
Change contents of a wiki page
To edit the content of a wiki page, select the "Edit page" tab of the desired wiki page. The Wiki Editor appears with various formatting options. Here you can also include images, media links, mathematical formulas, internal and external links in your wiki. In addition to the buttons in the editor, there are other formatting options that you can insert directly in the text as syntax elements.
The wiki syntax is explained in more detail below.
Wiki Syntax
You can format your input using the following wiki syntax.
Attention
It is recommended to use special characters in Wikiwords with restraint. The colon (:) is not allowed. Also note that a space at the beginning of a line is interpreted as a formatting command (Preformatted Text).
Text design
| Syntax | Result (Formatting) |
|---|---|
| '''Bold text''' | Bold text |
| ''Italic text'' | Italic text |
| ==Level 2 Headline== | Level 2 Headline |
| * List | |
| # Numbered list | 1. Numbered list |
Links
| Syntax | Result (Formatting) |
|---|---|
| [[Internal link]] | Internal link |
[[Link | Text]] |
Text |
| External link [http://www.openolat.org] | http://www.openolat.org |
| [http://www.openolat.org The Website of OpenOlat] | The website of OpenOlat |
External addresses are automatically converted to a link if you provide the full address: http://www.openolat.org. If you want to specify a different term instead of the link, put the URL and the term together in square brackets, separated by a space.
Tables
Single Row
{|
|Cell 1
|Cell 2
|}| Cell 1 Cell 2
Cell 1 Cell 2
Multiple Rows
{|
|Cell 1
|Cell 2
|-
|Cell 3
|Cell 4
|}|
Cell 1 Cell 2
Cell 3 Cell 4
With frame
{| border="1"
|Cell 1
|Cell 2
|-
|Cell 3
|Cell 4
|}
| Cell 1 | Cell 2 |
|---|---|
| Cell 3 | Cell 4 |
Pictures and other files
For example, to add images to the wiki, you must first upload them to OpenOlat (via the "Upload File" button). As soon as there is at least one file in the wiki, the drop-down menu "Insert file" appears, with which images etc. can be conveniently inserted.
[[Image:openolat_logo_72.png]]
![]()
When inserting the image, the following optional formatting options are available:
Caption
[[Image:openolat_logo_72.png | This is the OpenOlat logo.]]|
![]()
This is the OpenOlat logo.
Alignment
Use the "left" or "right" addition to specify how the image should be aligned.
[[Image:openolat_logo_72.png|right]]
![]()
Picture size
Specify in pixels how large the image should be displayed.
[[Image:openolat_logo_72.png|120px]]|
![]()
Miniature picture
If you select the "thumb" addition and a small image size, the image will be inserted as a thumbnail. Clicking on the image will display it in full size.
[[Image:openolat_logo_72.png|thumb|24px]]
![]()
Combined formatting
Multiple formatting options can also be used simultaneously.
[[Image:olat_logo.png|center|150px|thumb|Das ist das OpenOlat-Logo.]]
![]()
Other files: PDF
[[Media:any.pdf]]
Mathematical formulas (LaTeX)
To make OpenOlat display the formulas faster and nicer, you can install jsMath fonts on your computer. You can find the download area and instructions at: http://www.math.union.edu/~dpvc/jsMath/download/jsMath-fonts.html
The syntax of the mathematical notation used in OpenOlat can be found at: http://meta.wikimedia.org/wiki/Help:Formula
Syntax
<math>Insert formula here</math>
Inline Mode
\(x^2\)
x2
Unformatted Text
<nowiki>Insert the unformatted text here</nowiki>
Insert the unformatted text here
Info
Further information on the wiki syntax of the Media Wiki can be found here: https://www.mediawiki.org/wiki/Help:Formatting.
Attachments, links to files, export
To attach a file, first upload it via "Upload file". Navigate to the location on the wiki page where you want the file to appear. Then select the file via "Insert file" and confirm with "Save". Links to other wiki pages are created using the "Insert Link" button. Further formatting options can be found one line above.
You create links to files in folder course elements in OpenOlat by clicking on the metadata icon  , and then copying the External link to this resource. Please note that you can only link to files that are inside a subfolder in a folder course item.
The wiki can be exported and saved as IMS content packaging by all participants via the corresponding link. Authors can also re-import an exported CP into OpenOlat.
Note
If a wiki is to be exported directly as a wiki, this is only possible by the owner of the wiki directly in the learning resource via the menus "Copy" or "Export content". Course participants do not have this option.
Attention
When you delete pages, all versions are also deleted. So you cannot restore deleted pages.