Blogging
If a published course contains a blog, coaches and course participants can work with this blog (blogging). The term "blogging" refers to the use, utilization and deployment of a created and configured blog.
Quick Links
As a course participant or coach, you can
View and read posts
To access a blog, simply click on the corresponding course element in the course menu on the left. Then select the post that interests you.
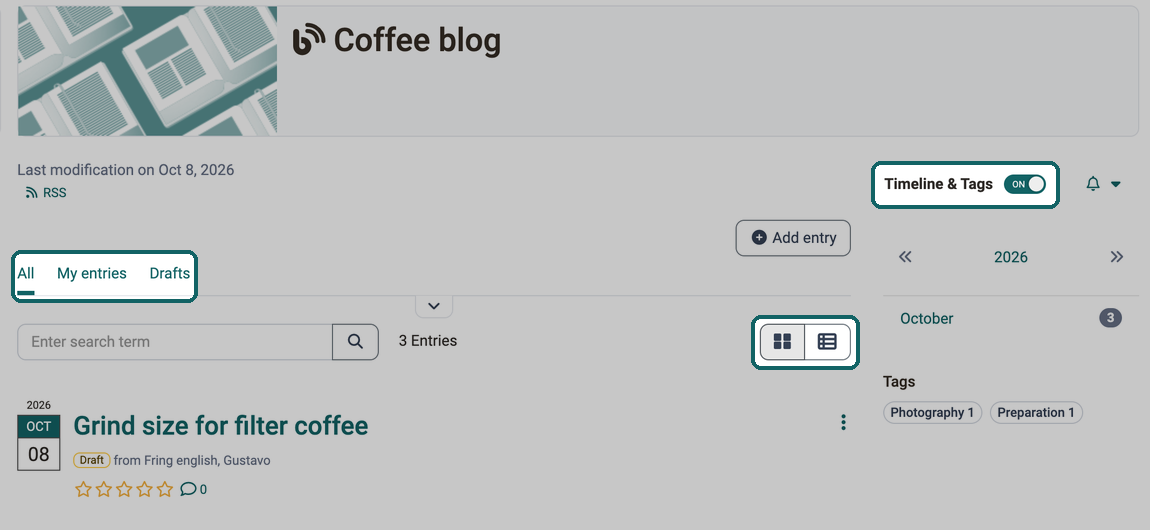
To switch between "List view" and "Table view", use the buttons on the right above the list.
With the "Timeline & Tags" toggle you additionally show and hide a timeline and the tags of the entries to the right of the list.
Filters are available above the list to limit the displayed posts: "All", "My entries" and "Drafts".
Important
If you only have read access to the blog (e.g. as a coach without write permission or as a course participant who is not allowed to create their own posts), only the filter "All" is available to you .
Note
It is also possible to use a blog learning resource "stand alone" (without integration into a course). In this case, the blog learning resource could be accessed after publication, e.g. via a link in an email or in the catalog.
Also remember that you can send a link in emails directly to a specific course element within a course (e.g. the blog).
Add and edit posts
Requirements
In order for you as a course participant or coach not only to comment and rate, but also to write your own contributions, it must first be permitted by the course owner. (See also Blog Configuration)
Please also note that external blogs inserted via a link cannot be edited.
Add your own entry by using the "Add entry" button. To reopen and edit, select the option under the 3 dots or click on the title in the list view. In the course view, you will find an "Edit" link for each of your contributions.
When adding or editing an entry, you fill in the following fields.
Title
Enter a title that describes the blog entry. This field is mandatory.
Tags
Optionally, assign tags to the entry. You select an existing tag or create a new one. With the "Timeline & Tags" toggle, the tags appear next to the list of entries.
Content
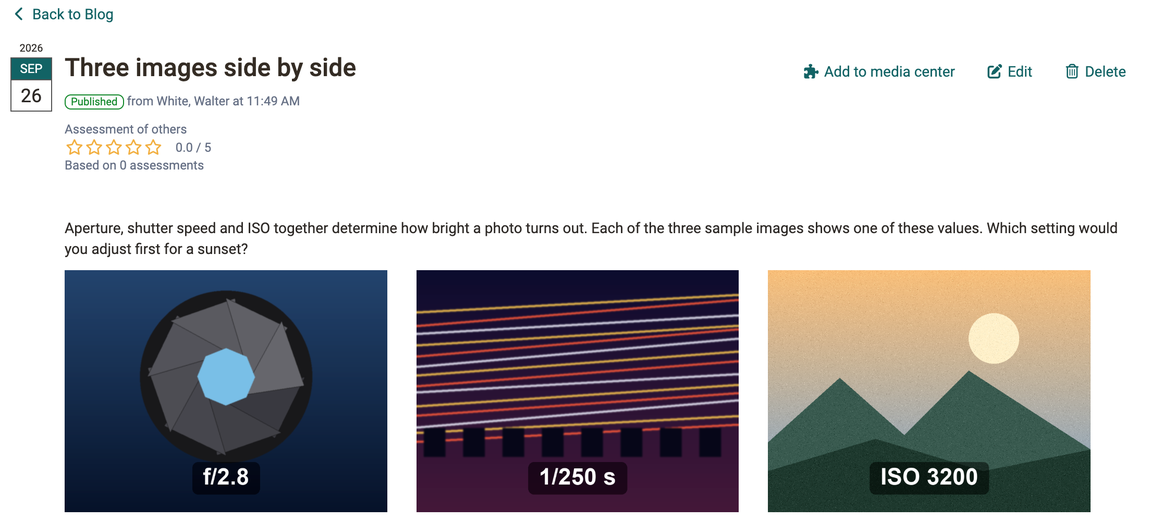
The content is the actual blog entry. This field should therefore be filled in. Formatting and images are permitted. To use them, switch from "Multi-line" to "Formatted" at the top right of the field. You write the content in the same HTML editor as in the course element "HTML page", but here without the "Table" menu. How to arrange several images side by side is described in the section Several images side by side.
Summary
The summary is optional and is used as a preview of an article or entry. It can therefore also be a short introduction.
Audio or video file
Optionally, attach a file in the formats MP3, MP4, M4V, M4A or AAC to the entry. For a video, OpenOlat prefills "Width" and "Height" with the values from the file when uploading.
Time and date of publication
The date and time of publication are used to make the entry visible to other participants or to hide it. If the time of publication is in the past, the entry will be visible. However, if it is in the future, it is a planned publication of the entry.
You can make the entry accessible to others by clicking on "Publish" (from the date specified). If you want to continue working on your entry at a later date, click on "Save draft". "Cancel" discards your changes and closes the form window. In the list of entries, a colored label shows the status: "Draft" in yellow, "Planned" in blue for a publication in the future and "Published" in green. Published entries are visible to others.
You can either publish the new entry directly, select the date of publication or save the entry as a draft. To the top of the page ^
Delete posts
A "Delete" button appears for each blog post if you are authorized to do so (because you are the author or moderator/course owner).
In the table view, a mass action is available for deleting multiple posts. To do this, select the checkboxes in the first column. Various filters and the search function support the search for specific posts.
Comment on posts
Course members can comment on blog posts with a text. Files can also be attached to comments and uploaded.
To write a comment or read existing comments, click in the comment line. A small text editor opens. Click the "Comment" button to send the comment.
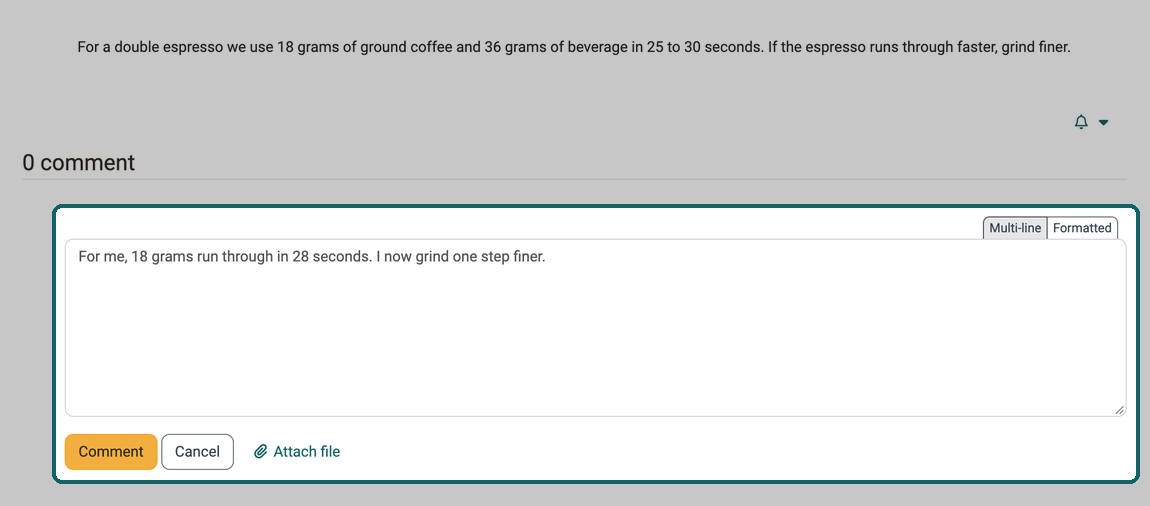
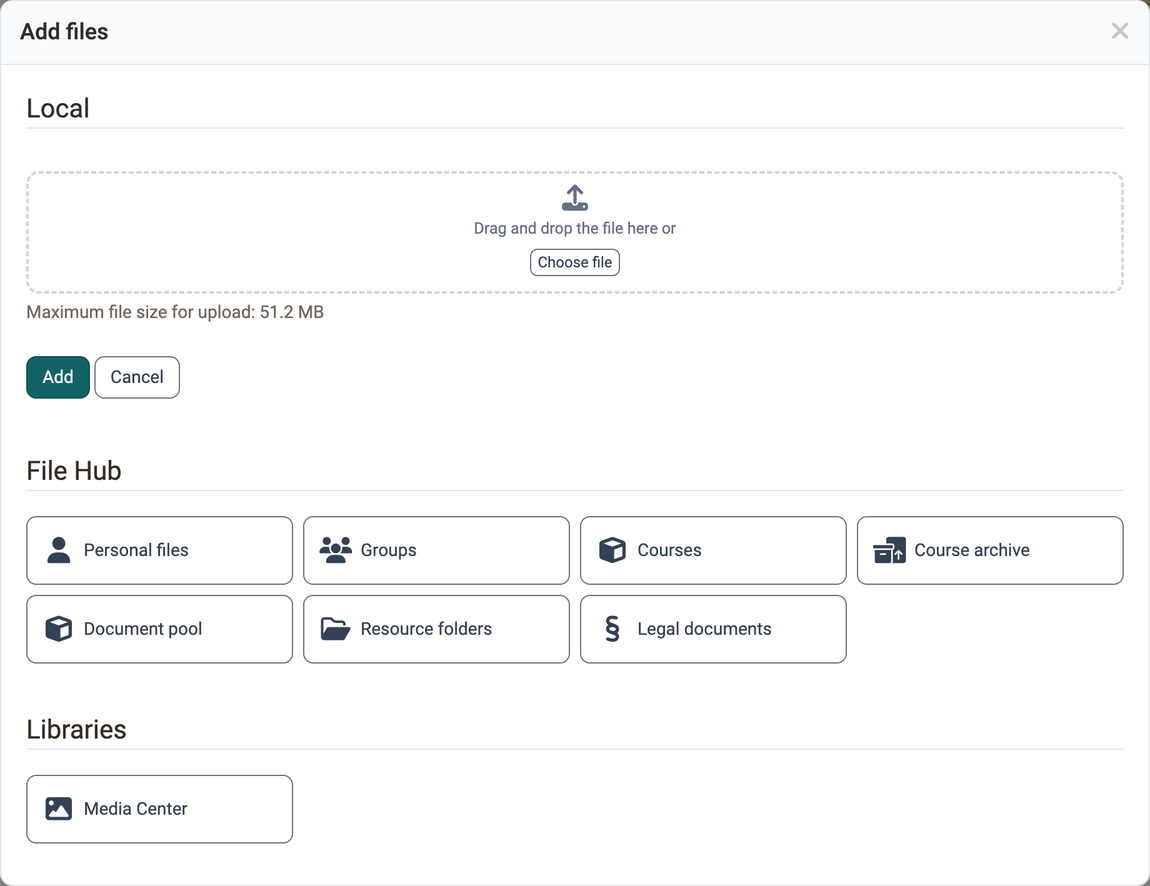
With "Attach file" you attach a file to your comment. In the "Add files" dialog, upload a file from your computer under "Local" or select a file from the "File Hub" or from the "Media Center".
Assess posts
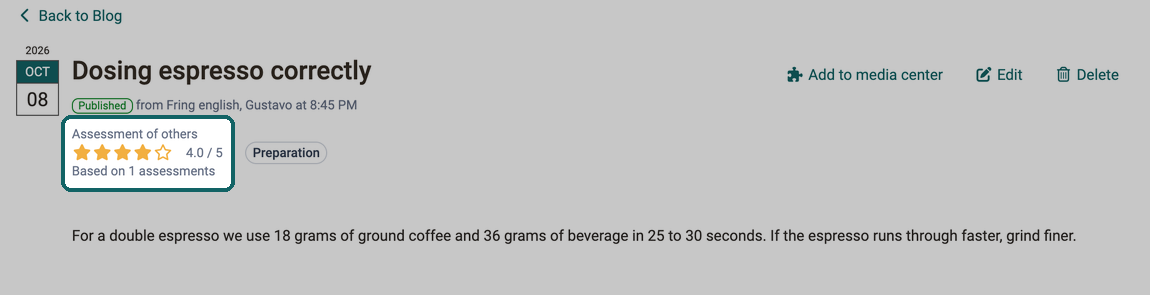
Course members can award 1-5 stars for the assessment of contributions.
In the normal state, you will see the ratings of other readers. As soon as you move your mouse over the stars, you can add your own rating.
Moderating a blog
Moderating a blog means directing or intervening in communication. In a blog, this means that a person checks whether the posts are appropriate or whether they need to be corrected or possibly even deleted. Moderators of an OpenOlat blog have the rights to read, comment, edit, delete and create new entries. Moderators can also customize the title and description of the entire feed.
The role of moderator can be taken on by course owners in any case. However, the right to act as moderator can also be assigned to coaches or specific persons. (See also Blog configuration)
Important
If blog entries have been imported, they can only be deleted by moderators, owners or coaches. (The original authors are still displayed as the creators of the posts).
Subscribe to posts
Subscribe to the blog's RSS feed to make sure you don't miss any new entries. You can find instructions here: Set up subscriptions (video introduction) (German)
If you would like to be notified as soon as a new post is added, subscribe to the blog as a whole. To do this, use the bell icon "Subscribe" on the right above the list of entries. If you only want to be notified when a comment is posted on a blog entry, you can also choose this type of subscription.
If you would like to pass on the link to the blog, you will find the link on the left above the list of posts under "RSS".
If you would like to pass on the direct link to an individual post, you can copy the URL from your browser window. The direct link will be displayed there.
Store posts in the Media Center
As the author of a post, you can also store your blog posts in the Media Center. The "Add to media center" button appears on your own posts for this purpose.
Further information
Mentioned on this page
Blog Configuration >
Course Element "HTML page" >
Further reading
Create a blog >
How do I create a blog? >
youtube
Set up subscriptions (German)