To-Dos
Where are to-dos in OpenOlat?
The tasks to be completed (to-dos) can be found in several places in OpenOlat:
- in the personal menu
Here you will find all your personal to-dos summarized in an overview. - within a project
These are tasks that need to be completed as part of the project. - within a Course
In the course menu
Administration > To-dos, to-dos can be created that relate to the currently edited course. - in the course element "Task"
- in the Course Planner
Every CPL element has a "To-dos" tab in which tasks can be assigned directly to the element. A central overview brings together all CPL to-dos across all products.
Components of a to-do
A to-do is a kind of index card on which there are various fields.
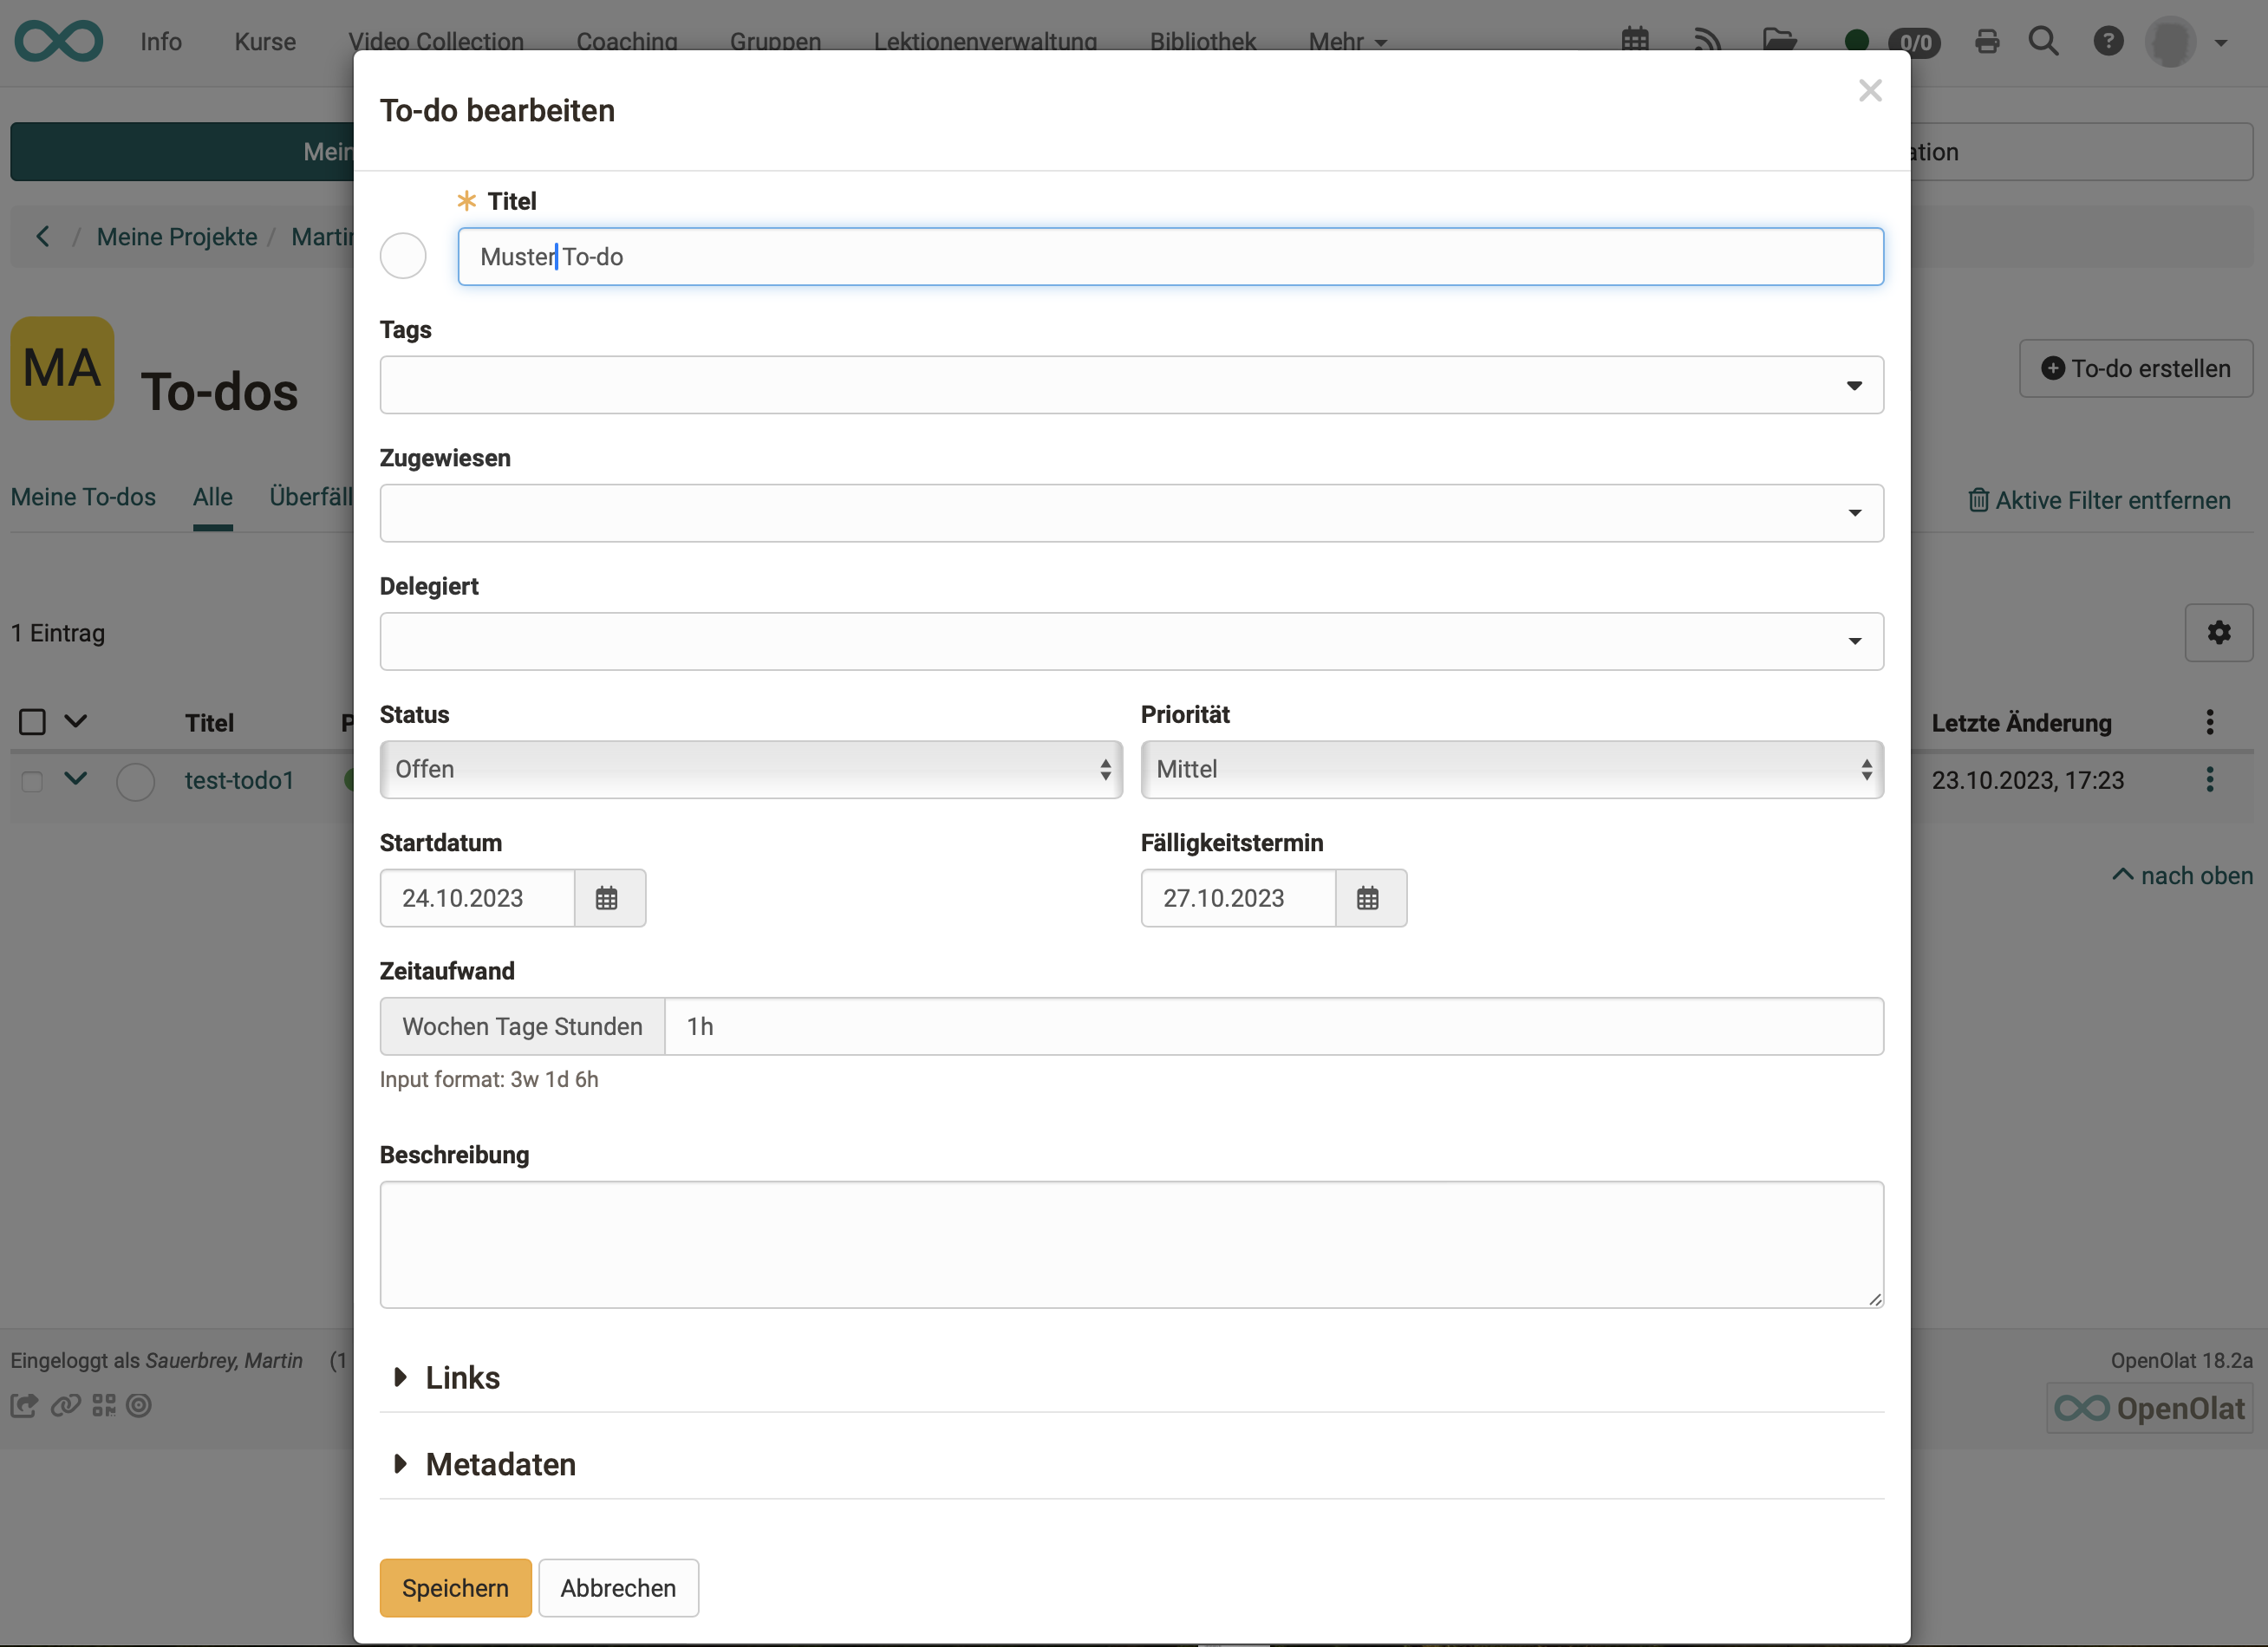
- Title
A mandatory field. If possible, enter a self-explanatory title. - Tags
Tags can be created for keywording. Once created, tags can also be used in other to-dos. Please note, however, that this is not a systematically (hierarchically) structured indexing (taxonomy), as can be created elsewhere in OpenOlat. - Assigned
A mandatory field. The person responsible for completing the to-do is selected here. - Delegated
The work can be delegated to another person, even in phases to different people. The person entered in the "Assigned" field still has overall responsibility. - Status
The status shows the current processing state (Open, In progress, Done) and is displayed in the list view as a colored circle next to the title. The status can be set via the dropdown in the editing dialog. The quick actions "Start" (sets the status to "In progress") and "Mark as done" are available directly from the list, without opening the to-do. - Priority
Can be classified by: Urgent - High - Medium - Low. - Start date
The start date can be used for reminders. If both a start date and a due date are set, a progress bar is displayed in the list view. -
Due date
The date by which the task should be completed. -
Time required
A field for the estimated time required. The information can be used for calculations.
Weeks (w), days (d) and hours (h) can be specified. Example: 3w 1d 6h -
Description
Additional information about the task. -
Links
Here you can link this to-do with files, deadlines and decisions of the project. - Meta data
Creation date of the to-do and all changes (who, when) can be tracked in the metadata.
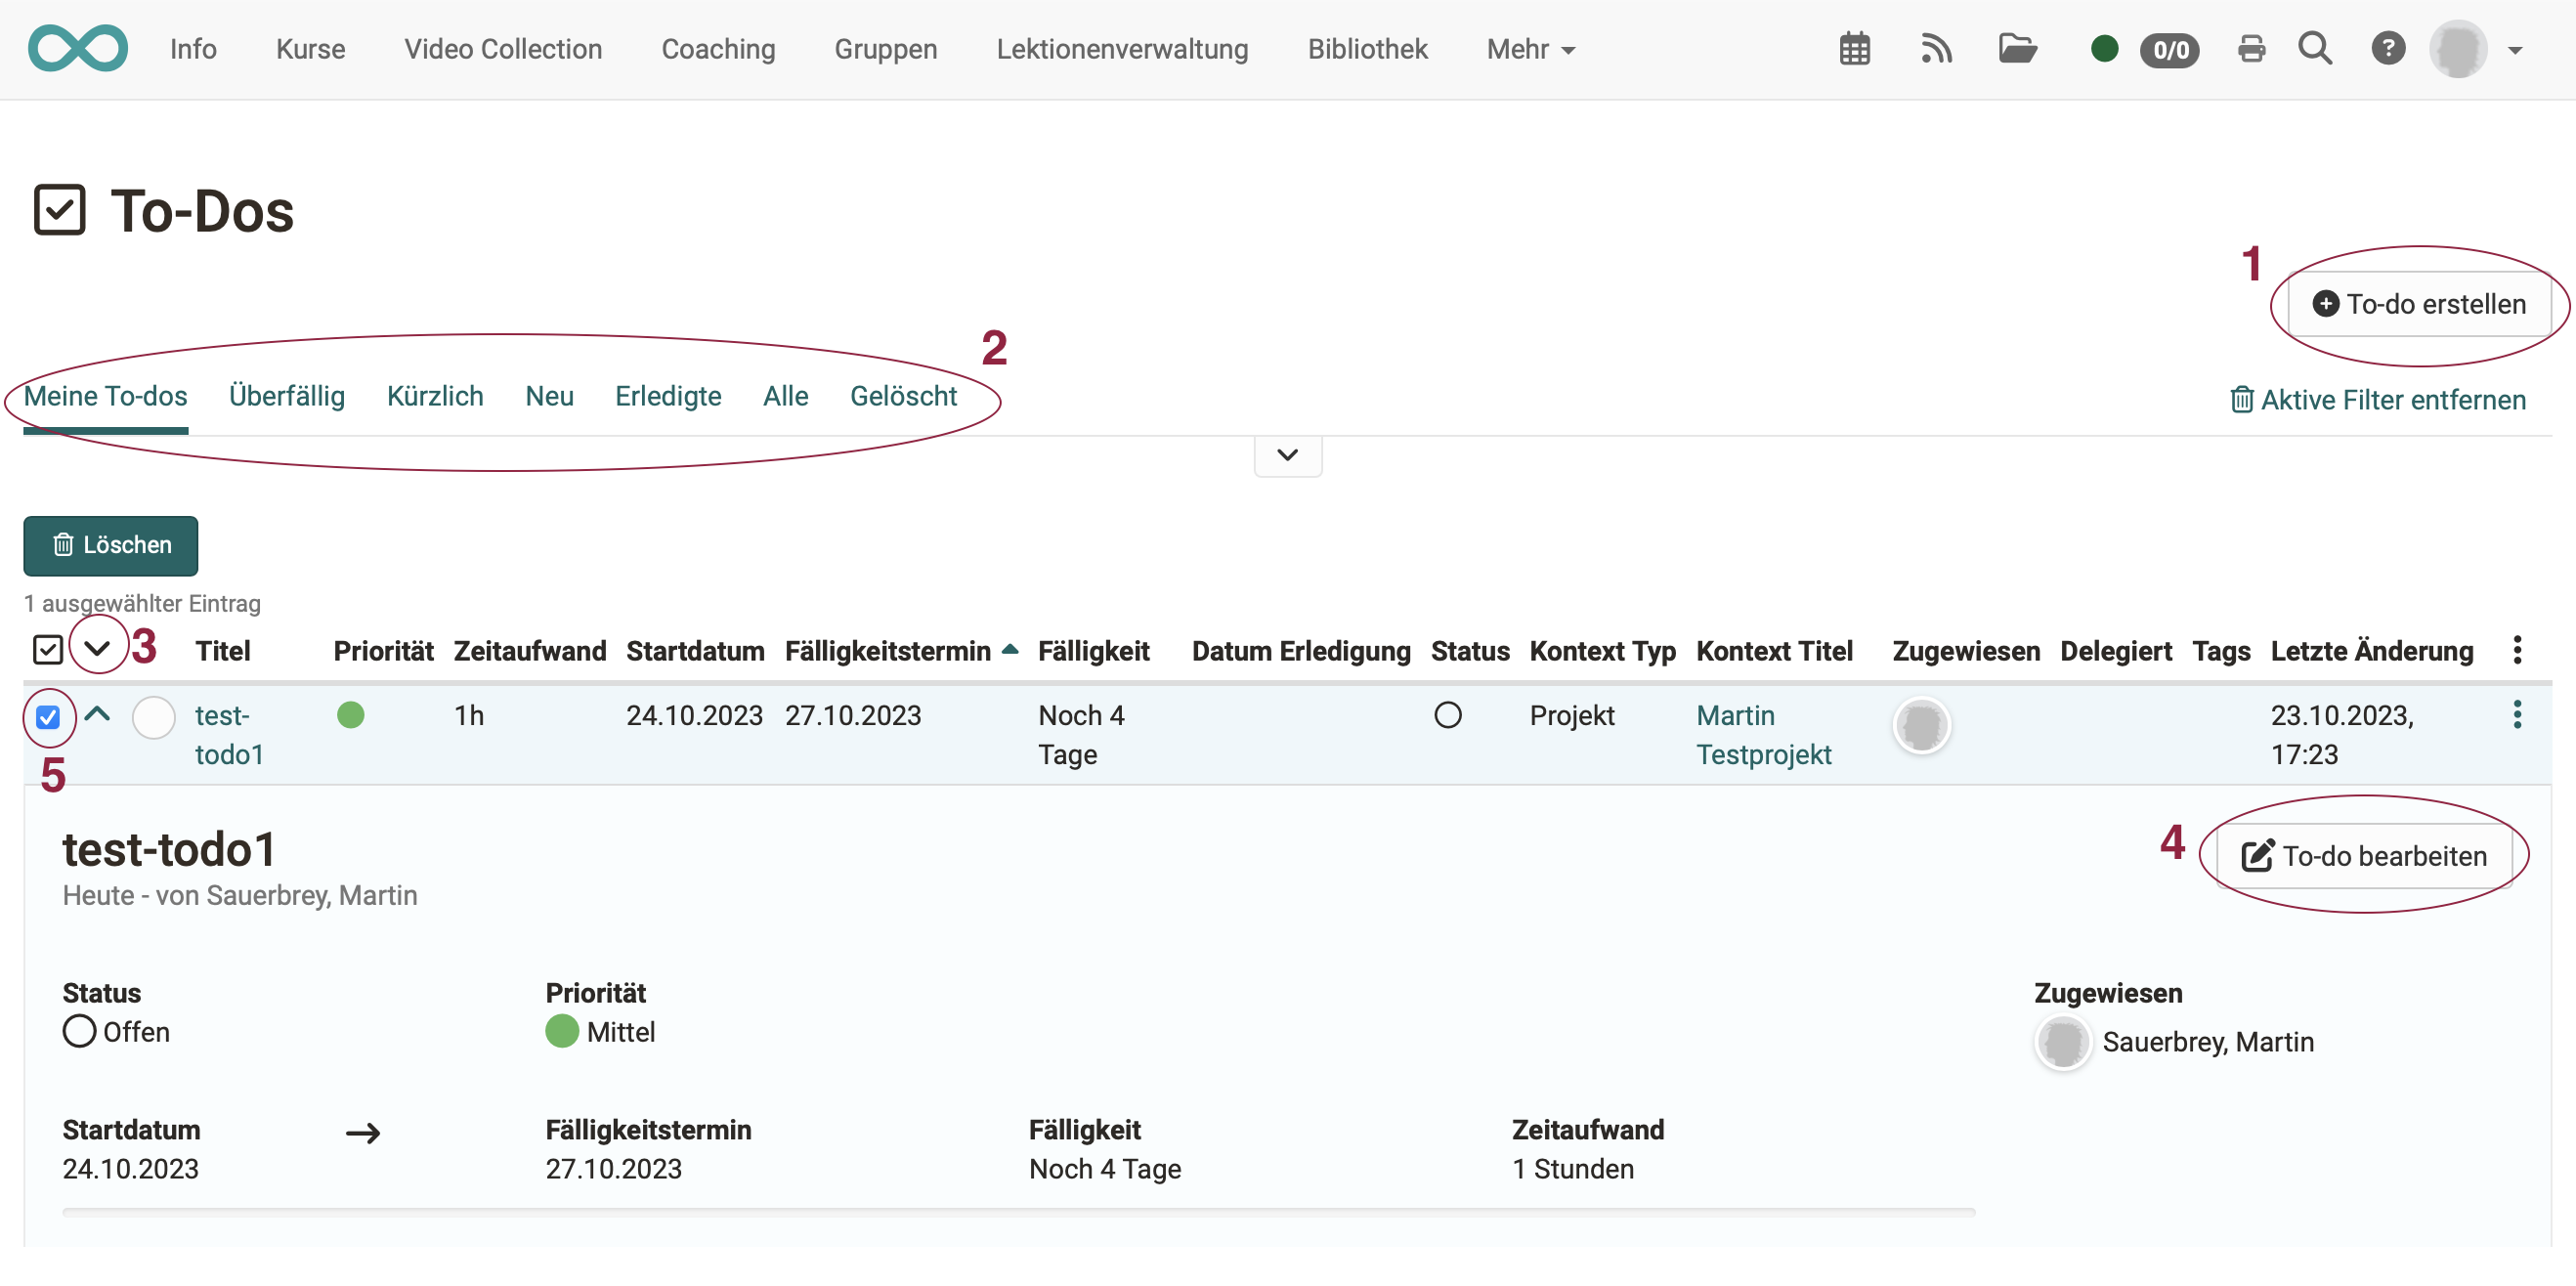
Manage To-Dos
You can
- create new to-dos (1)
- display your to-dos sorted by status (2)
- click on the small arrow at the beginning of the line to open the details of a to-do (3)
- edit the to-dos (4)
- Delete to-dos (after selecting a to-do in the first column, the delete button is displayed) (5)
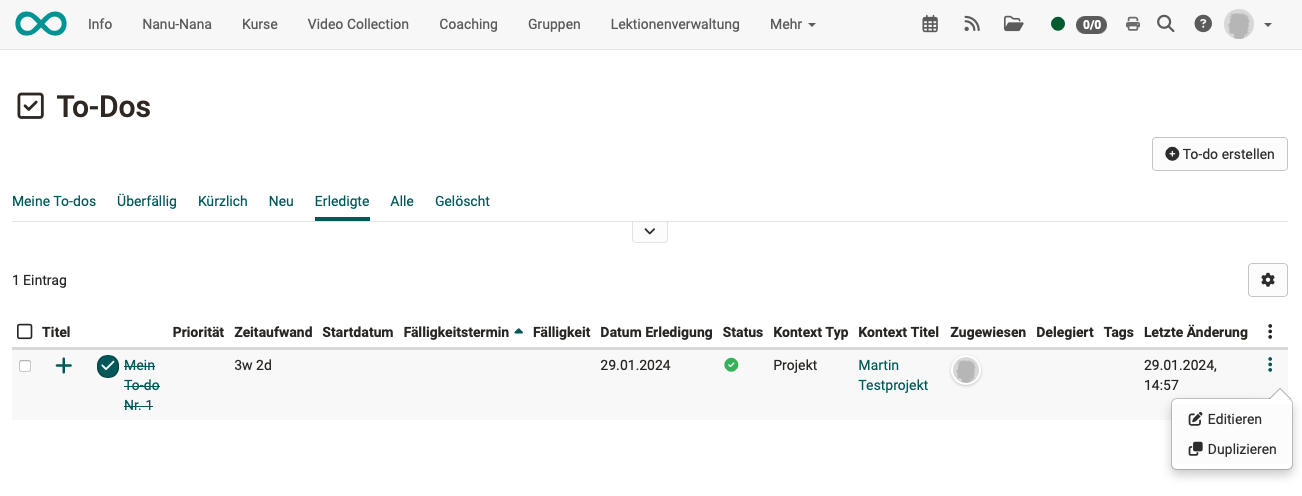
To copy a to-do, select the Duplicate option under the 3 dots at the end of a line. The tabs above the list help you to select the desired copy template. For example, by preselecting to-dos that have already been completed.
Note
If you prefer to have your to-dos displayed in the header instead of the personal menu, you can move the menu option from the personal menu to the header. You can make the settings for this under
Personal menu > Settings > Tab System > Section Personal Tools
All tools that you select here are displayed in the header at the top right instead of in the personal menu and can therefore be accessed more quickly.
Notifications
If to-dos are created or edited and other people are affected, they are notified of the changes by automatically generated mails. If several changes are made within a short period of time, a summarised email is generated.