Life cycles - Overview
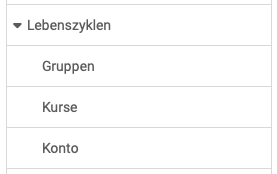
Under Administration > Life cycles, you set up three of the four life cycles of OpenOlat in the system administration: the group life cycle, the course life cycle and the automatic user lifecycle. Each has its own trigger and its own steps.
The fourth, the implementation life cycle, is not in this menu. It takes the implementations of the Course Planner through their status values and does not delete anything. The element type specifies its rules, and the individual implementation can override them, see Configure automation.
Profile
| Name | Life cycles |
|---|---|
| Available since | Release 16.1 (2021) |
Groups
In OpenOlat Administration, settings for the group life cycle can be configured. It proceeds in the following steps:
- Inactivation
- Deletion
- Permanent deletion
The trigger is the time without a visit by the group coaches or group participants. The group life cycle applies either to all groups or only to groups without included courses. Externally managed groups can also be excluded.
The page Automatic Group Life Cycle describes the steps and settings.
Courses
In the course life cycle you can define how a course leaves operation after the course end:
- whether and when a course is automatically set to "Finished" status,
- when it is then moved to the trash,
- and when it will be permanently deleted.
The periods count from the end date of the execution period, for the permanent deletion from the day the course was moved to the trash.
In addition, you can enforce the notification of the owners when someone finishes or deletes a course in the authoring area.
The page Automatic Course Life Cycle describes the steps, configuration, confirmation before saving and status display.
Account
Similar to the course life cycle, the life cycle of accounts can also be automated: with the automatic user lifecycle. You configure it in the system administration under:
Administration > Life cycles > User
Account expiration and automatic user lifecycle
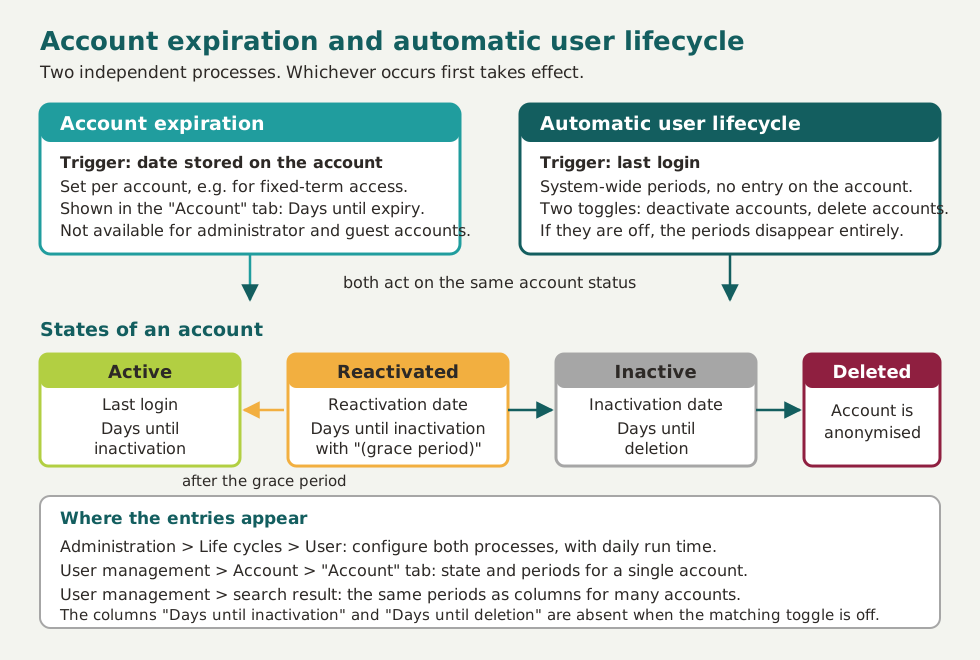
The configuration is held in two separate areas. The area Account expiration controls what happens when an account reaches the expiry date stored for it. This date is set per account, for example for guest lecturers or fixed-term project work. The area Automatic user lifecycle controls what happens to accounts that are no longer used over a longer period. What counts here is not a date but the last login.
Both processes have their own triggers and their own notifications. Whichever occurs first takes effect: an account is deactivated by its account expiration even when the inactivity period is still far from being reached.
If the expiry date falls before the date of the automatic inactivation, the entry "Days until inactivation" in the "Account" tab therefore names the expiry date. It always shows the next date due, not the plain inactivity period.
Each of the two areas states in its explanatory text the time at which OpenOlat runs the respective process daily.
An account passes through the states active, reactivated within the grace period, inactive and deleted. Which entries an account shows in which state is described on the page Manage user settings.
The three steps at a glance
Three steps end the use of an account: the account expiration, the deactivation and the deletion. For each step the table names the trigger, where you set it and the notification.
| Step | Trigger | Where you set it | Mail notification | Version |
|---|---|---|---|---|
| Account expiration | The expiry date stored for the account is reached. | You set the date per account in the user management: when creating it under User management > Create user or subsequently under User management > "Account of the person" > Tab "Account". The actions "Import users" and "Create temp. users" in the user management and the action "Change user settings" for selected accounts in the account search set it as well. |
Before and after the account expiration, in the area "Account expiration" | |
| Deactivation | No login occurs during the inactivity period. | Automatically: toggle "Deactivate user after inactivity" and field "Num. of days before deactivation" in the system administration under Administration > Life cycles > User. Manually: status "Inactive" under User management > "Account of the person" > Tab "Account". |
Before and after the deactivation, in the area "Automatic user lifecycle" | |
| Deletion | The account stays inactive for the configured time after the deactivation. | Automatically: toggle "Delete inactive user" and field "Num. of days before deletion" in the system administration under Administration > Life cycles > User. Manually: action "Delete user" under User management > Delete user. |
Before and after the deletion, in the area "Automatic user lifecycle" |
Important
The area "Account expiration" only configures the notifications. There is no system-wide expiry date: each account carries the date individually.
For each step you formulate your own notification and define how many days before the step OpenOlat sends it. You set up the irrevocable deletion in the last step to run automatically or exclusively manually.
Deactivation and reactivation
Whoever deactivates an account or looks for a deactivated account meets three words in the interface. They name the same thing from three angles:
| Word | What it names | Where it appears |
|---|---|---|
| deactivate, deactivation | The action: OpenOlat or a person sets the account to inactive. | Toggle "Deactivate user after inactivity", fields "Num. of days before deactivation" and "Mail before deactivation" |
| Inactivation | The point in time at which the action is or was carried out. | Columns "Days until inactivation" and "Inactivation date", filter "Inactivation" in the account search |
| Inactive | The status of the account after the deactivation. | Field "Status" in the "Account" tab, filter tab "Inactive" in the account search |
Deactivation sets the account status to "Inactive". The person can no longer log in. The account itself is fully retained. Password, profile, roles, group memberships and course data remain unchanged.
Reactivation sets the account status back to "Active". The person logs in with the existing password. A new password is not required.
You reactivate an account manually under:
User management > "Account of the person" > Tab "Account"
If the person logs in via Shibboleth, OpenOlat reactivates the inactive account automatically.
If the automatic deactivation is switched on, the person has 30 days to log in after a reactivation. This time is the grace period. During this time the automatic user lifecycle does not deactivate the account again, and the "Account" tab shows the remaining days with the addition "(grace period)". If no login occurs, OpenOlat deactivates the account again.
The 30 days are set system-wide and apply to all accounts.
Deletion and deleted accounts
The deactivation leaves the data in place. Only the deletion removes it: it deletes the password irrevocably and takes the person out of all groups and roles, see Delete user.
The record itself remains in anonymised form. OpenOlat replaces the login name with an ID of the form "del_884736" and sets the status to "Deleted". This is necessary because objects such as forum posts still refer to the account. You find the anonymised accounts under:
User management > Status > Deleted users
An account with the status "Active and not deletable" is excluded from deletion by the automatic user lifecycle.
Further information
Mentioned on this page
Course Planner: Implementations >
Automatic Group Life Cycle >
Automatic Course Life Cycle >
Manage user settings >
Delete user >
Further reading
Account search >
Create user >
How do I manage lifecycles of groups, courses or user accounts? >
Module Course Planner >