How do I record an oral exam in OpenOlat?
Objectives and content of this instruction
With the help of this guide, you should be able to conduct oral exams using OpenOlat. You will learn how to set up a course that allows you to efficiently record oral exams.
Target group
[x] Authors [x] Coaches [ ] Participants
[x] Beginners [x] Amateurs [x] Experts
Expected previous knowledge
- "How do I create my first OpenOlat course?"
- Familiarity with form element rubric >
Oral exams in OpenOlat: Why?
If learners have already taken OpenOlat courses and completed written exams in OpenOlat, this data and all information about the learners is already recorded in OpenOlat. To avoid having to re-enter participant data separately for the oral exam, it makes sense to conduct oral exams using OpenOlat as well. This way, all participant data and results can be managed together in OpenOlat. Overall results from both written and oral exams can also be calculated immediately in OpenOlat.
In OpenOlat, you can create forms—specifically the Form Element: Rubric— which can be used to prepare the structure and questions for an oral exam.
Step 1: Are all participants in the oral exam registered in OpenOlat?
In most cases, all exam participants are already registered in OpenOlat. However, at the start of your preparations, please check whether all participants in the oral exam are already registered in OpenOlat. If not, they will need to be added in the user management section. To do this, go to User Management > Create Account
If you are not yet familiar with user management, you can find more information here:
Admin Manual: User Management >
Step 2: Creating a course for the oral exam
Create a standalone course in the Authoring Area. Here's how to create a course: How do I create my first OpenOlat course? >
Which course element?
Typically, the record of an oral exam includes a handwritten evaluation. Either an online form or a printed version may be used. The Course Element "Assessment" is particularly well-suited for both situations.
(In principle, a "Form" course block can also be used, but it does not issue a "Pass" status. Therefore, in this case, an additional "Grading" course block is required.)
Breakdown of oral exam topics
Depending on the subject matter of the exam, different topic areas are usually covered. The topic structure and exam sections help determine how the forms can be divided up in a logical manner.
Example 1:
You can create a course with one course module titled "Assessment", which contains one form that, in turn, contains 10 rubric items covering 10 topic areas.
Example 2:
You can create 10 course modules of the "Assessment" type, each with one form.
Settings in the tab "Assessment"
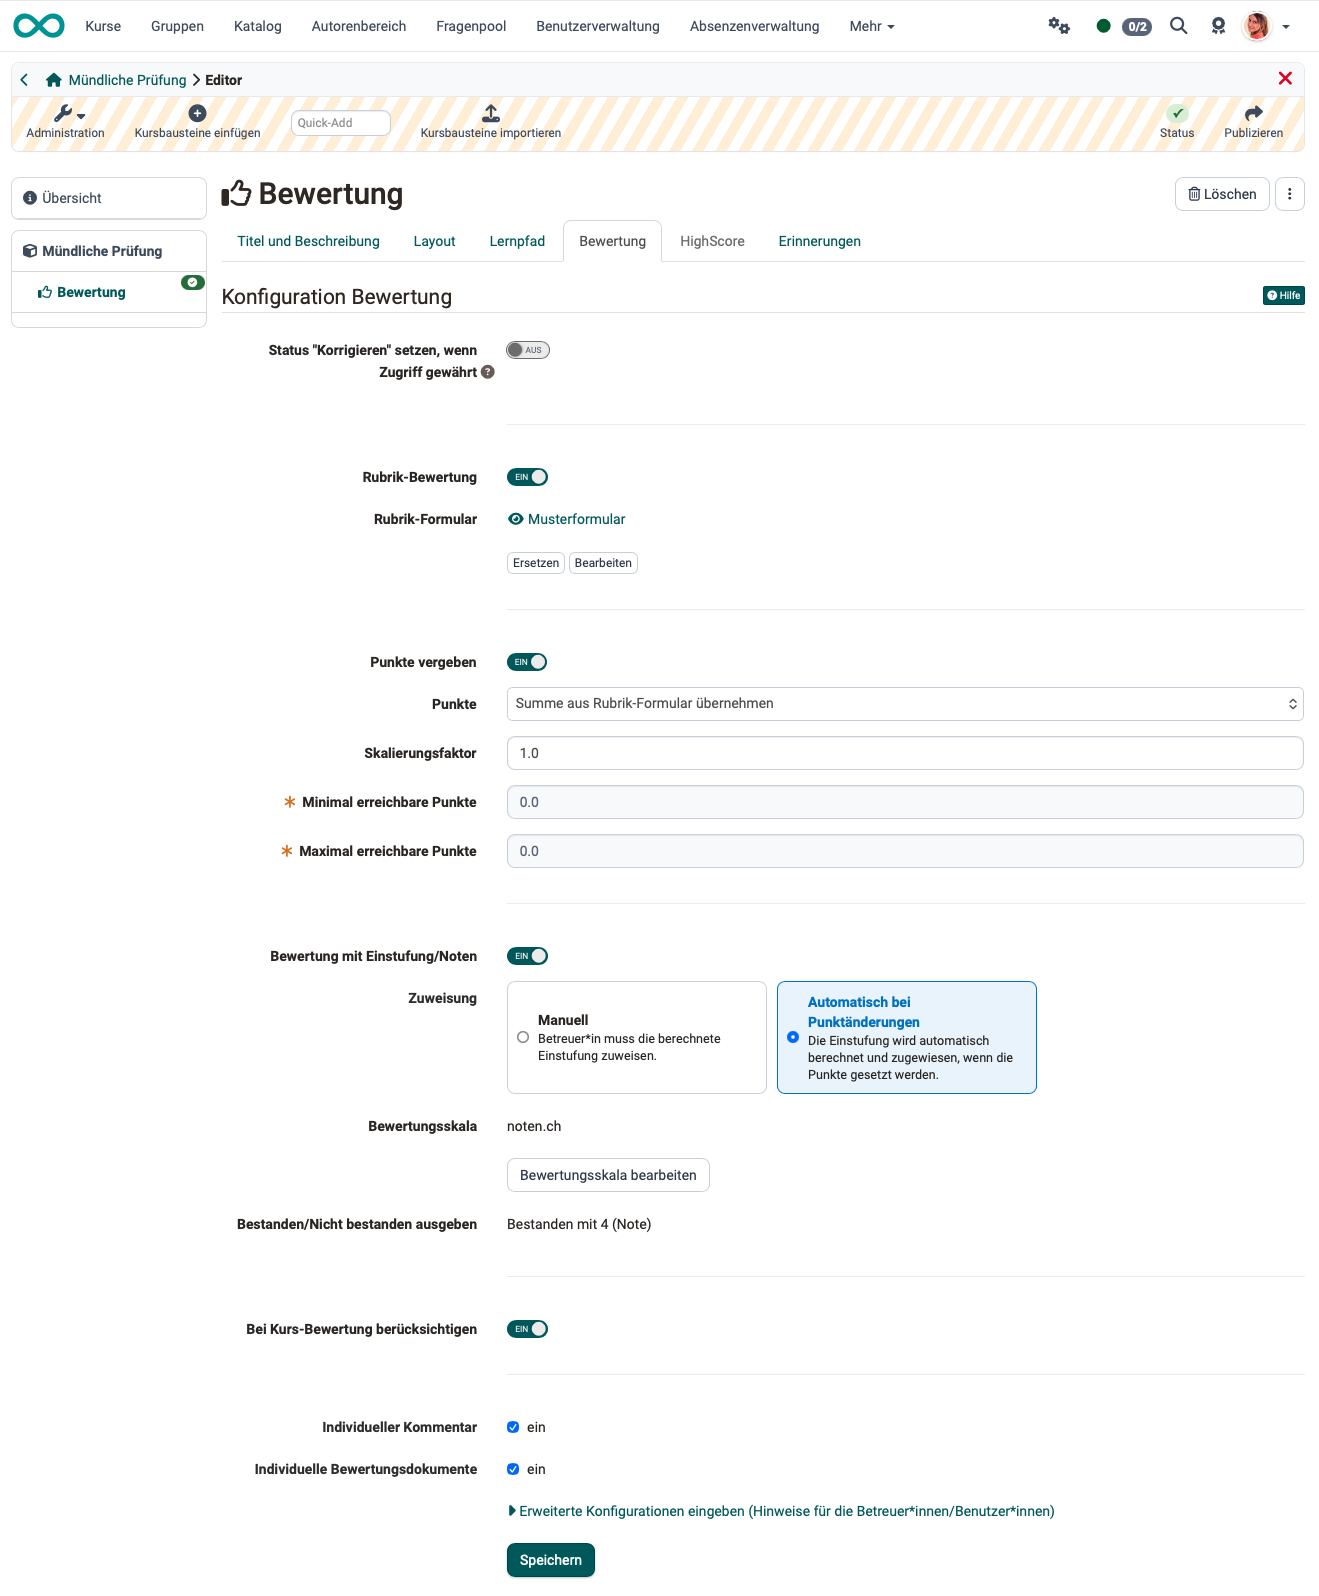
Set the "Correct" status when access is granted:
During an oral exam, assessments are made on the spot; there is no need for a later review, as is the case with written exams. This option can therefore remain disabled.
Rubric Assessment:
The rubric is a key component of the evaluation process for an oral exam.
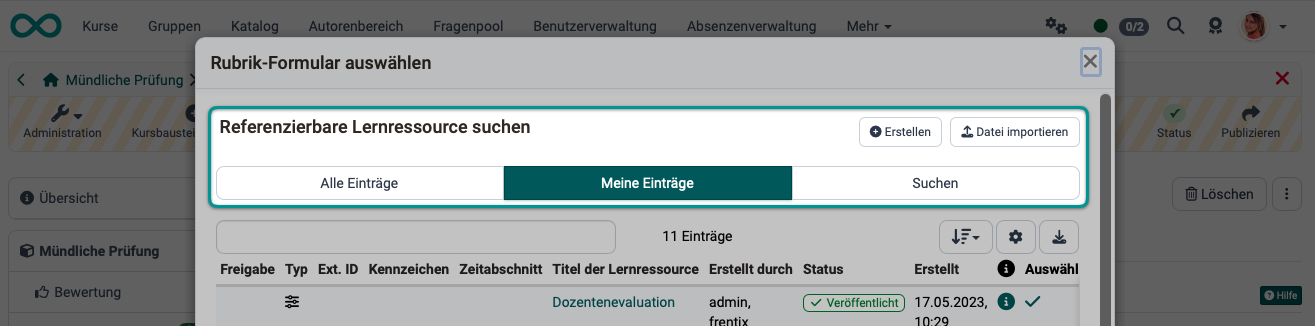
Toggle this button on, and then select, import, or create a rubric form.
If you don't want to create a form right away, you can do so later in the authoring area (Step 3) and then embed it (Step 4).
Award points:
Since we use a rubric for the oral exams, the scores can be transferred from the rubric.
If you use multiple "Grading" course blocks within an oral exam (for a course), you can use the scaling factor, for example, to adjust separately graded parts of the oral exam for the overall grade.
Example: The oral exam consists of three parts, each of which accounts for one-third of the overall grade. If the scoring rubric for one part of the exam allows for a maximum of 50 points, while the rubrics for the other parts allow for a maximum of 100 points each, the points for the first part must be doubled so that it carries the same weight in the overall grade.
Grading with ratings/grades:
Once "Assign points" has been enabled, you can also enable and further configure the "Grading with ratings/grades" option.
By default, results in OpenOlat are graded using points. By enabling this option, the points are converted into a letter grade scale or another grading system.
More about grading systems >
Rating scale:
Click "Edit Grading Scale" to select a scale and make any additional settings. The scale also specifies whether a grading scale is associated with a pass/fail designation and, if so, at what point.
Under Assignment, you can specify whether the assignment to the selected grading scale should be done manually by the instructors or automatically based on the score achieved.
Display Pass/Fail:
If you have chosen a grading scale, the passing score for the selected scale will be displayed.
If you do not use a grading scale, you can choose whether to display the "Pass/Fail" status of the course module to participants.
If "Points" has been enabled in addition to "Pass/Fail", an automatic, point-based grading system can be activated in addition to the standard manual grading by instructors.
To be considered in course assessment:
If this option is enabled, the points earned in this course module will count toward the passing score defined in Administration -> Settings -> Grading, which is required to pass the course. Alternatively, the course module will be considered part of the required course modules needed to pass the entire course.
If you are using multiple "Grade" course blocks for the oral exam, please make sure this option is selected in all of them.
Individual comments:
If this checkbox is selected, examiners (with the "Coach" role) will see a field where they can enter individual comments for the examinees.
Individual assessment documents:
Check this box to allow reviewers to provide individual documents, such as feedback.
Further configurations
Under the "Enter advanced configurations" link, you can enter general information for the examiners (in the role of coaches). For example, you can use this to remind all examiners of the general guidelines for the oral exam.
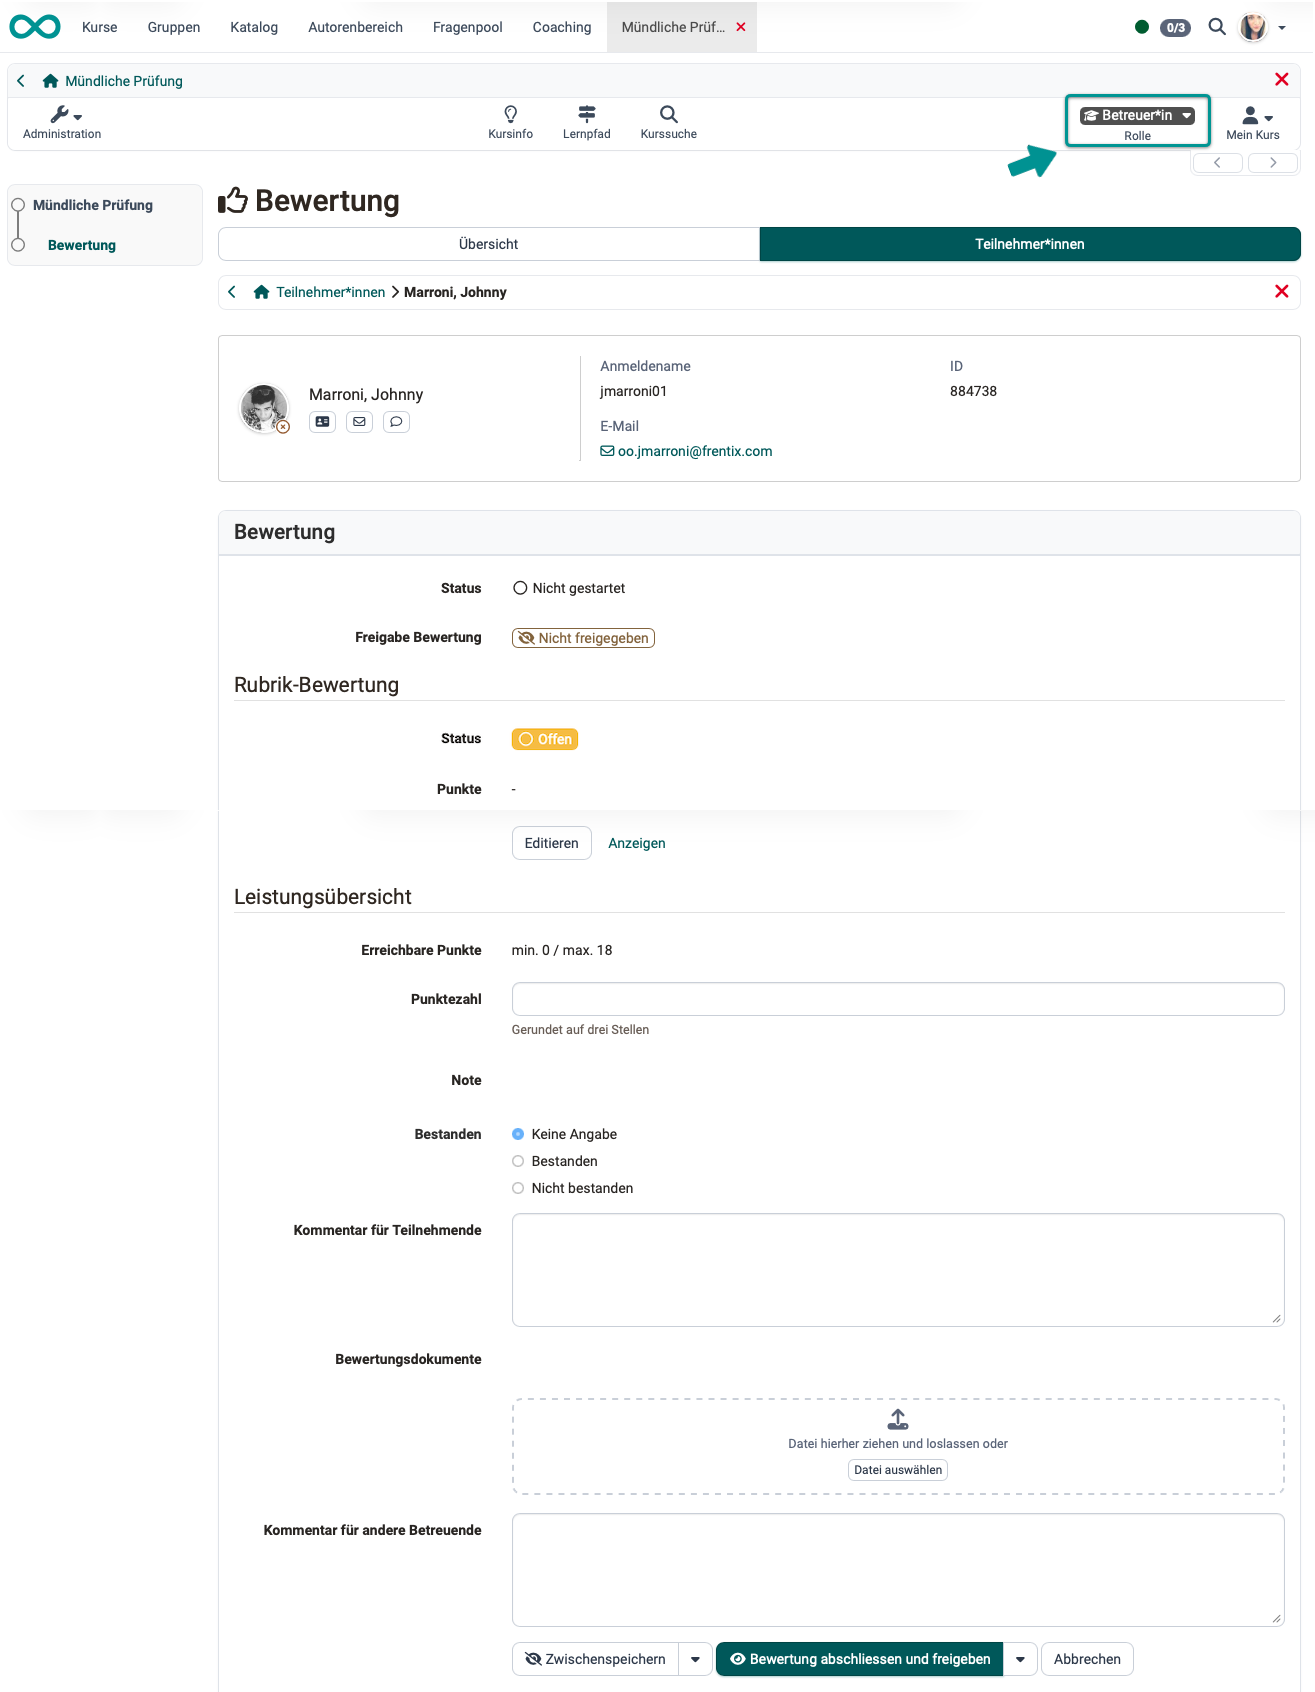
The result as the examiners will see it later:
Setting the time
The delivery period specified in the "Delivery" tab of the settings applies only to participants. Since only the examiners (with the role of coach or owner) access the course during the oral exam, this setting is irrelevant in this case.
Step 3: Creating a form for the oral exam
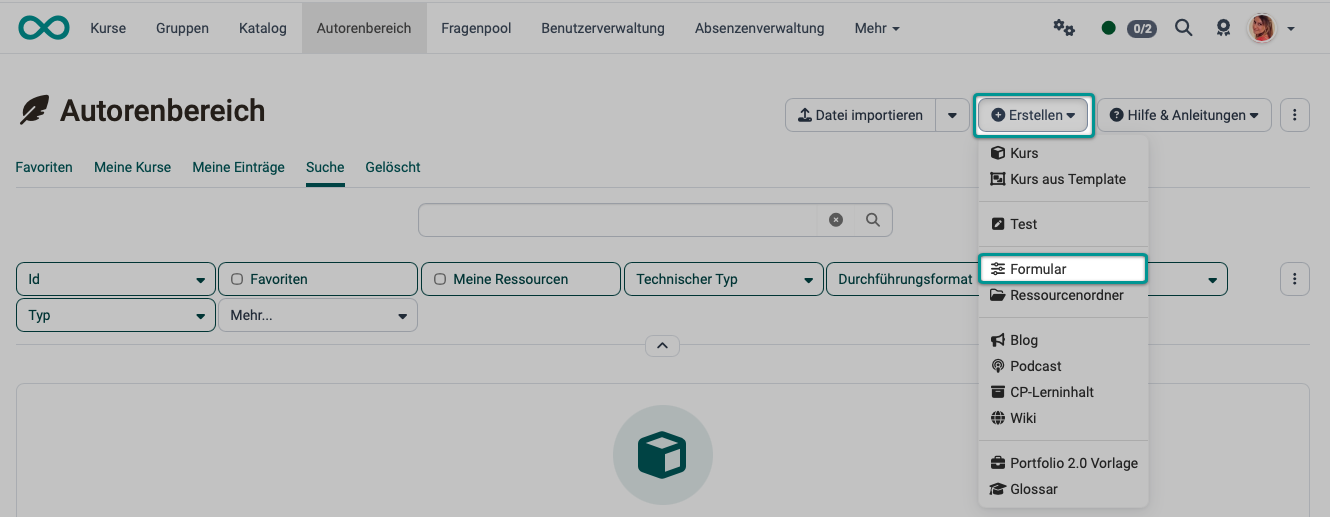
If you did not create a category form when setting up the course module in step 2 above, you can create a new one (or a different form to replace the existing one) in the authoring area:
Author Area > Create > Form
A newly created form does not initially contain any section elements. These must be added in the course via "Edit" or, alternatively, directly in the learning resource using the form editor.
Form layout and content
Oral exams often consist of a combination of different formats, such as presentations, technical questions requiring explanation, brief content-based questions, as well as reflective and application-based questions. A good rubric reflects this diversity and makes it clear what is being assessed in each section and how the assessment is conducted.
In OpenOlat, the best way to create customizable grading rubrics is to use the "Rubric" element. A rubric element consists of a grid with rows and columns. The rows list the assessment categories or statements, while the column headers represent the rating scales. This allows multiple different statements to correspond to a single rating scale. Depending on the specific configuration, this can result in a wide variety of rubric variations.
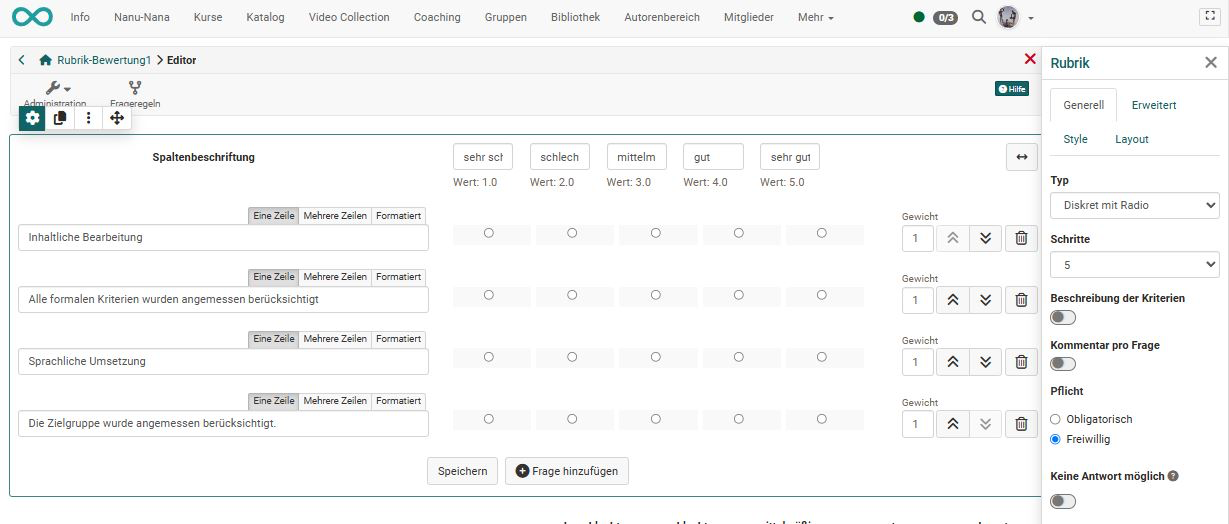
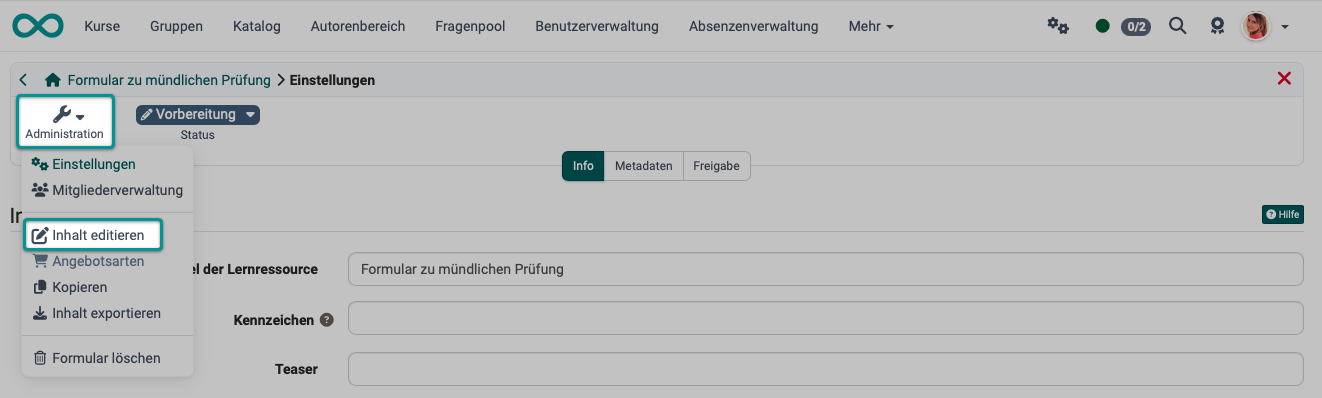
In the newly created form learning resource, open the editor under Administration > Edit Content and create a rubric form that is appropriate for your oral exam.
For detailed information on how to create a category form, please see below:
The form element Rubric >
Forms in Rubric Scoring >
Insert Layout >
Add content elements >
Informations in the header
Note
Participant data is specified in the header of the… and does not need to be included as a field in the form (otherwise, it would appear twice).
The header section of the form displays the user's general information. This is used in many other places in OpenOlat (events, coaching, tests, assignments, learning path overview, portfolio, projects, etc.). It is not possible to change this in the form alone. (The general display of the user is controlled via the "UserShortDescription" user property context.)
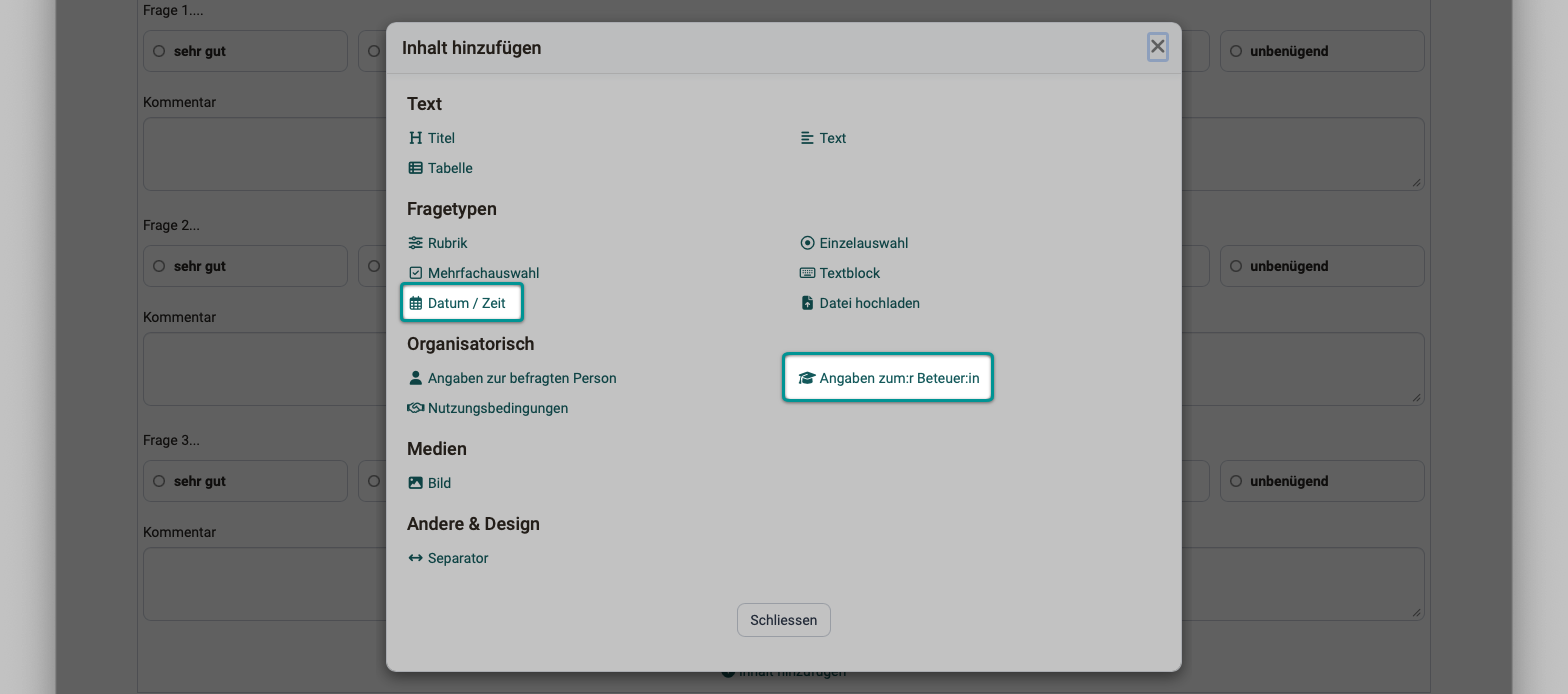
In the form's content editor, add
- Exam start
- Exam end
- and for the examiners involved,
add information in a content element above the section element. This information will then be displayed in the header.
Step 4: Embedding the form in the course
If the form was not created immediately when setting up the course element (Step 2), but instead was created separately in the authoring area (Step 3), you must reopen the course editor and embed the form in the "Assessment" course element under the "Assessment" tab.
Step 5: Add examinees and examiners
Once the form and course content have been finalized, the examinees can be assigned to the oral exam.
Course > Administration > Member Management > Add Member
Assign the "Coach" role to the examiners.
If you are not yet familiar with the membership management system, you can find more information here: Members management >
Note
External examiners are often involved in oral exams. Keep in mind that, ideally, these examiners should also be set up as users in OpenOlat (see Step 1).
A tip if you're new to OpenOlat:
Note the difference between User Management and Member Management
Step 6, Method a): Conducting the oral exam using an online form
Note
As a course owner, please remember: Has the course status been set to "Published"?
Please designate which examiner will keep the minutes in OpenOlat.
As the note-taker (OpenOlat role "Coach"), follow these steps:
- Open the course.
- Select the course element "Assessment"
- Select the examinee in the "Participants" tab by clicking on their name.
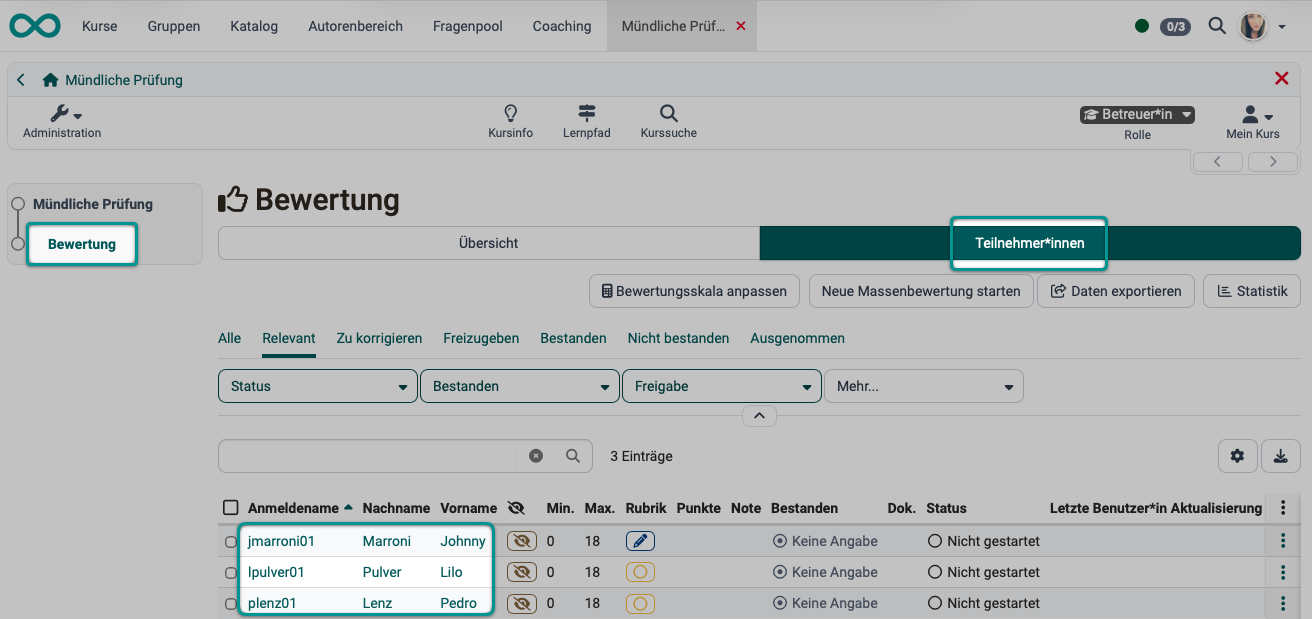
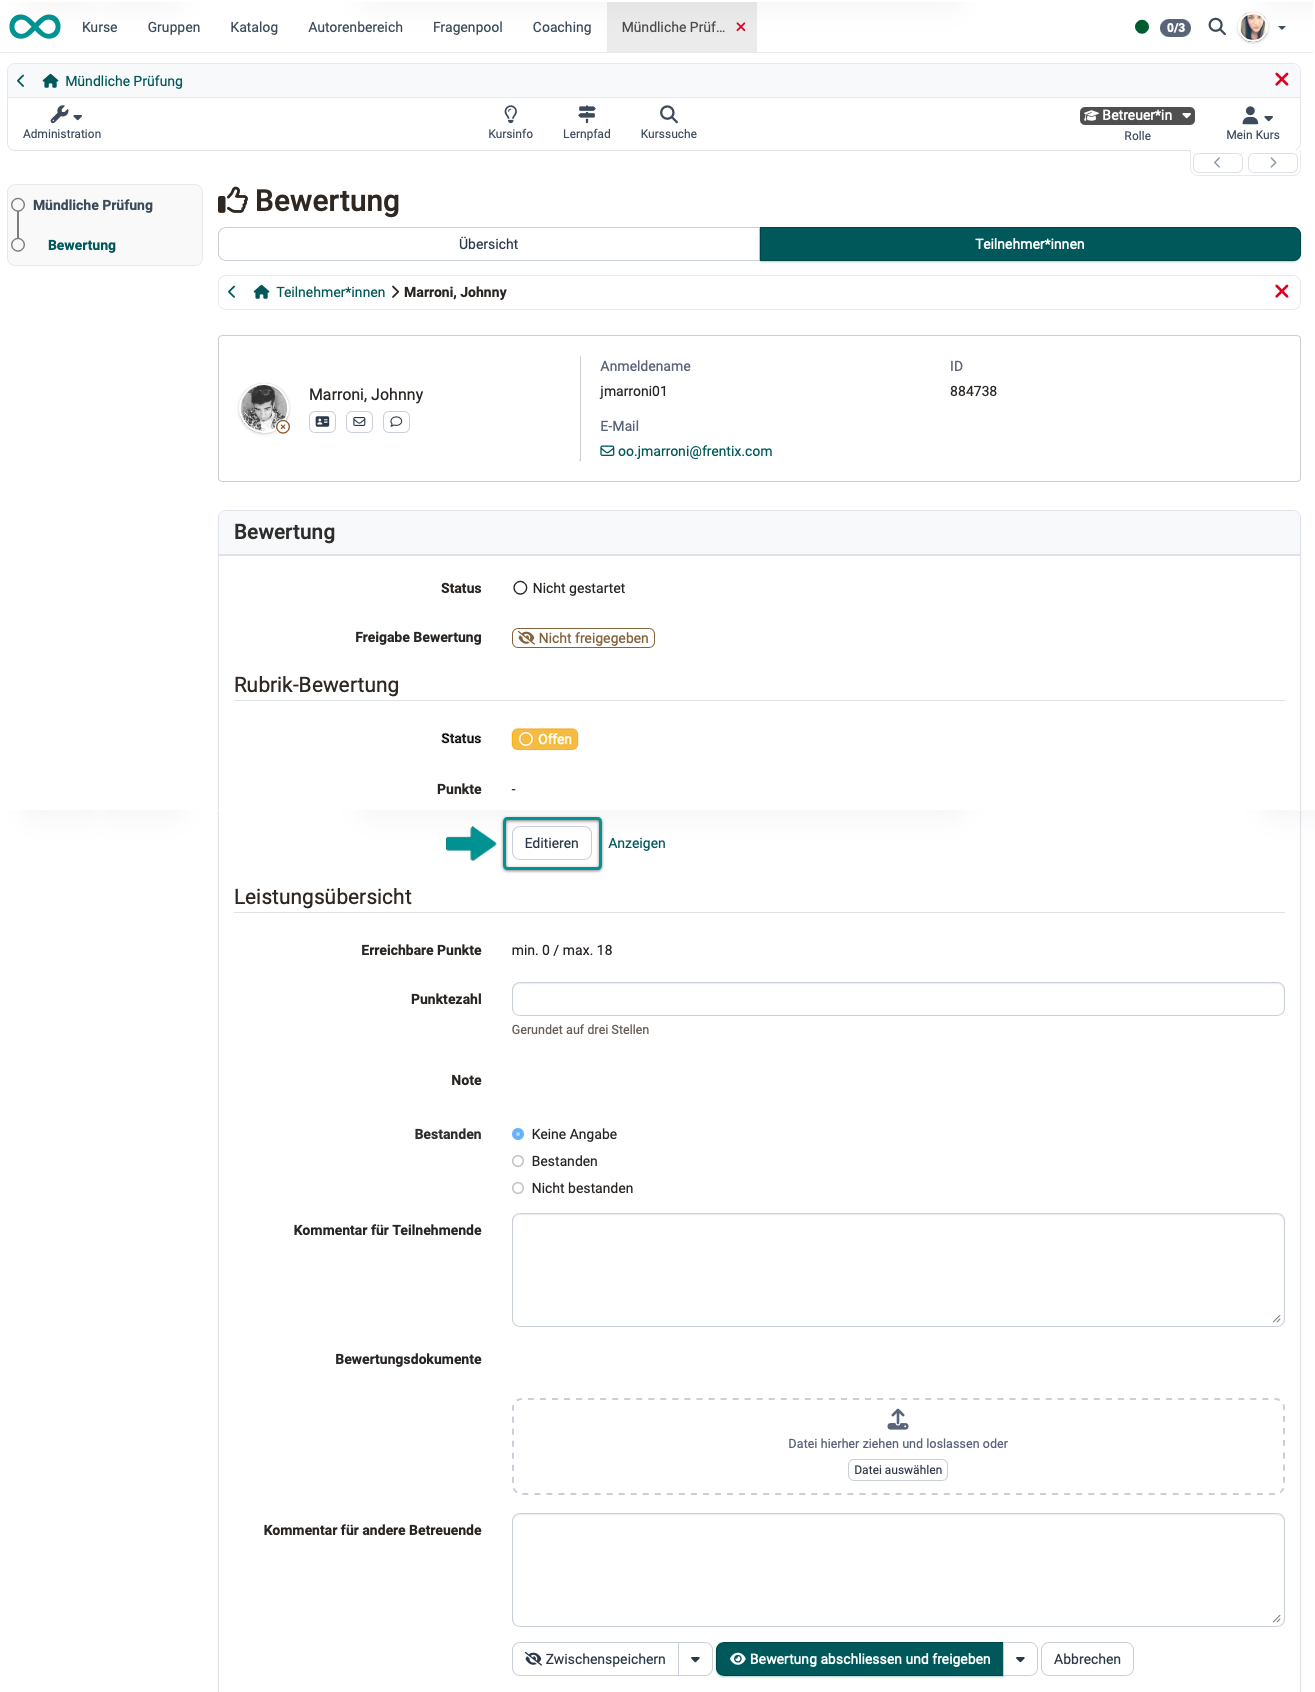
You can now enter your assessment of this person's oral exam in the fields displayed:
- Score
- whether passed or failed
- This note is relevant for participants if they are able to or are expected to access this course on their own after the oral exam.
- Assessment documents (files) can be attached.
- In the "Comments for other coaches" field, you can, for example, note down key points from the discussion among the examiners.
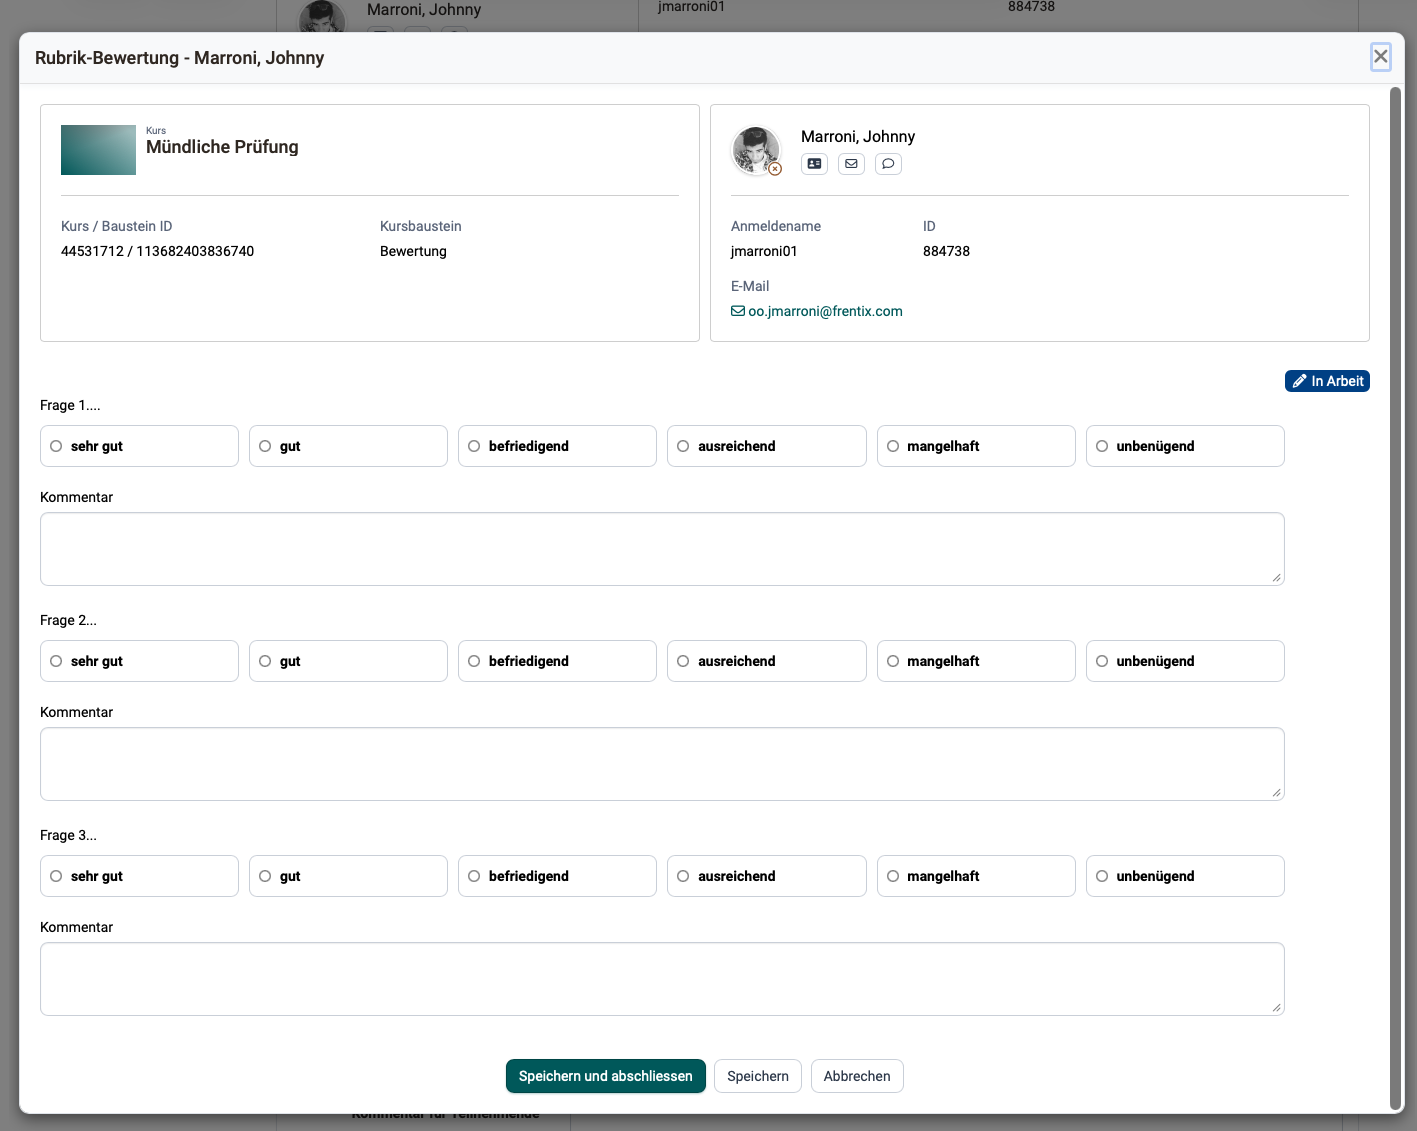
- To use the category form, click the "Edit" button in the "Category Rating" section.
- To complete the oral exam, click the "Complete and Submit Assessment" button at the bottom of the page.
After clicking "Edit" in the "Course Assessment" section, you will see the course assessment form where you can enter your ratings and comments on the course performance.
Note
As the creator of the category form, please make sure before the first oral exam that the examiners can provide all the necessary information. Once the form has been used, it cannot simply be modified for the other test-takers. (All test-takers should be evaluated using the same form and according to the same criteria.)
Step 6, Method b): Conducting the oral exam with a printout (pdf)
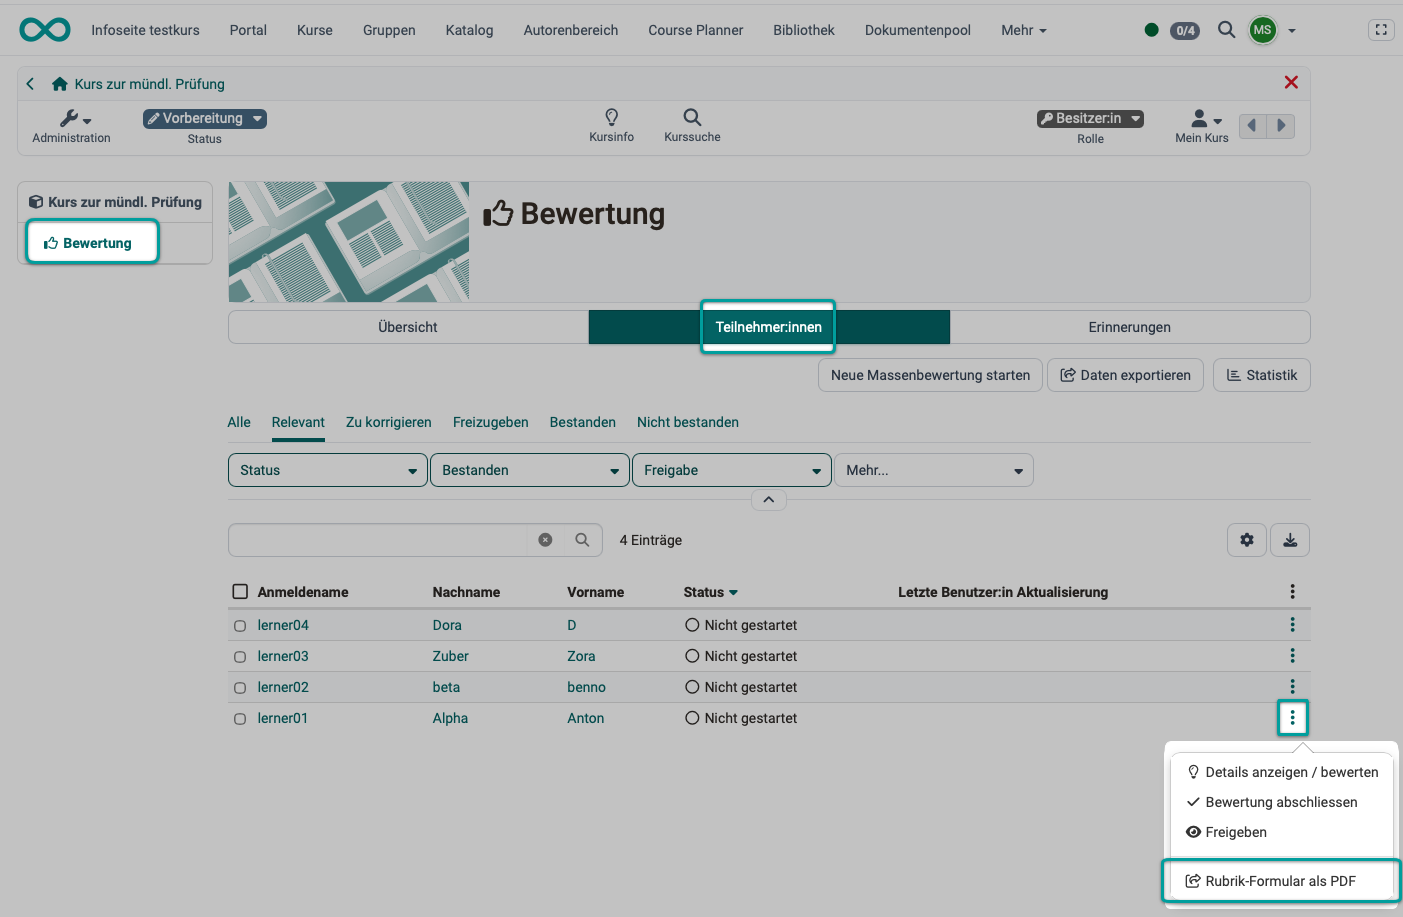
If you want to print the oral exam record, you can generate a PDF in OpenOlat. For example, examiners who are not assigned to online logging in OpenOlat can be provided with a printed copy of such a form.
- Select the desired test taker, and all of their personal information will already be displayed at the top of the PDF file.
- Under the icon with the three dots, you'll find the option "Category Form as PDF."
- Download this PDF file and print it out.
Step 7: Assessment of the oral exam
If you completed the assessment using the online form (Step 6a), all entries are already in OpenOlat, and you can begin the evaluation immediately.
If the category form has been printed out, the relevant data must first be entered into OpenOlat from the handwritten notes.
The score generated by the rubric form is automatically applied as either a total or an average. If "Total" is selected, the points assigned for each row are added together. If "Average" is selected, the average of all rubric rows is calculated. Alternatively, you can choose to assign points manually or opt not to use points at all.
Above the list of participants, you will find buttons for the options described below.
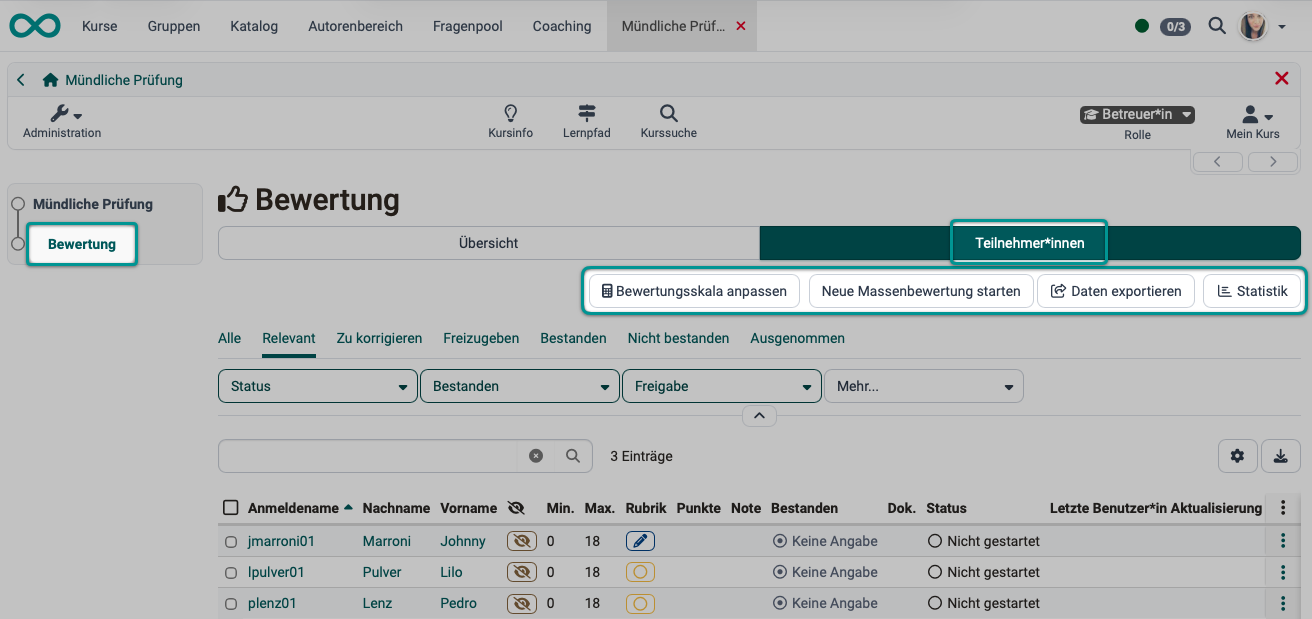
Adjust the rating scale
As long as no rating has been submitted yet, the rating scale can still be adjusted.
Bulk action
If you need to grade multiple people at once—for example, when grading a group project presentation—you can do so by clicking the "Start New Bulk Action" button.
Export data (Exporting test results)
You will also find a button to export the exam results above the list of participants. This button exports the results for all participants.
If you want to export results for individual participants, select the relevant people in the first column. An additional export button will then appear above the list.
You will receive the results as an Excel file containing the raw data and, upon request, as a PDF file with detailed information.

Statistic
The "Statistics" button displays a table showing the results for the section items, including the scores for individual questions, the participants' total scores, and the averages.
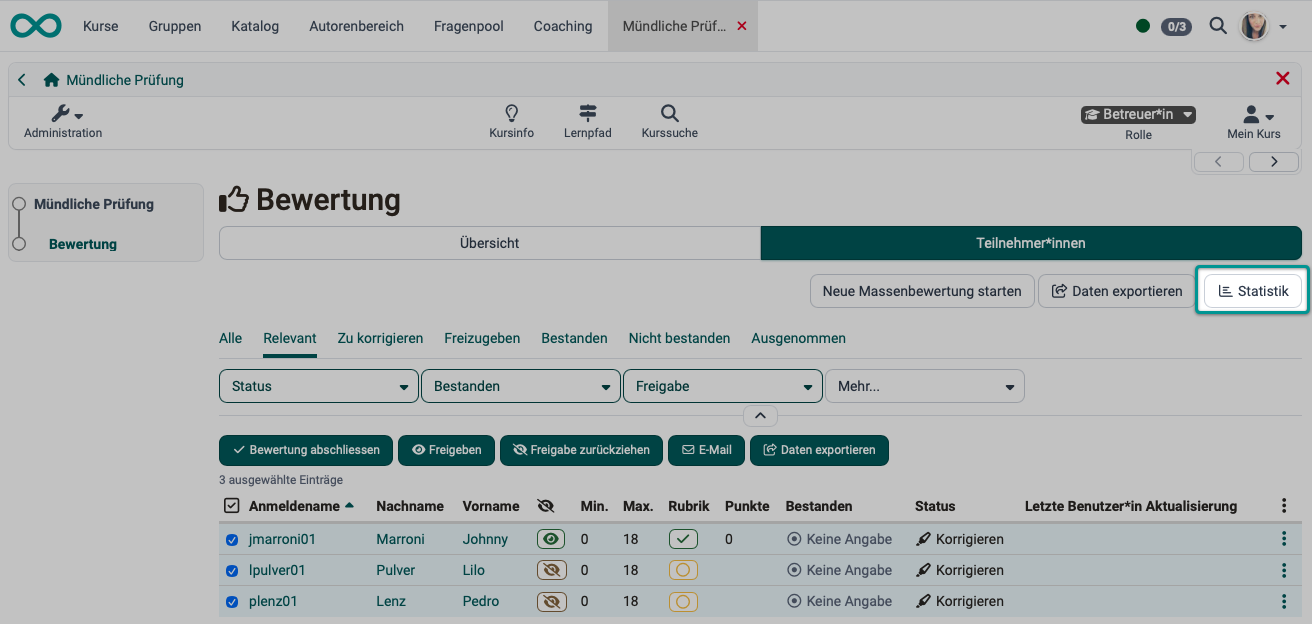
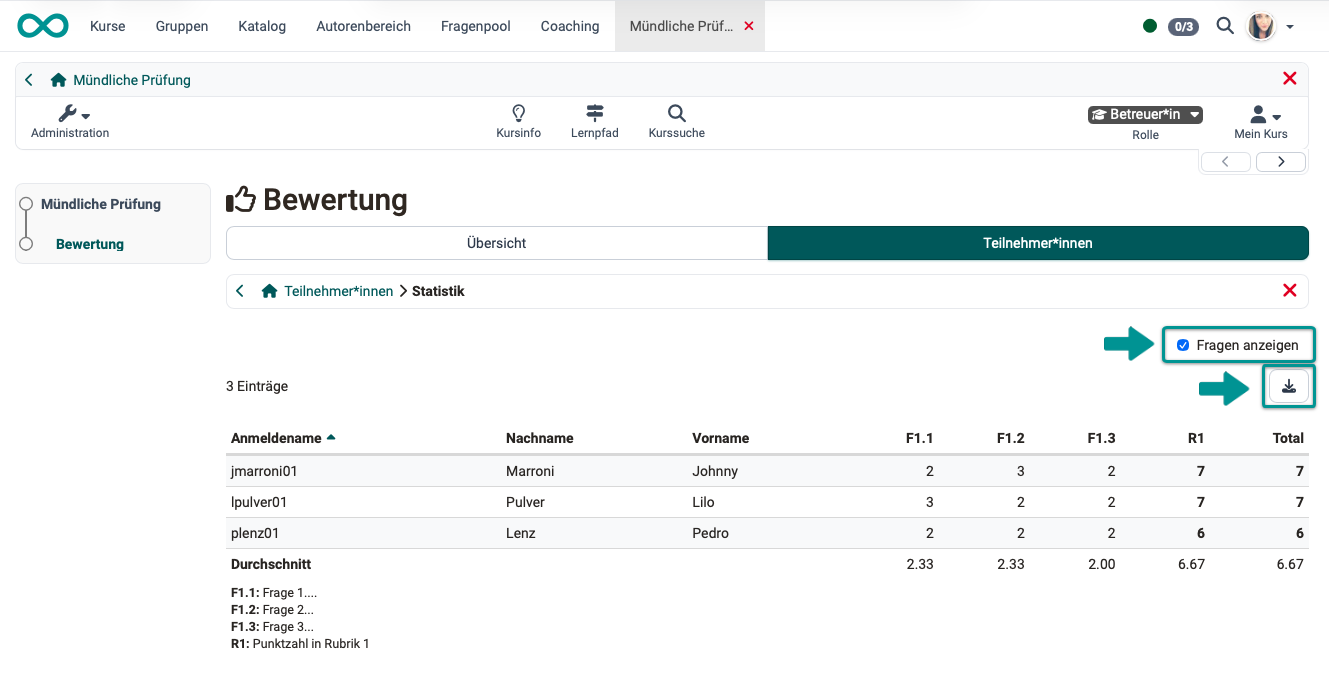
Clicking the "Statistics" button opens a table with detailed information.
If you check the "Show questions" box, details of the section questions will also be displayed in a table. Below the participants, you will find the averages in the table.
Click the download button to get an Excel file containing the results.
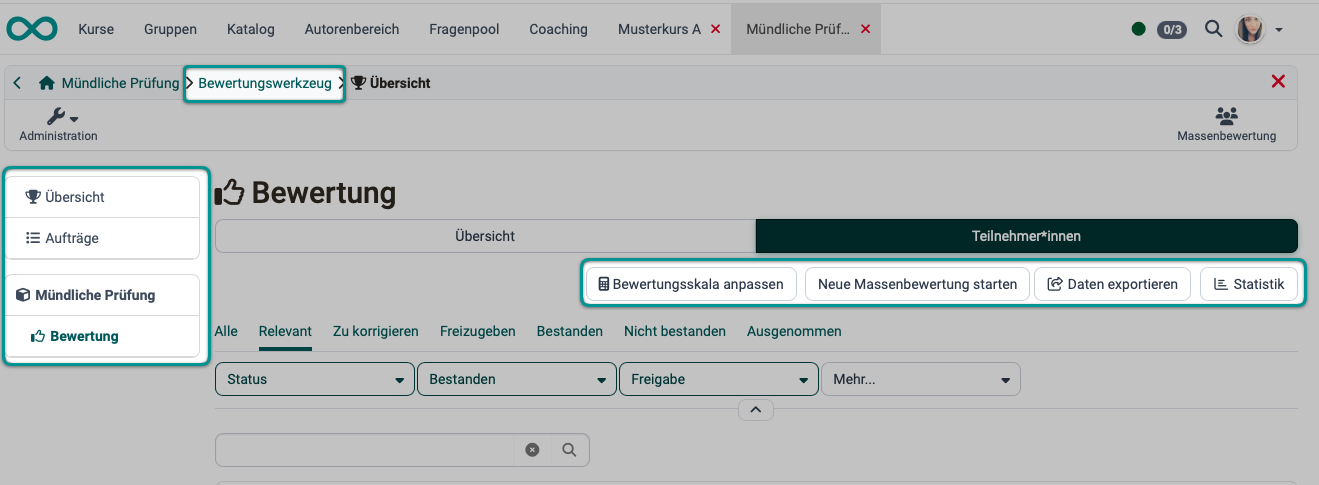
Assessment tool
Alternatively, the same buttons can also be found in the rating tool.
Assessment tool > Course element Assessment > Participants tab > ... button
Checklist
- Are all participants in the oral exam registered in OpenOlat?
- Has a separate course been created for the oral exam?
- Has a "Grading" course block been added to the course?
- Has a rubric form been created and integrated into the "Assessment" course block?
- Is the assessment module configured correctly (points, passing score, comments enabled)?
- Should multiple "Assessment" course blocks and multiple rubric forms be integrated into the course?
- Is the structure of the oral exam accurately reflected in the rubric forms?
- Have the visibility rules been agreed upon (immediate display or approval after completion)?
- Are all exam takers registered as members of the exam preparation course?
- Are all examiners (including external ones) listed as members in the exam course?
- Do all graders have the "Coach" role and can they access the grading tool?
- Has the course been published and made available to instructors?
- Have the exam dates been set and communicated to everyone involved?
- Was a test run successfully conducted with a dummy participant?
Frequently asked questions
Can I correct the points later?
Yes. As a coach or owner, open the participant's profile again in the assessment tool and overwrite the values. All changes are recorded in an audit log.
How do I export the results?
In the assessment tool, you'll find the "Export" option in the upper-right corner. You'll receive an Excel or CSV file containing all the items, grades, and comments.
What should you do if a participant doesn't show up?
In the grading module, enter "0 points" and "Fail," and note "Did not attend" in the internal comment field. Alternatively, you can set the status to "Did not participate" if this option is configured in the grading system.
Can participants download their assessment?
Yes, you can access a PDF containing the results for all graded modules by going to “My Course” > Transcript.
Is it possible to take an online exam via video?
Yes. Combine the course with a video conferencing system (such as the built-in BigBlueButton module) to administer the exam remotely. The grading will remain in the grading module.
Further information
How do I create my first OpenOlat course? >
Forms: overview >
The form element rubric >
Insert layout >
Insert content element >