Course Settings - Tab Assessment:
Certificates and recertification
The configuration of a certificate for a course is done in:
Course > Administration > Settings > Tab "Assessment"
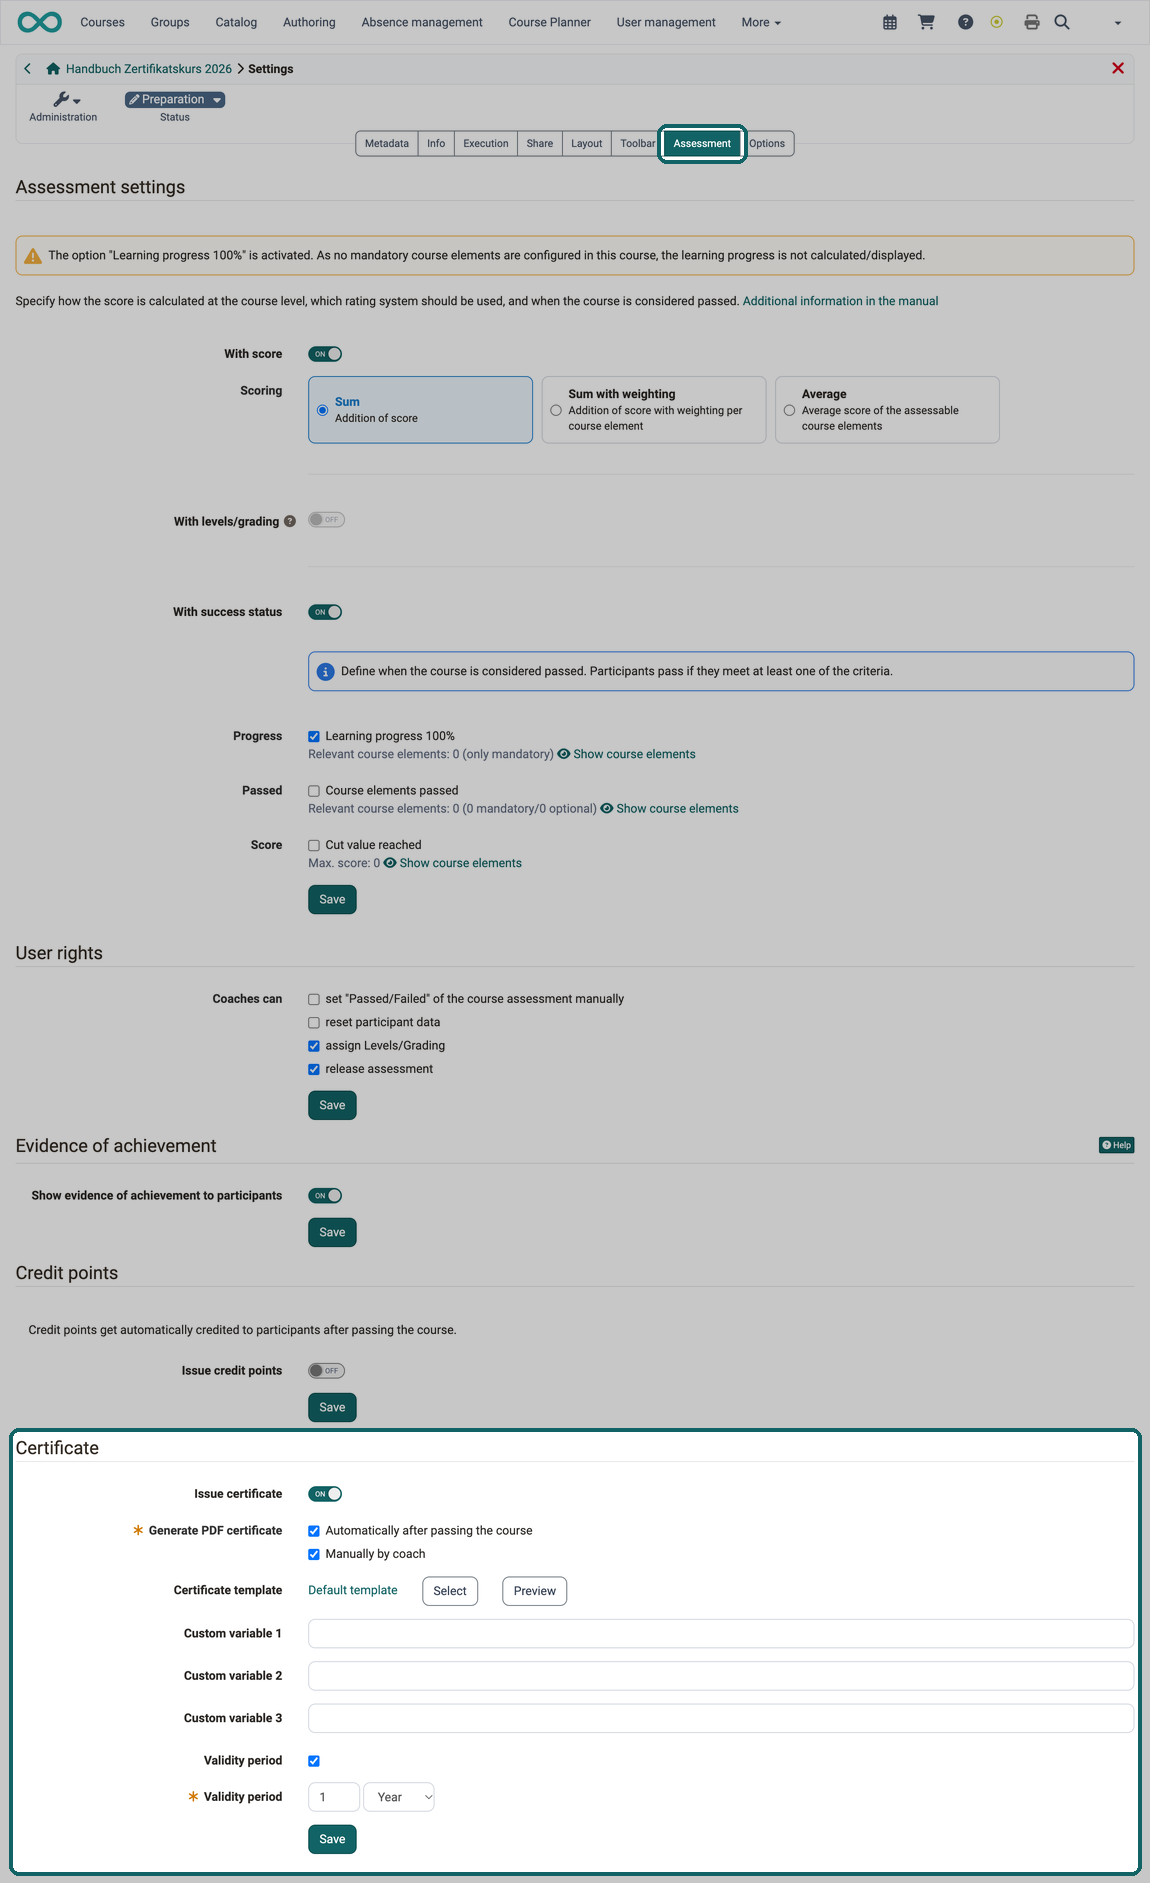
Certificates
What is a certificate?
A PDF certificate can be issued as confirmation of attendance at a course or completion of certain course-related activities. It is also possible to issue a certificate without using an evidence of achievement.
In addition to these course certificates, the certification program can also issue a certificate for attending multiple courses. Such certificates are awarded within the Course Planner (Implementation).
More about certification programs >
If the course is part of an implementation that is linked to a certification program, the "Assessment" tab shows the "Certification program" section with the note "Part of a certificate program" instead of the "Certificate" section. You then set up the certificate and the recertification in the certification program, not in the course.
The following information refers to the certificate for a single course.
Who issues a certificate?
As the author, you choose in the field "Generate PDF certificate" whether the certificate is issued manually by coaches and/or automatically after passing the course.
The "manual" option allows certificates to be used even in courses without assessable course elements. If the certificate is to be issued manually, the coach can do so in the assessment tool in the performance overview for each individual user. There, issued certificates can also be viewed and managed later. After issuing, OpenOlat reports "The certificate will be created within the next few seconds." and generates the PDF file in the background.
Where can the certificates be viewed?
Once the participant has fulfilled all the requirements for passing a course, the certificate is available in the toolbar of the respective course under "My Course" in the evidence of achievement. OpenOlat issues the certificate immediately and then generates the PDF file in the background. The file is usually available after a short time, and the users then automatically receive an email notification. Until then, the certificate cannot be downloaded yet; in the personal menu its detail view carries the label "Pending".
More about certificates in the personal menu >
How is validity verified?
A validity period can be specified for the certificate. To do so, select the "Validity period" checkbox. In the second field with the same label "Validity period", you enter the duration in days, weeks, months, or years.
To verify the validity of the certificate, the attribute "certificateVerificationUrl" must be added to the template. This allows the certificate to be regenerated at a later date using a QR code and compared with the current version. If both versions match, the certificate can be declared valid. However, the QR code for validation is only possible when using an HTML form.
What happens when a certificate expires?
Reminders can be triggered based on the certificate's issue date and expiration date. For example, course participants can receive a notification that the certificate has expired or will expire in a few days, or that recertification is now possible.
Create certificate template
By default, the supplied default template is used as the template for the certificate. Administrators also provide further system-wide templates for selection. If you want to use your own template, upload it under:
Course > Administration > Settings > Assessment > "Certificate" section > Certificate template
Note
When you use the "Preview" button, only a dummy will be displayed. Only dummy data is used in a preview, not real values from the database. For example, the current date is displayed everywhere. It should not give the impression that this could be a real certificate. A preview must be deliberately and obviously incorrect.
A certificate template is not a normal PDF file. Two formats are possible: an HTML template that you upload as a ZIP file with the file "index.html" in the main directory, or a PDF form with form fields that you upload as a PDF file.
The default template supplied is HTML-based and kept simple. HTML templates are the recommended option; PDF forms still work but should only be used if the Gotenberg PDF service is not installed.
You can check the appearance of the default template directly in OpenOlat: the "Preview" button generates the PDF file "Certificate_preview.pdf" from the currently selected template. Open this file to judge the layout and the placement of the variables.
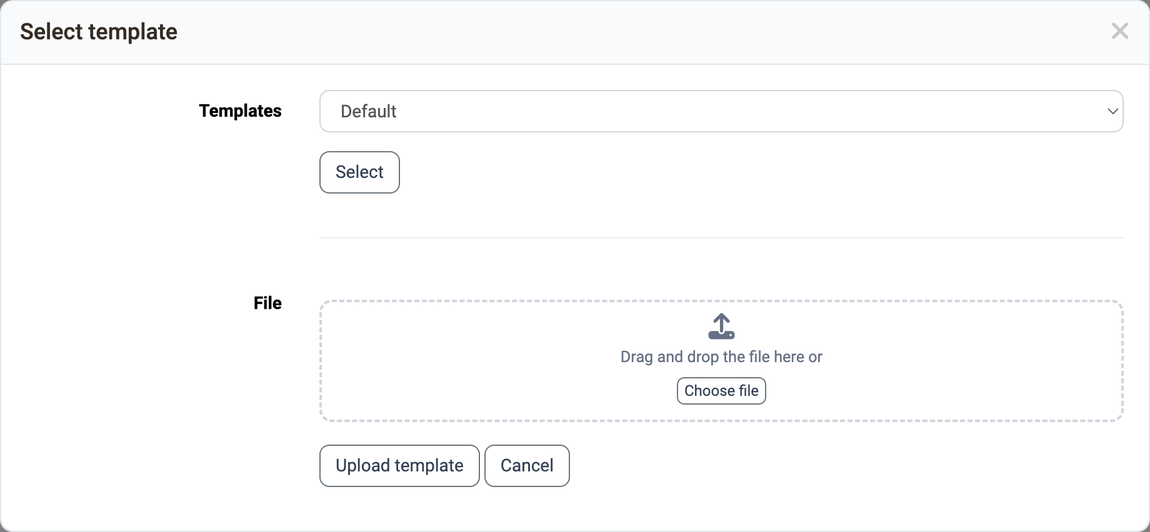
The "Select" button next to the "Certificate template" field opens the "Select template" dialog. It offers the system-wide templates with the entry "Default" for the default template, and below that the field for your own file.
This certificate bot allows you to quickly and easily create certificate templates in HTML format. If you want to customize the bot to suit your needs, the repository with the publicly available code (MIT license) is available.
Variables in the certificate template
The form fields must contain certain variables, also called placeholders. When the certificate is issued, the system replaces them with the data of the person and the course. All attributes can be used as variables. For PDF templates, the variable names are used without the $ prefix, while for HTML forms, they are used with the $ prefix.
The "dateFormatter" object is available for formatting date formats. This allows the "*Raw" formats to be formatted using "formatDate()" or a specified period to be added using formatDateRelative (Date baseLineDate, days, months, years).
Signatures, logos, etc. can be integrated into the certificate as static graphics using the optional variables. The corresponding files must be available with the certificate template for this purpose.
Overview of the most important variables
User:
- $fullName
- $firstName
- $lastName
- $birthDay
- $institutionalName
- $orgUnit
- $studySubject
- ...
All user attributes are available as variables.
Course:
- $title
- $externalReference
- $authors
- $from (date)
- $fromLong (date)
- $location
- $to (date)
- $toLong (date)
- $expenditureOfWork
- $mainLanguage
Performance data (all course types):
- $score
- $status
- $grade
- $gradeLabel
- $gradeCutValue
Performance data (only learning path course):
- $maxScore
- $progress
Certificate data:
- $dateFirstCertification
- $dateFirstCertificationLong
- $dateFirstCertificationRaw
- $dateCertification
- $dateCertificationLong
- $dateCertificationRaw
- $dateCertificateValidUntil
- $dateCertificateValidUntilLong
-
$dateCertificateValidUntilRaw
-
$certificateVerificationUrl
Relative date:
Data calculated relative to a raw date can be specified on the certificate:
| Method and parameter | Example: $dateNextRecertificationRaw = 15.11.2021 |
|---|---|
| Relative date short | Output: 22.09.2031 |
| $formatter.formatDateRelative(original date, "Voice code", +/- Days, +/- Months, +/- Years) | $formatter.formatDateRelative($dateNextRecertificationRaw, "en", 7, -2, 10) |
| Relative date long | Output: 22. September 2031 |
| $formatter.formatDateLongRelative(original date, "Voice code", +/- Days, +/- Months, +/- Years) | $formatter.formatDateRelative($dateNextRecertificationRaw, "en", 7, -2, 10) |
Date from the course description:
- $!description
- $!objectives
- $!requirements
- $!credits
Optional variables:
- $custom1
- $custom2
- $custom3
If you would like a certificate template, please contact us at contact@frentix.com for a quote for a template tailored to your individual requirements.
Print version for pre-printed paper
Some organisations print certificates on high-value, pre-printed paper that already carries background colours, graphics, or embossed elements. For this case, an additional print template is available that contains only the variable content without the pre-printed elements.
You do not configure the print version in the course settings, but in the certification program.
More about the print version in the certification program >
Recertification
Conditions
In order for a recertification process to be set up, certificate creation must first be activated and a validity period must be set. Without a validity period, the "Recertification" switch does not appear. When a certificate for a course expires, recertification can be offered to all affected participants even before the expiry.
The recertification option is linked to
- an existing previous (initial) certification
- A defined indication of the earliest date on which recertification is possible.
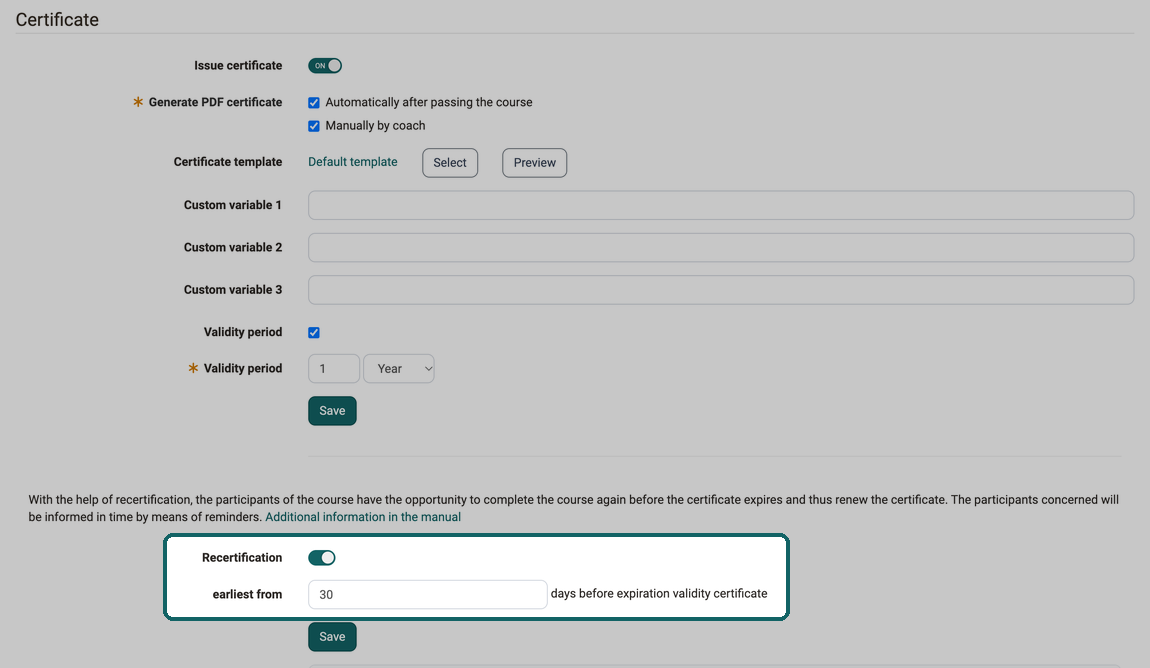
Activate recertification
If you switch on "Recertification", the "Activate recertification" dialog opens. There you define from when recertification is possible: "earliest from ... days before expiration validity certificate". The value must be less than the validity period. The "Activate and create reminders" button switches on the recertification.
Please note that you can also choose to display course elements only during the initial certification or only during one of the recertifications. This can be determined in learning path courses via exceptions. More on this >
Reminders for recertification
So that affected participants do not miss their recertification, OpenOlat creates the reminders itself when you activate it:
- "Recertification possible - ... days" at the start of the period from which recertification is possible
- "Certificate still valid for 10 days" ten days before expiry, provided the period is longer than 10 days
- "Validity certificate expired" on the day the certificate expires
If a reminder with the same rule already exists, OpenOlat does not create it a second time. You see and edit the reminders in the "Reminders recertification" section below the "Certificate" section.
If you switch off recertification later, the "Deactivate recertification" dialog opens. The "Delete reminders with recertification rules." checkbox is selected, so OpenOlat deletes the reminders as well. This way participants receive no reminder for a recertification that no longer exists.
The data of participating individuals will be reset during recertification (course reset).
Evidence of achievement and certificates from previous rounds will be retained.
Further information
Mentioned on this page
Course Planner: Certification programs >
Assessment tool - overview >
Personal achievements/successes: Certificates >
Course Reminders >
Zertifikatsbot >
Zertifikatsbot: Repository >
Learning path course - Course editor >
Further reading
Course Settings - Tab Assessment >
Assessment tool - reset data >