Authoring - Bulk Actions
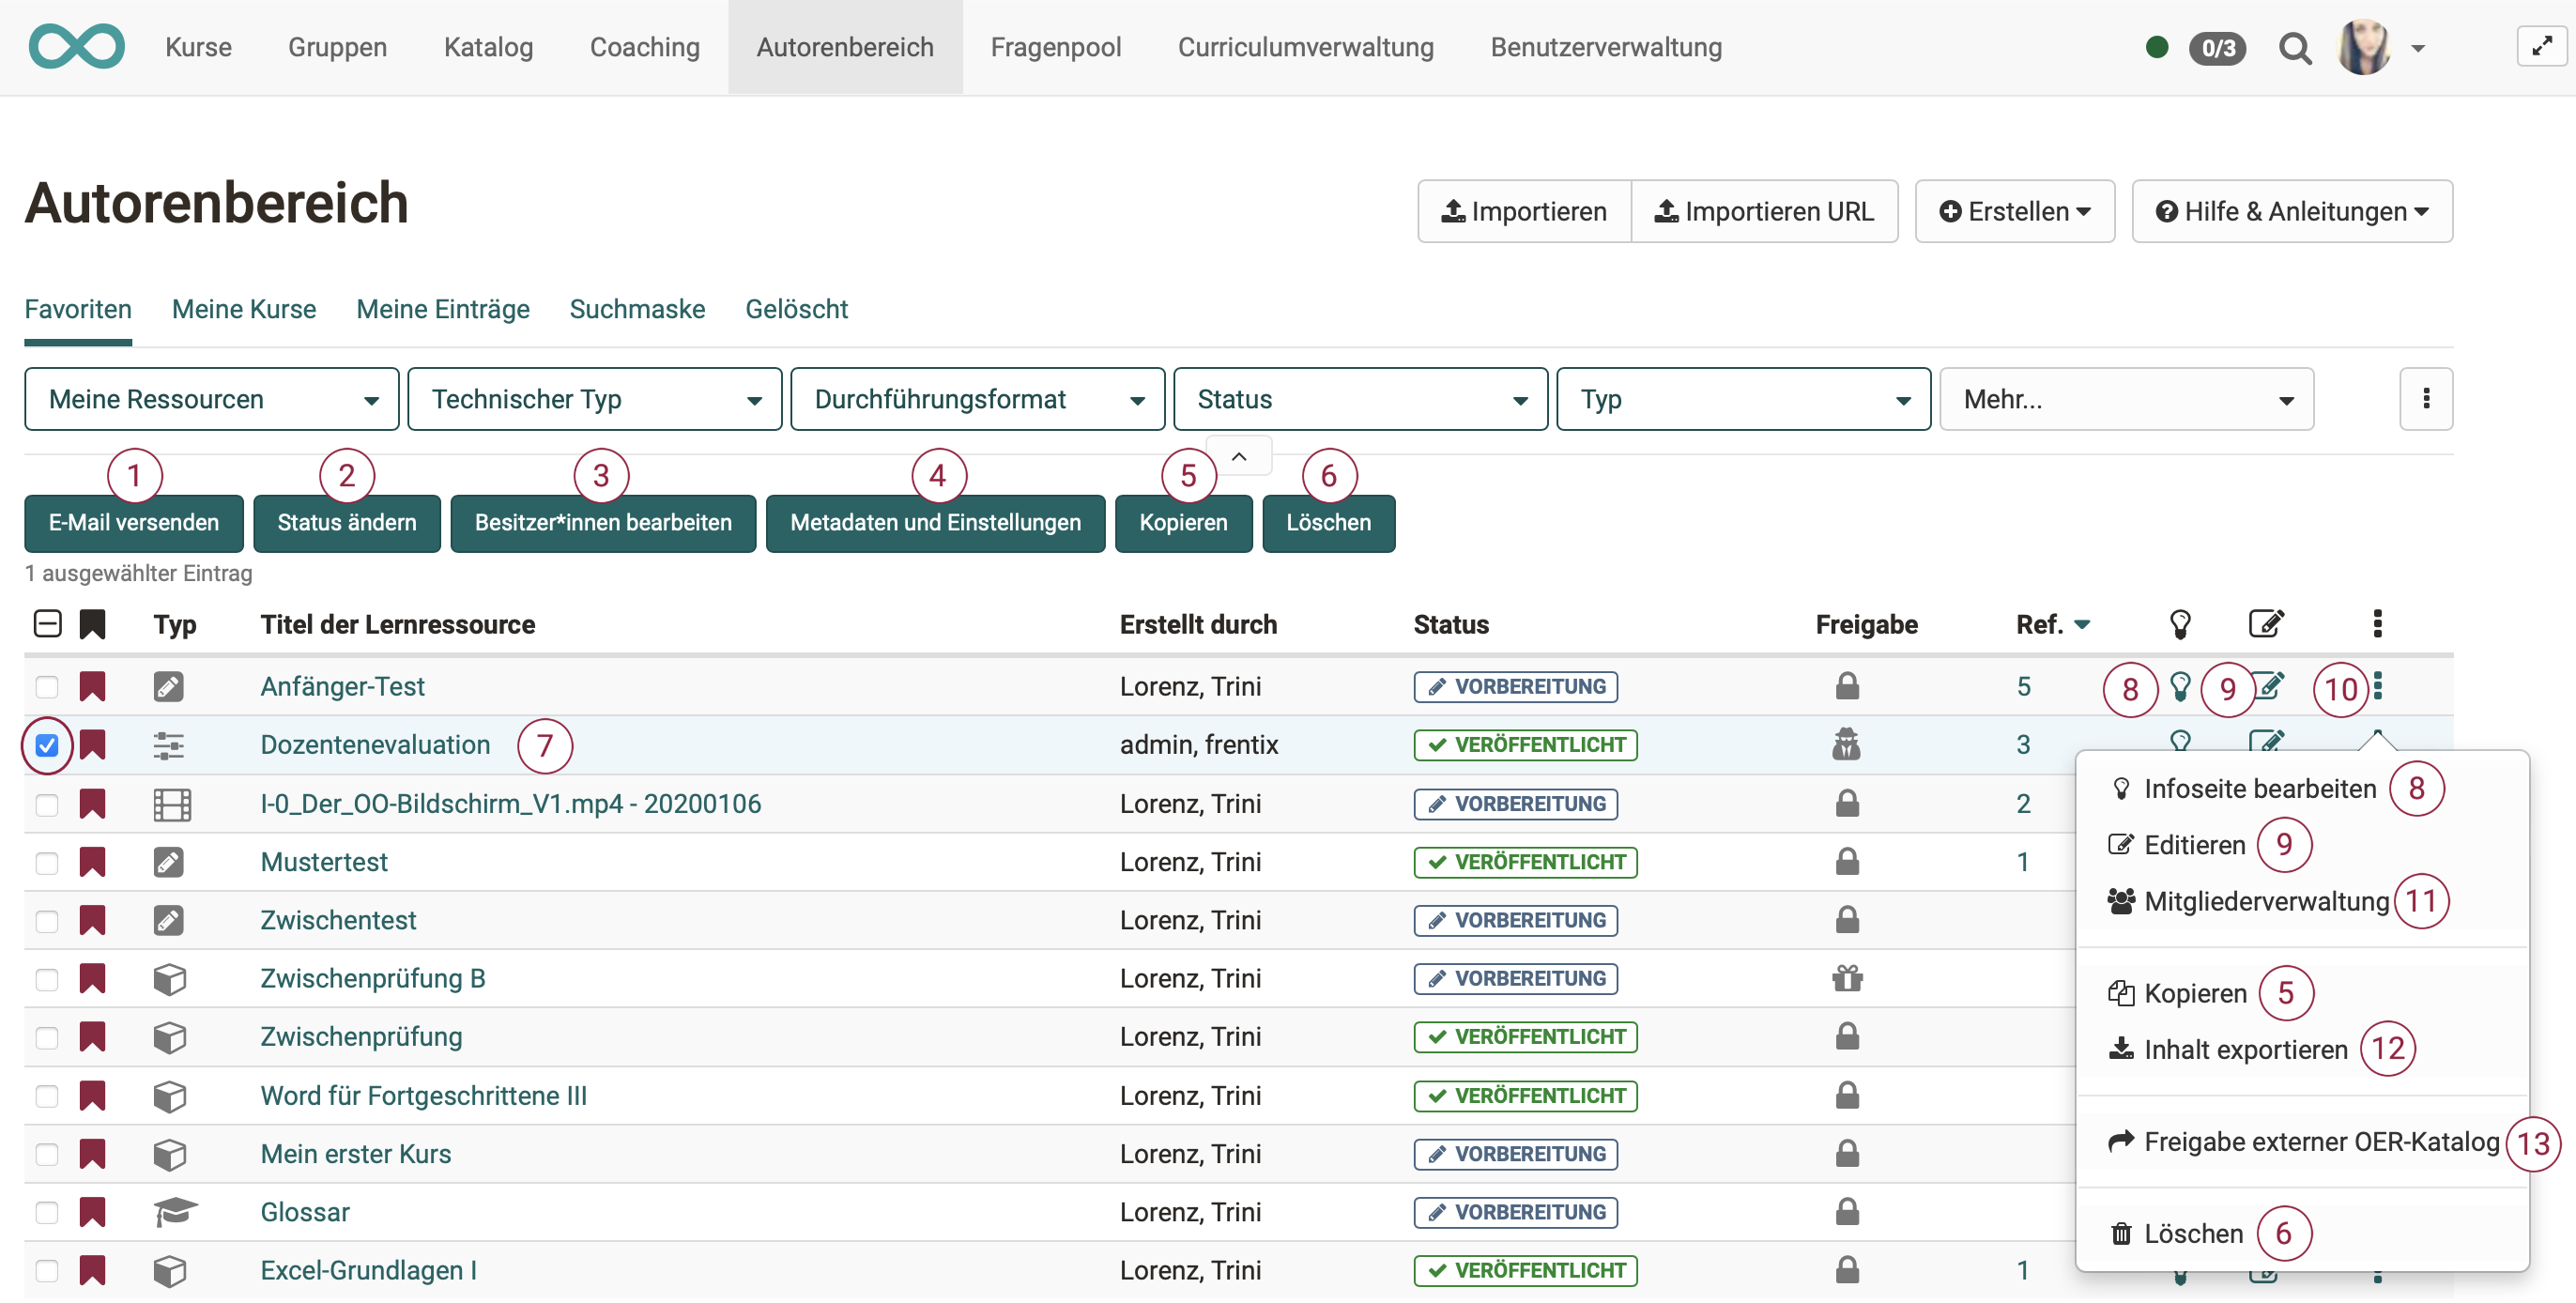
As soon as a learning resource has been selected in the first column of the table, additional buttons (1-6) appear above the table. They can be used to carry out actions for the selected resources, i.e. for several learning resources together (Bulk Actions).
For these buttons to be visible, at least one learning resource must be selected.
Clicking on the 3 dots at the end of a table row (10) displays options, which are only for this specific learning resource of this row.
Hint
If you select the checkbox in the title bar of the table, all learning resources will be selected at once. 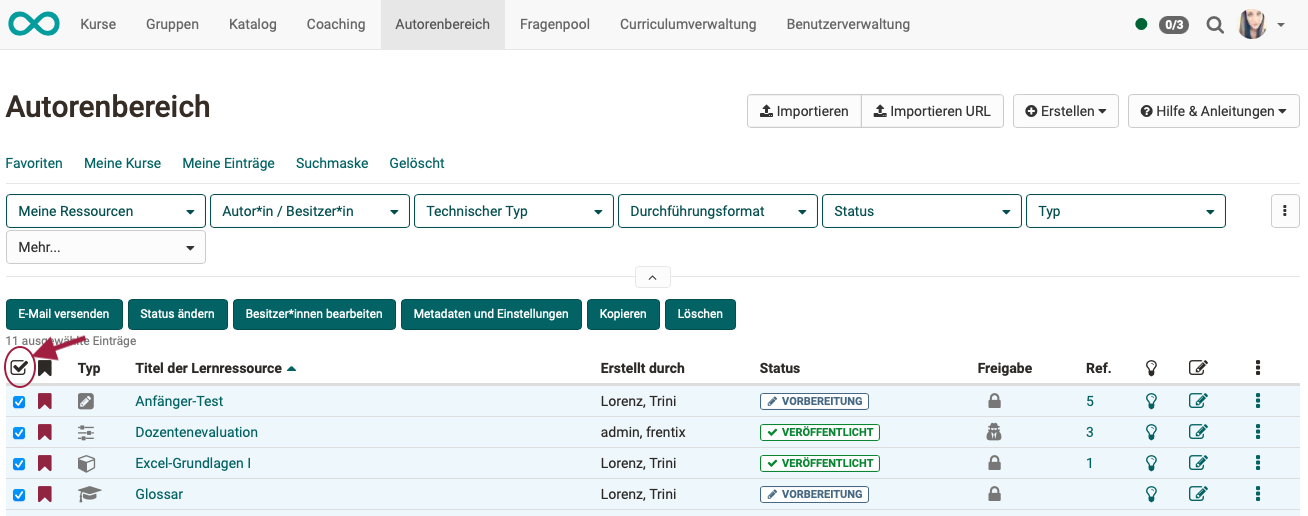
1. Send email
Select the desired learning resources and click on "Send email". A dialog opens. You can now define to whom the email should be sen. Possible recipients are all course owners, all course coaches and all participants.
Add a subject and the desired message. If necessary, an attachment and a copy for the sender can be added.
Note
You can send the email to all courses that are displayed to you. This also includes courses, which are visible to all authors. You do not have to be a member of the course to use this function.
2. Change status
Select the publication status that should apply to all selected learning resources and click on "Change".
3. Modify owners
All owners of the selected learning resources are displayed here. You can remove them from several courses at the same time or add new owners to the selected learning resources. An email notification option completes the editing.
4. Metadata and settings
Through bulk actions, various metadata can be standardized here for the selected learning resources, e.g. if several courses belong to a continuing education series. By clicking, a wizard opens.
For all marked learning resources
- the displayed name can be entered under "Taught by"
- the implementation format, e.g. "Exam course", can be selected
- language and time requirements must be defined
- and a suitable licence for the learning resources must be selected
- a suitable subject area and the desired organization for the learning resources must be selected.
- additional rights must be granted for all other authors.
- as well as a consistent execution period and location must be specified.
Courses also have the option of making a consistent selection for the tools in the toolbar.
5. Copy
With the "Copy" button above the table you can copy several learning resources..
By clicking on "Copy" in the menu that appears under the 3 dots at the end of a row, you copy a single learning resource. (The learning resource of this table row.)
Select one or more learning resources to copy them. For example, to reuse for a new semester or to create a backup copy.
Copied learning resources can then be found in the tab "My entries". The addition ("copy") is added to the title. However, the title can subsequently be changed as desired.
6. Delete
A learning resource can only be deleted by the owner of the learning resource, learning resource managers, and administrators.
With the button above the table you can quickly delete several learning resources at once.
If you only want to delete a single learning resource, you can also click on the 3 dots at the end of the respective table row and then on the option "Delete".
You must confirm this action again in the menu for the sake of safety. The owners of the learning resource will be notified by email, if configured.
After deletion, the learning resources will only appear in the "Deleted" tab (trash function) for the respective owners, learning resource managers, and administrators.
As the owner, you can restore deleted learning resources. Only administrators or learning resource managers can permanently delete learning resources.
7. Open/edit learning resource
Clicking on the title of a learning resource opens the corresponding resource.
8. Open info page
By clicking on the light bulb symbol  the info page will be displayed.
If, on the other hand, you click on "Change info page" in the menu under the 3 dots, you will reach the "Settings" area and can edit the information that appears on the info page.
You can find more about this topic on page "Set up info page".
9. Edit
For editable learning resources such as course, glossary, test, CP learning content, blog and podcast, clicking on "Edit" or the icon opens the corresponding editor.
10. Further options for individual learning resources
Clicking on the 3-dots at the end of a table row opens a menu with several options.
Actions in the menu under the 3 points always refer to the single learning resource of this row. With the buttons above the table (1-6), on the other hand, you can carry out actions for several learning resources.
11. Members management
Here you can organize members of a learning resource. You can find more information on this in the chapter Members management
12. Export content
This allows you to export your learning resources as a ZIP file, e.g. as a backup or for import into another system.
13. Release of external OER catalogue
If a course or learning resource is to be found by search engines, you can call up this option.
You can find a detailed guide to the topic here.
14. Convert to learning path courses
If the table row is a conventional course, the option "Convert to learning path course" is also displayed. A new, converted Learning path course will be created as a copy. The original version will be preserved as conventional course.
15. Copy with Wizard
If the table row is a learning path course, the option "Copy with wizard" is also displayed.
Further information
Create a course (overview) >
How to create my first course (detailed instructions) >
Course editor >
Course design >