How do I create my first OpenOlat course?
1. Get author rights
To be able to create OpenOlat courses, you need author rights. Please contact your administrator to give you the author role. Once you are an author, the entry "Authoring" appears in the menu of your header.

Hint
It may be necessary to log out and log in again so that the menu item is visible to you after the author role has been activated.
2. Enter authoring area
After opening the authoring area, you will see an empty list, because you have not created your own courses yet.
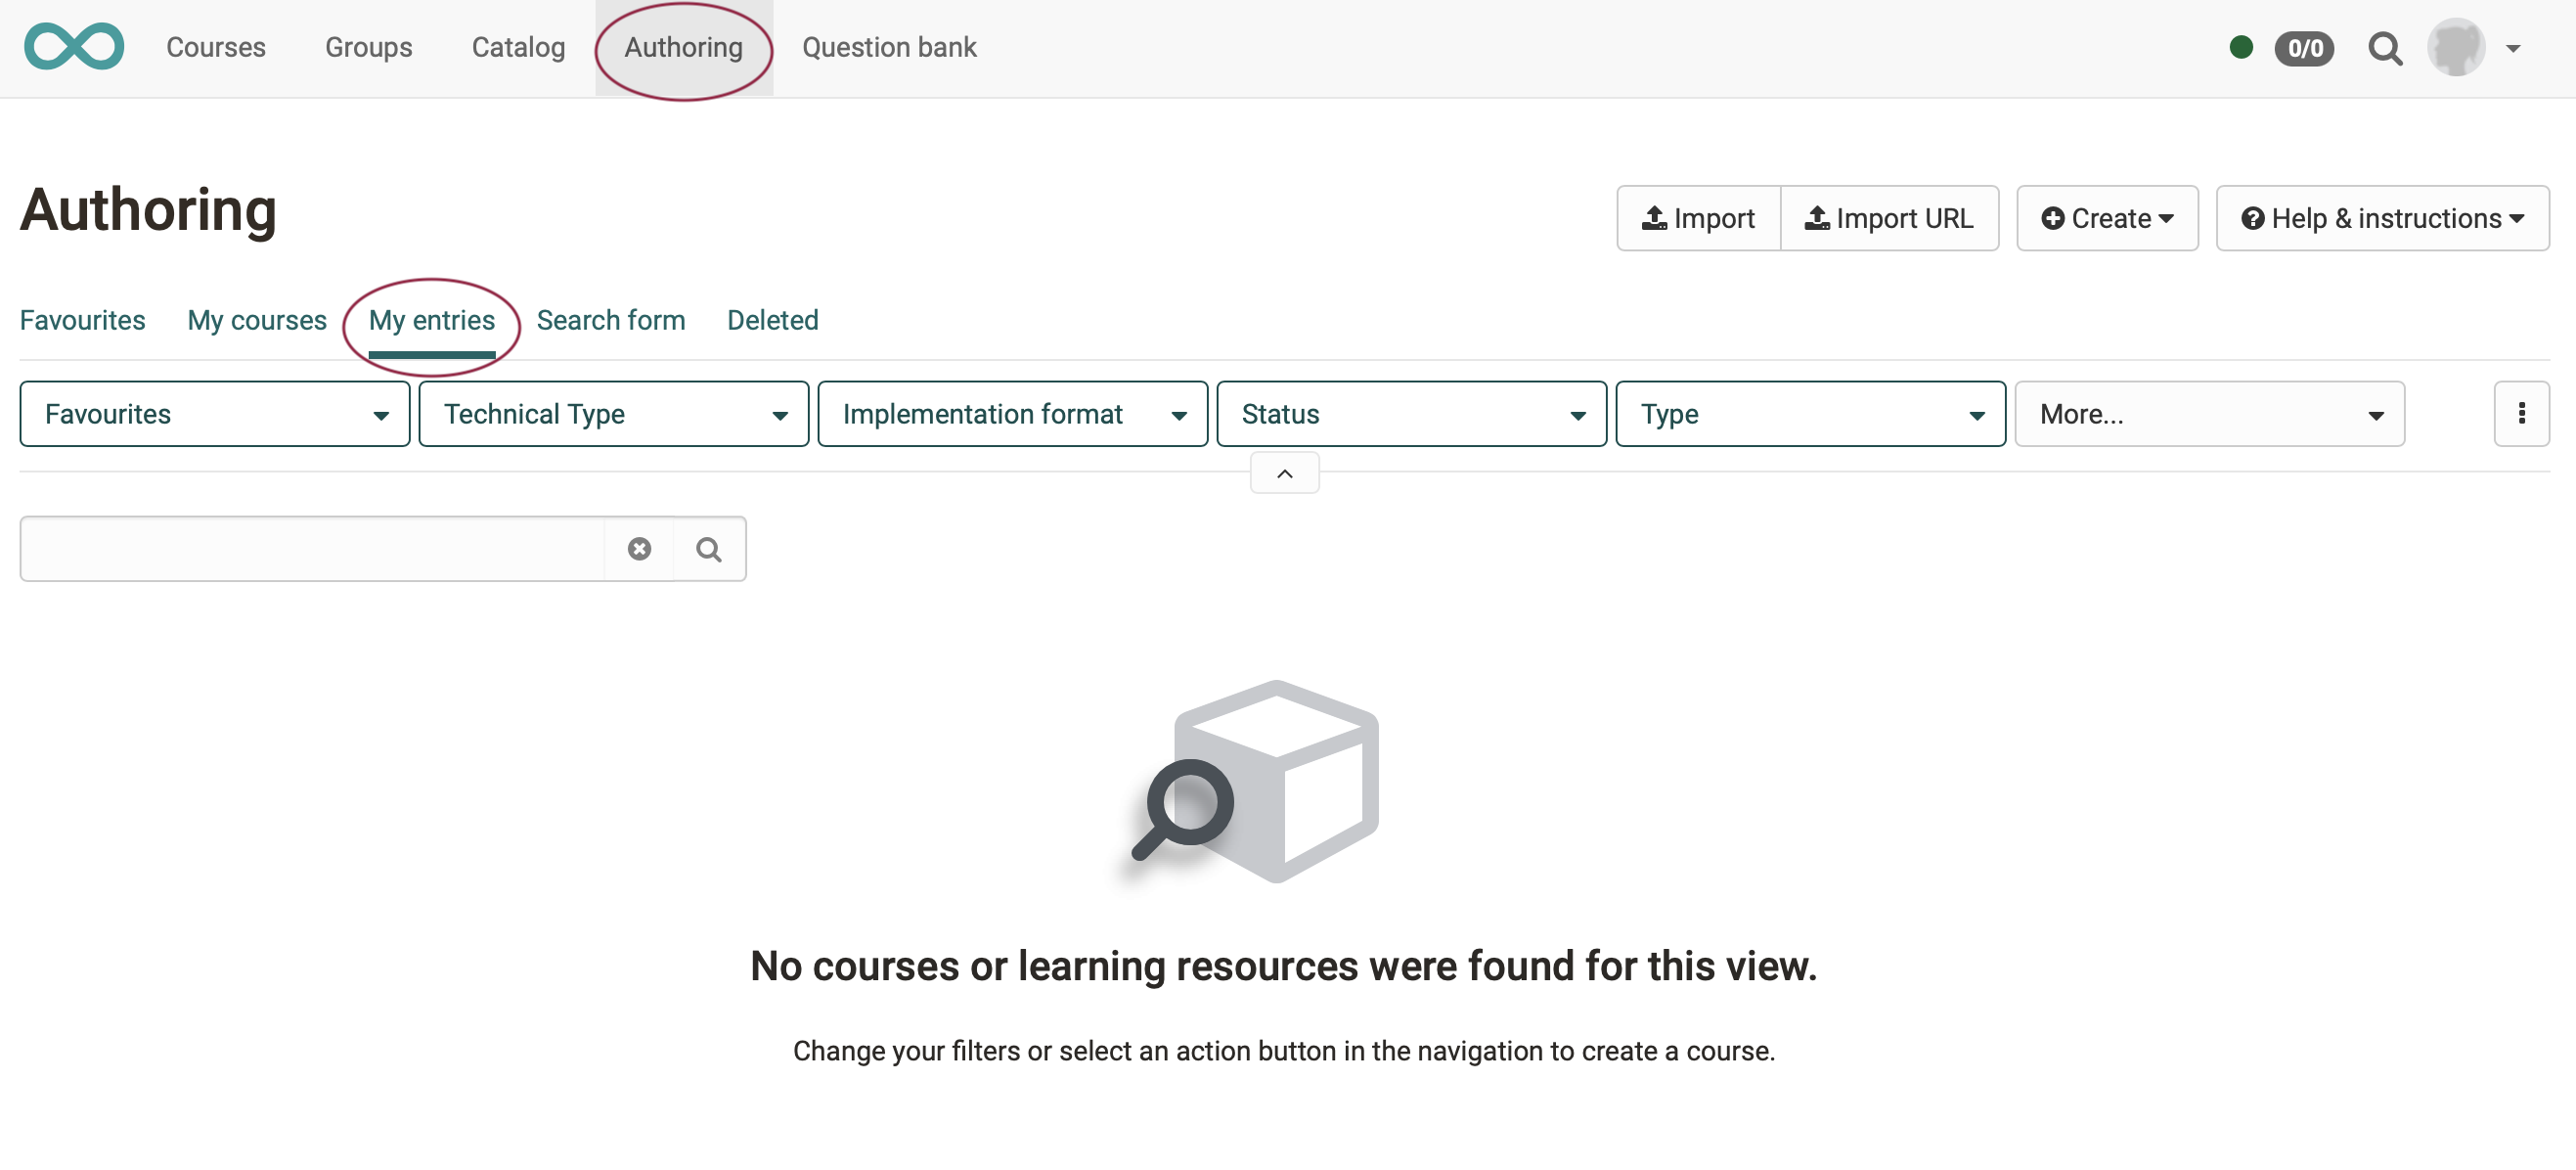
If you use the search mask, you will also find courses and learning resources from other authors. However, only those,
- which have already been published by fellow authors
- and access by other authors has been allowed.
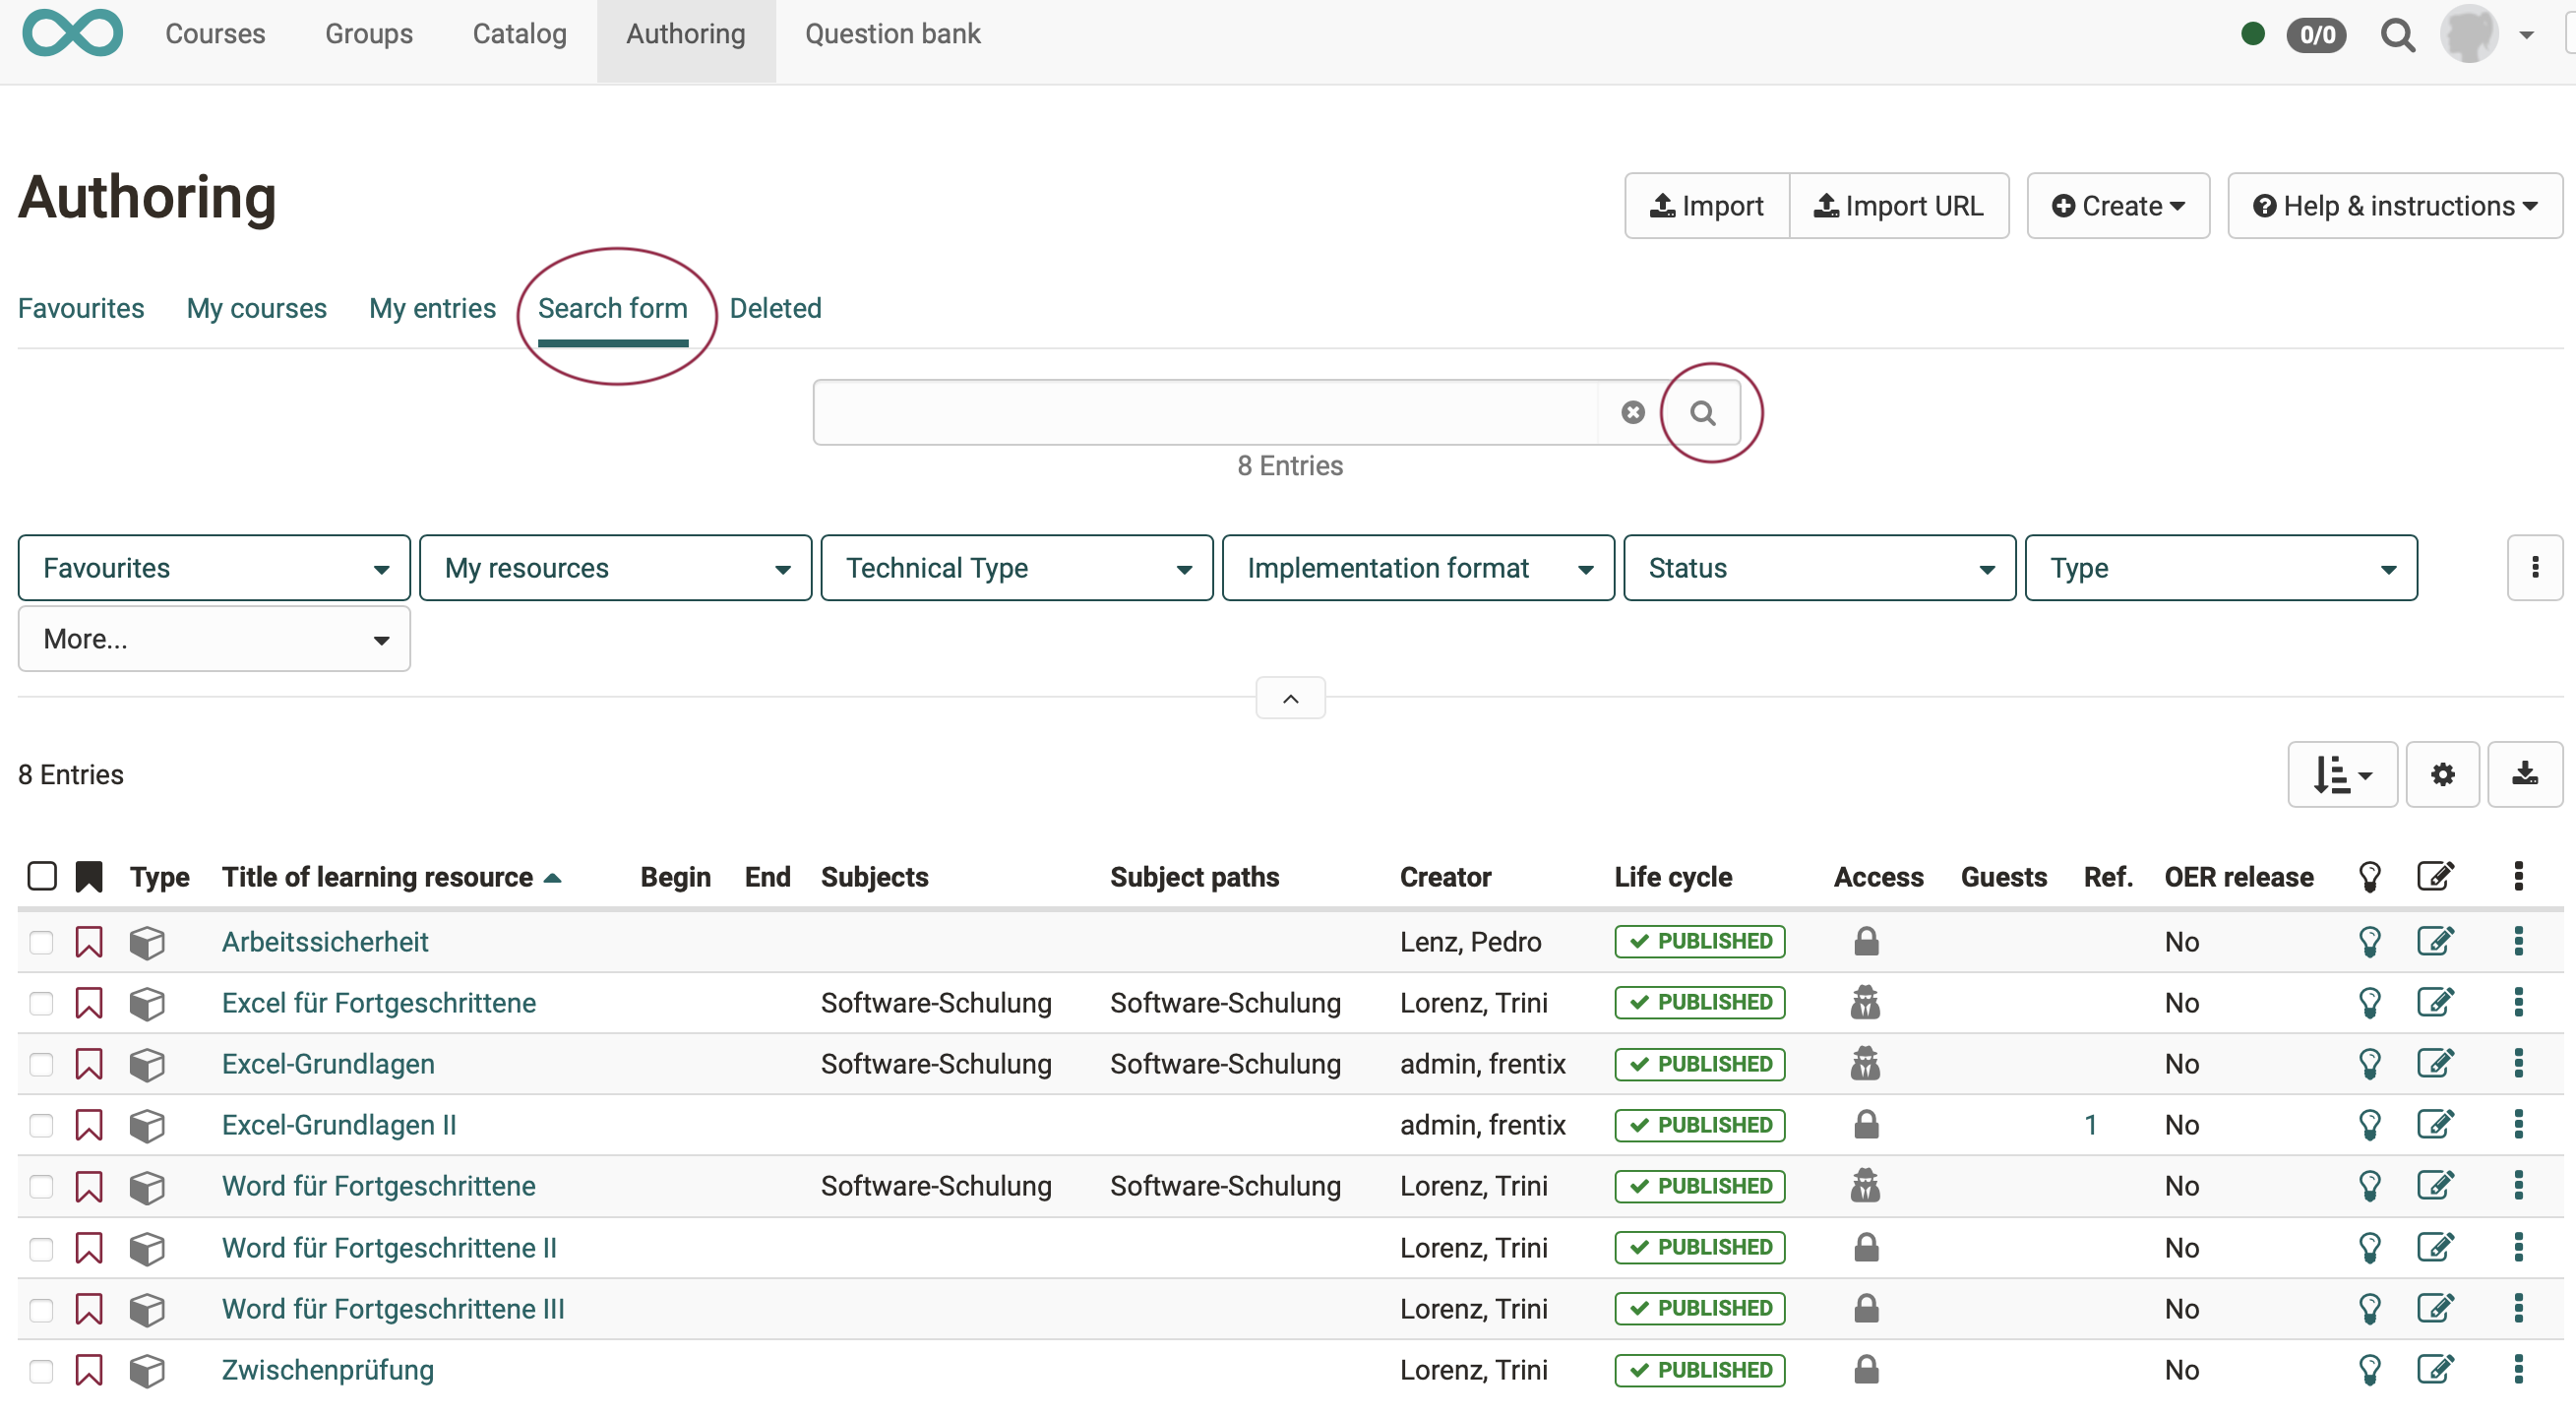
Hint
You can click on the magnifying glass icon without entering a search term. This will show you all available courses and learning resources. You can then filter the search results using the filter options.
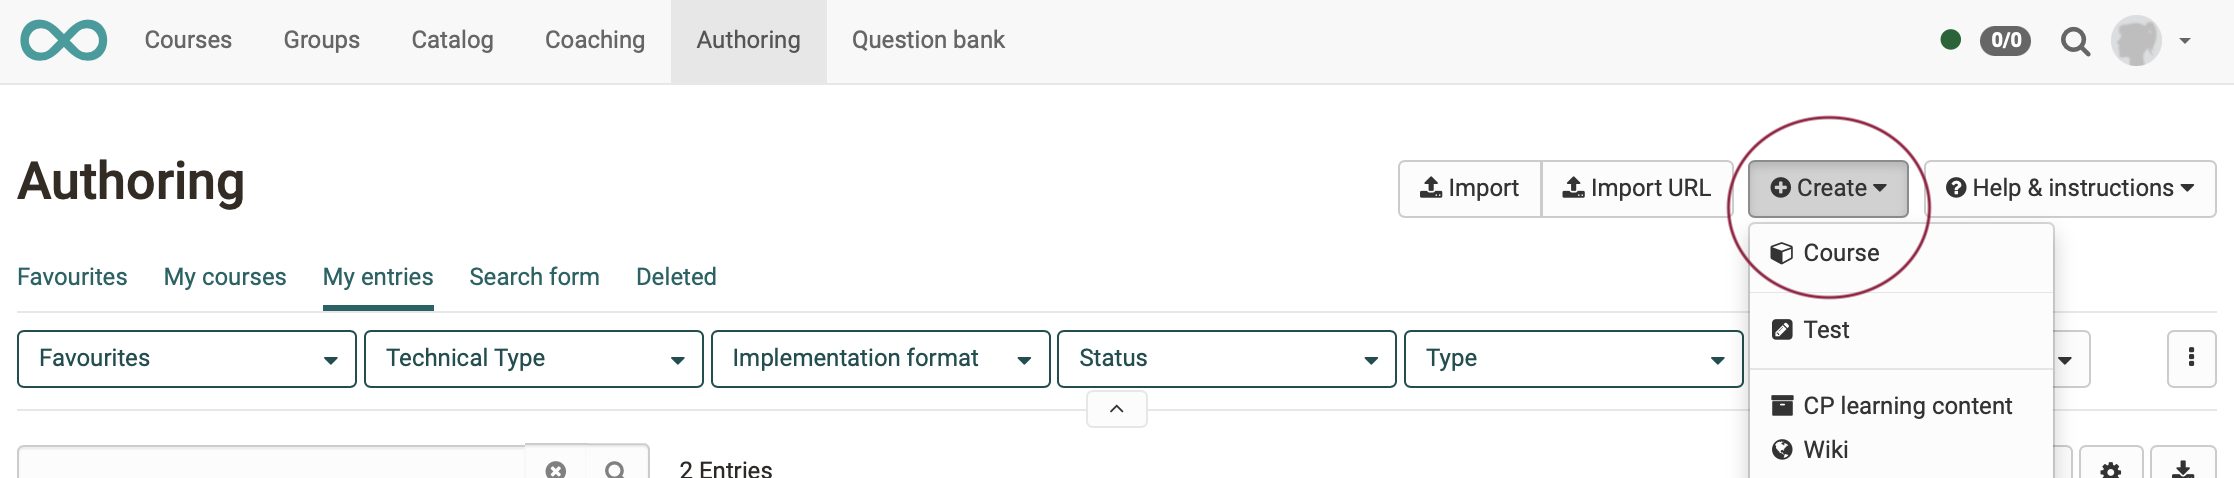
3. Create a new course
The button for creating new courses and other learning resources is located in the authoring area in the upper right corner. Create a new course here.
You will be asked right at the beginning whether you want to create a learning path course or a conventional course.
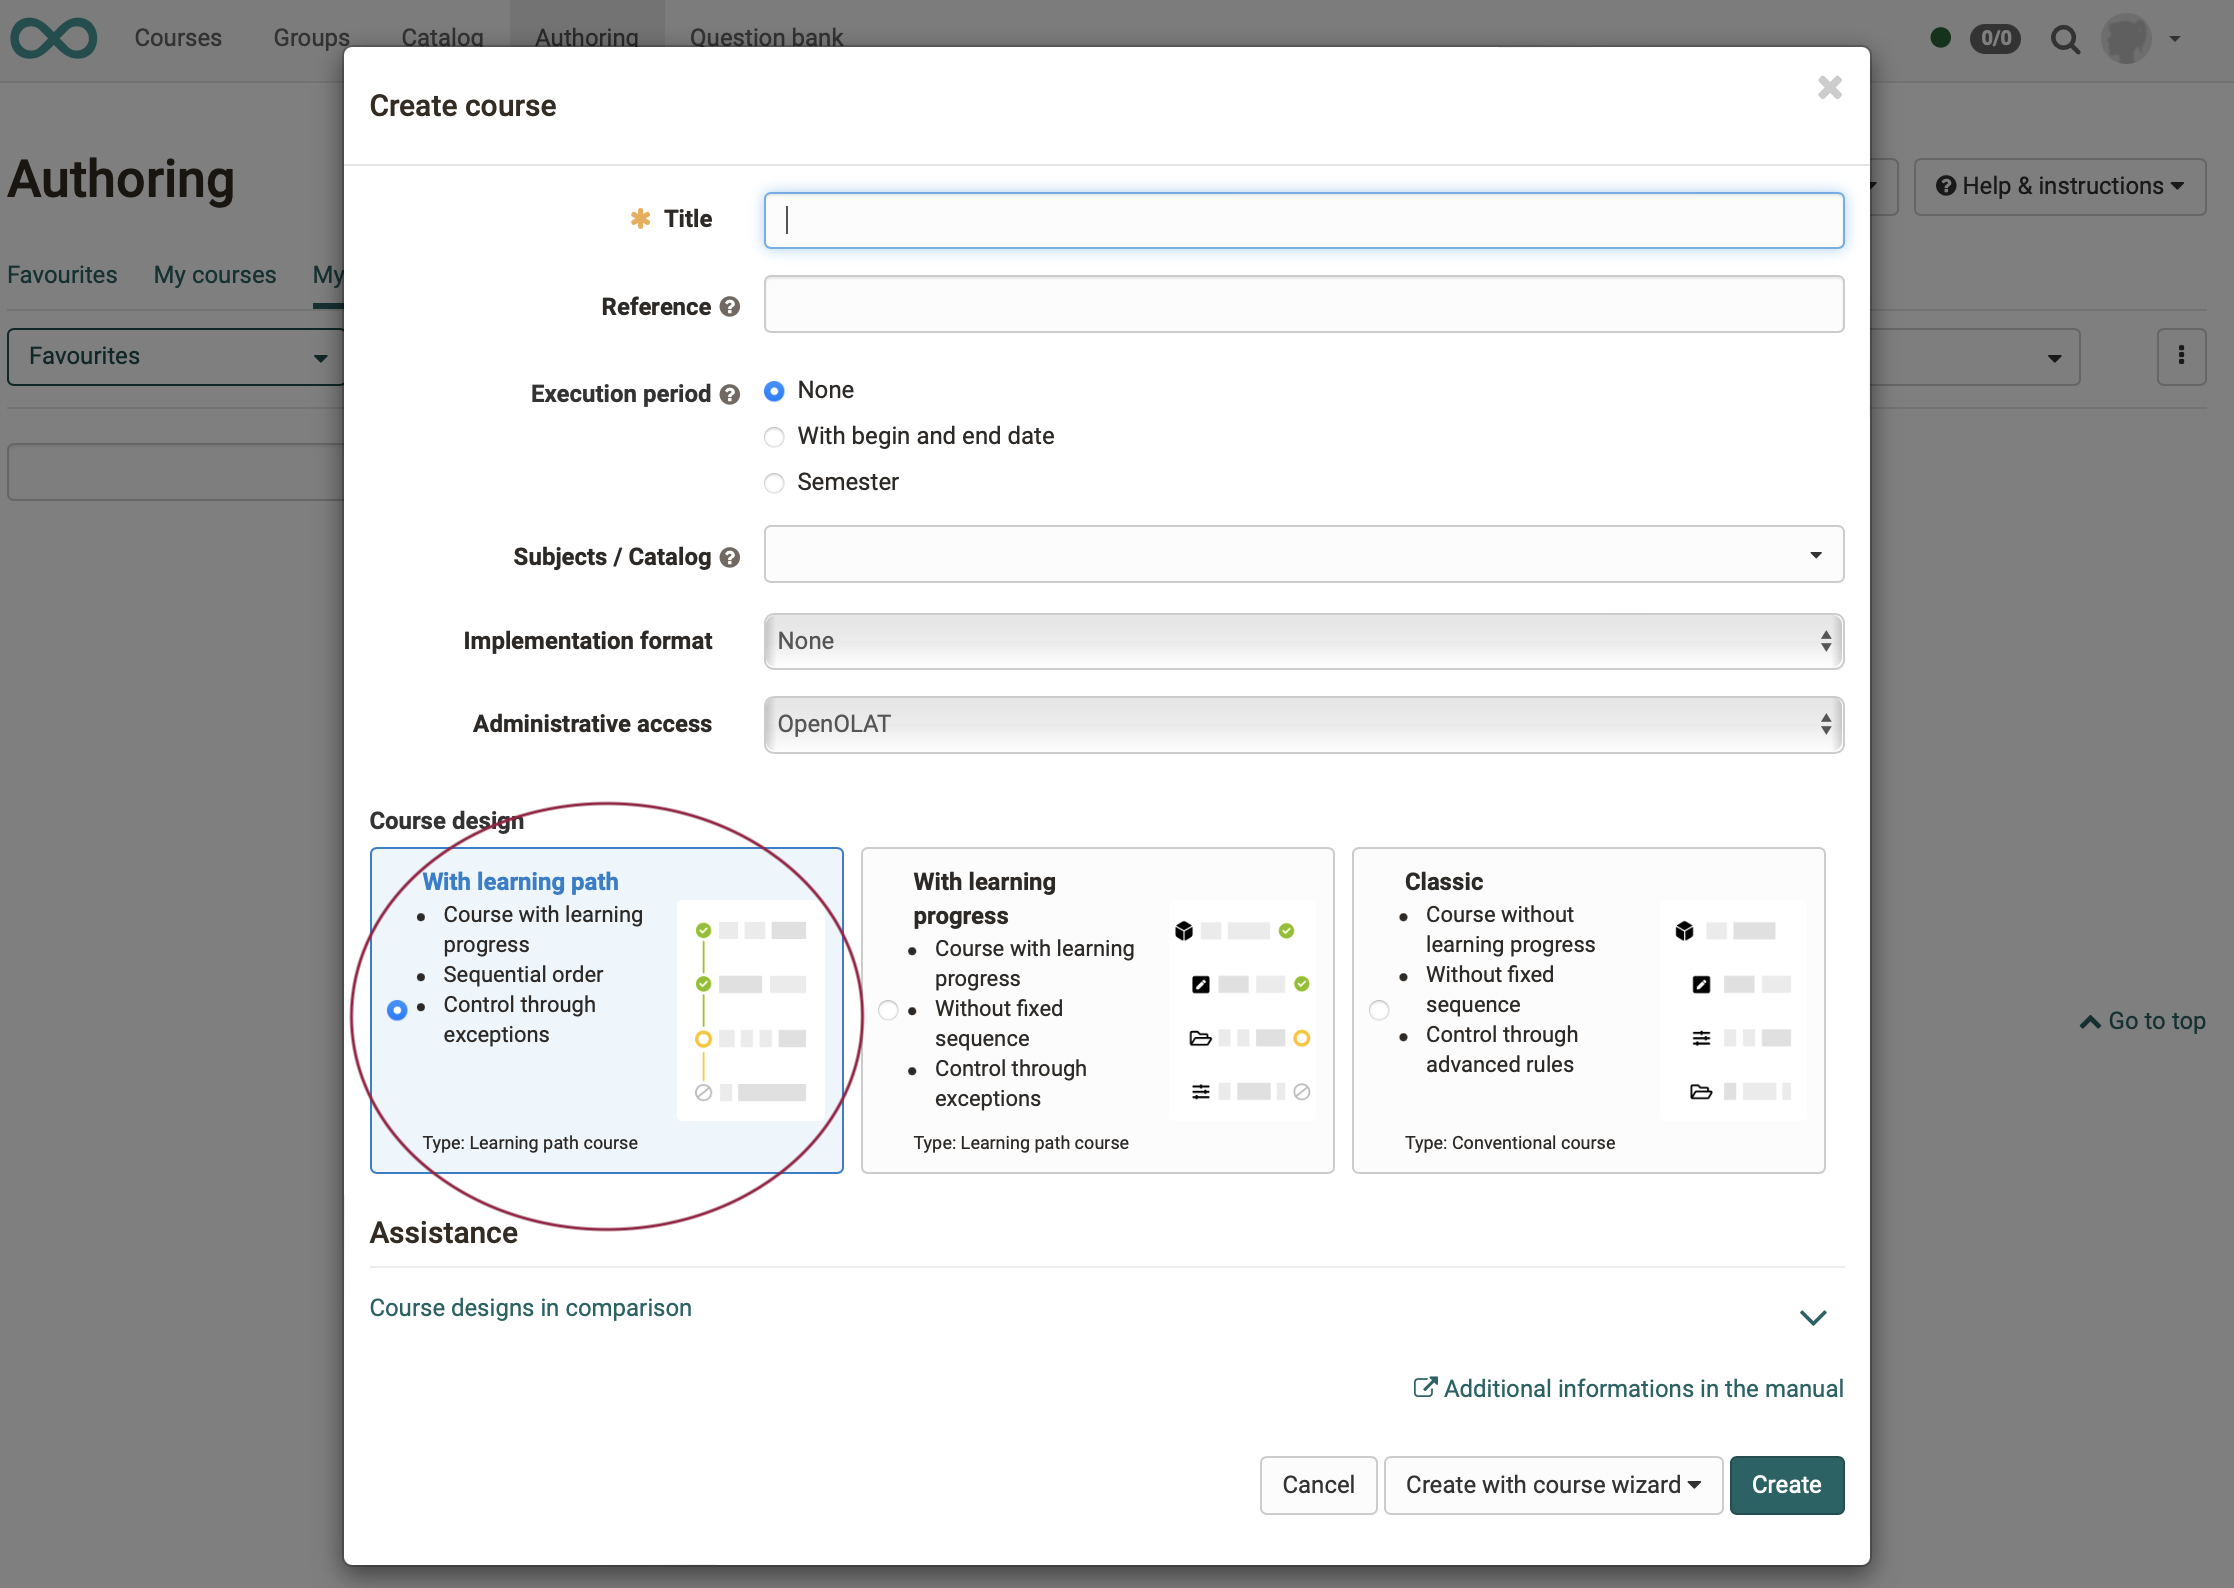
In order for the course to be saved, it is mandatory to have a title. The other information you can also add and edit at a later time.
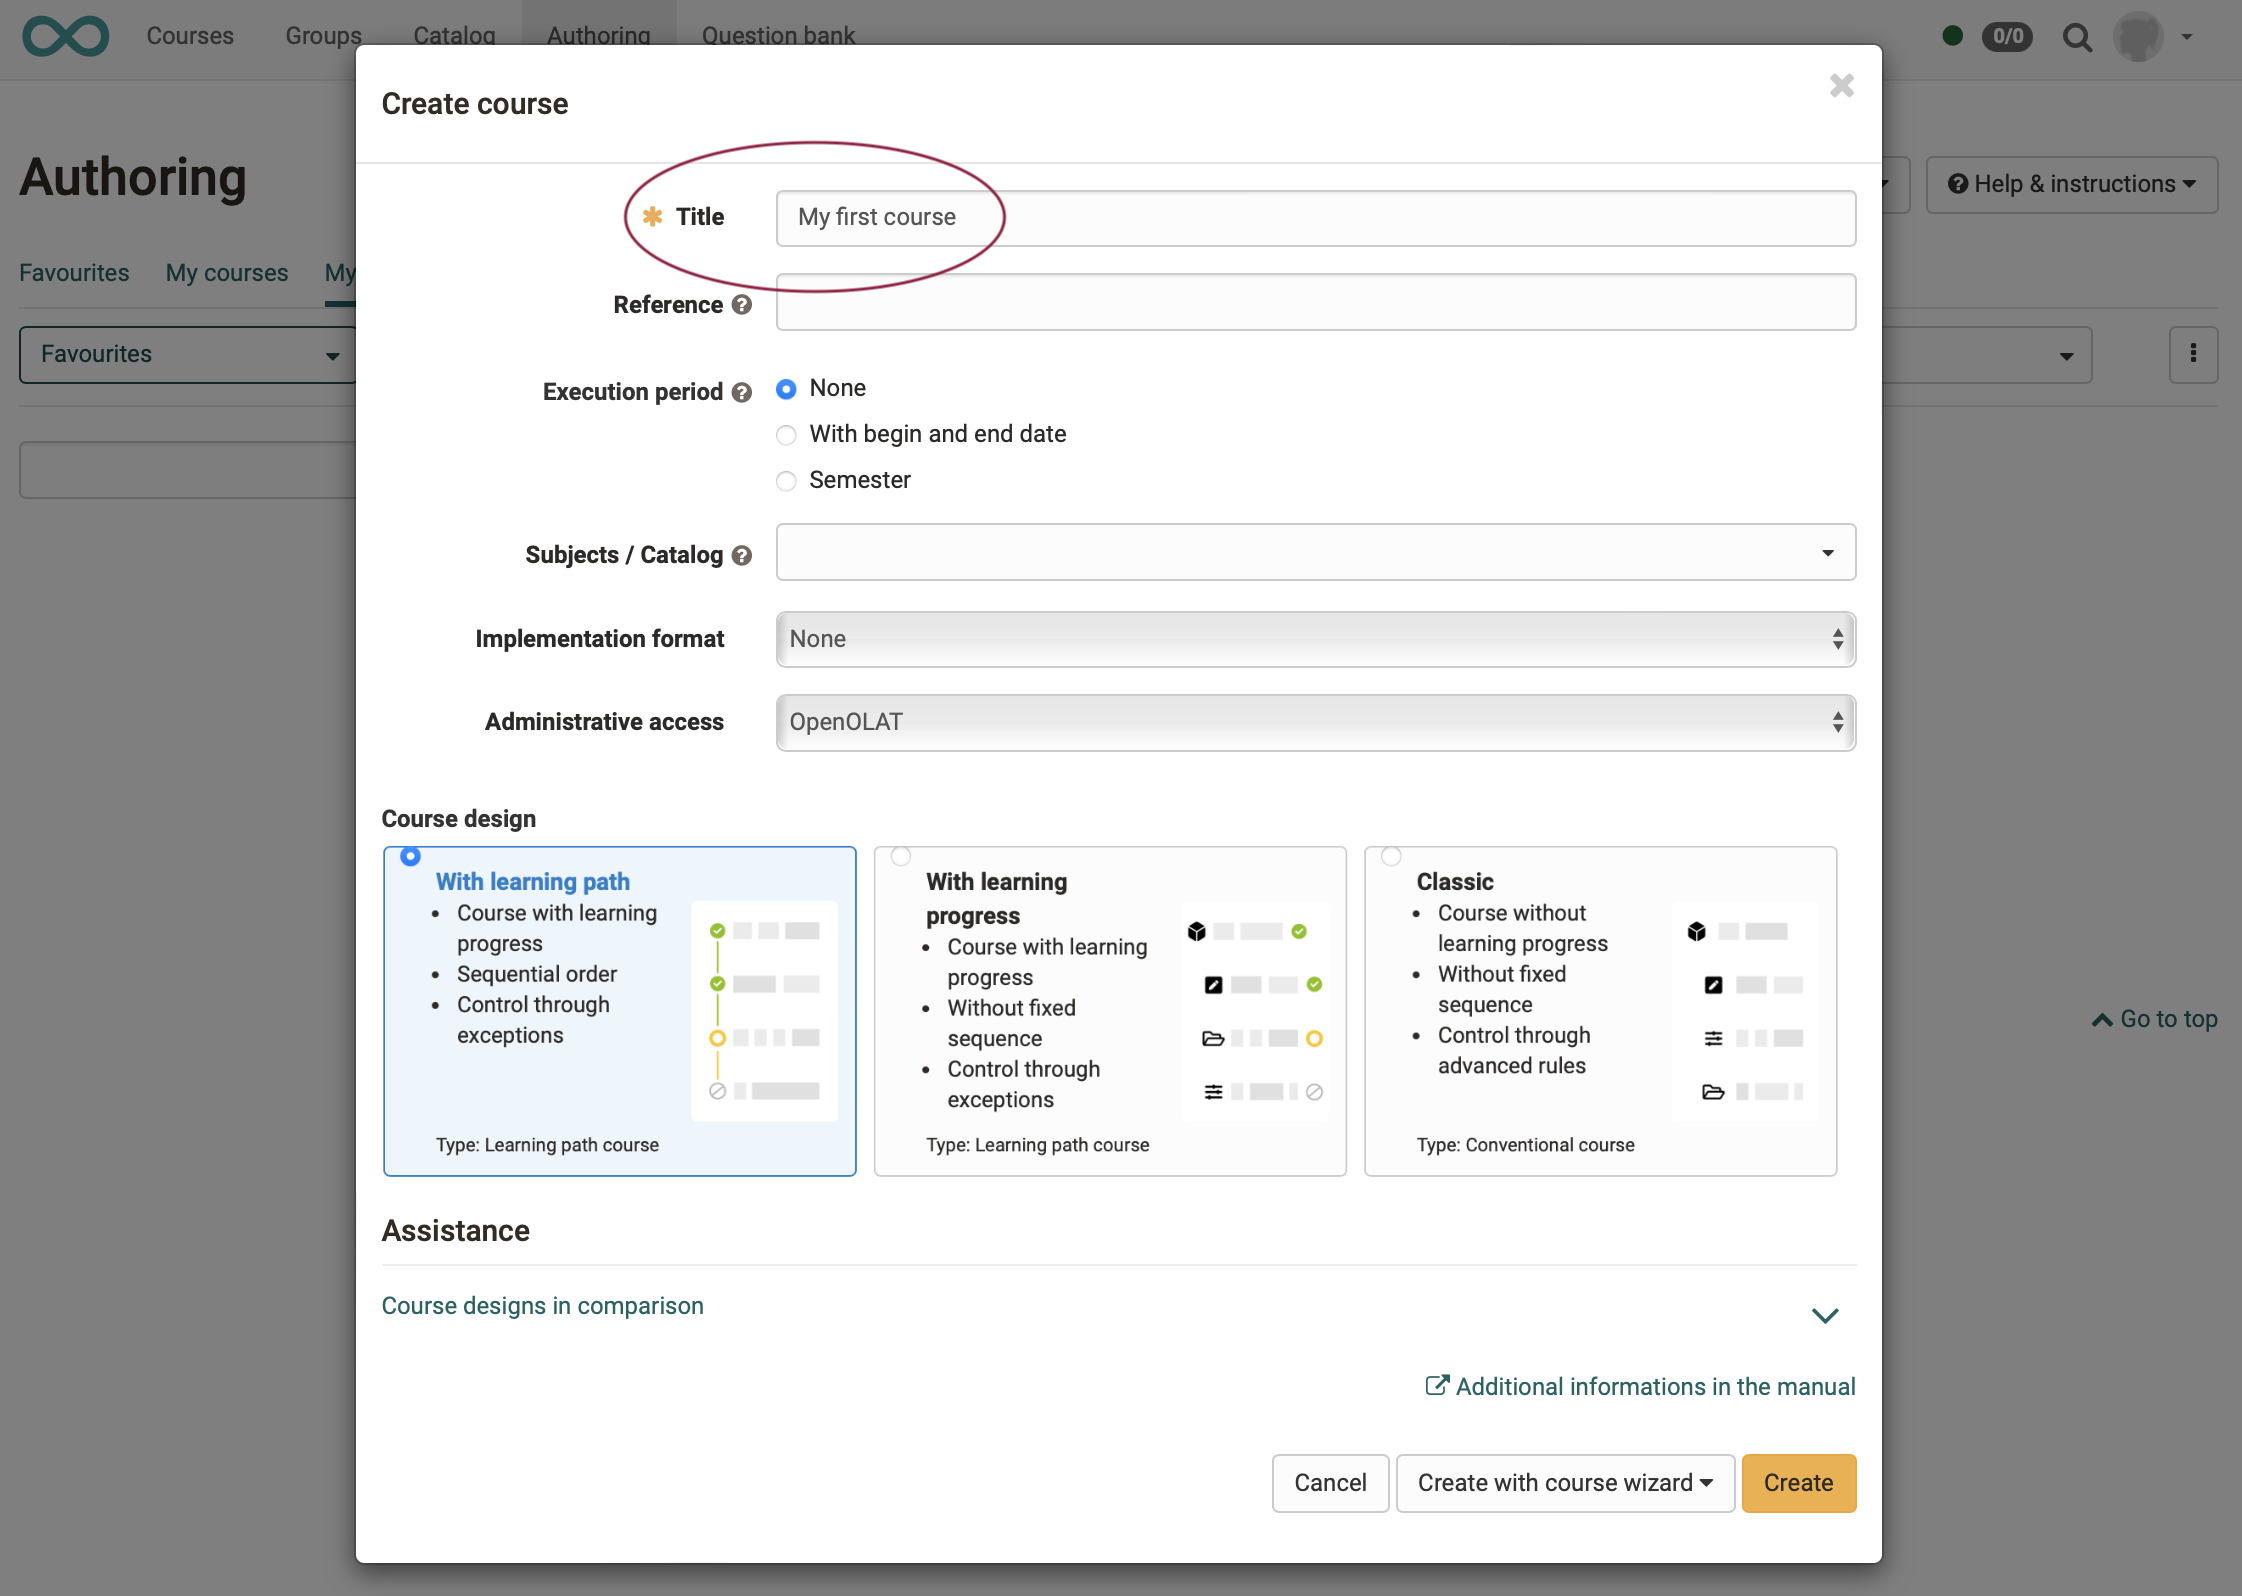
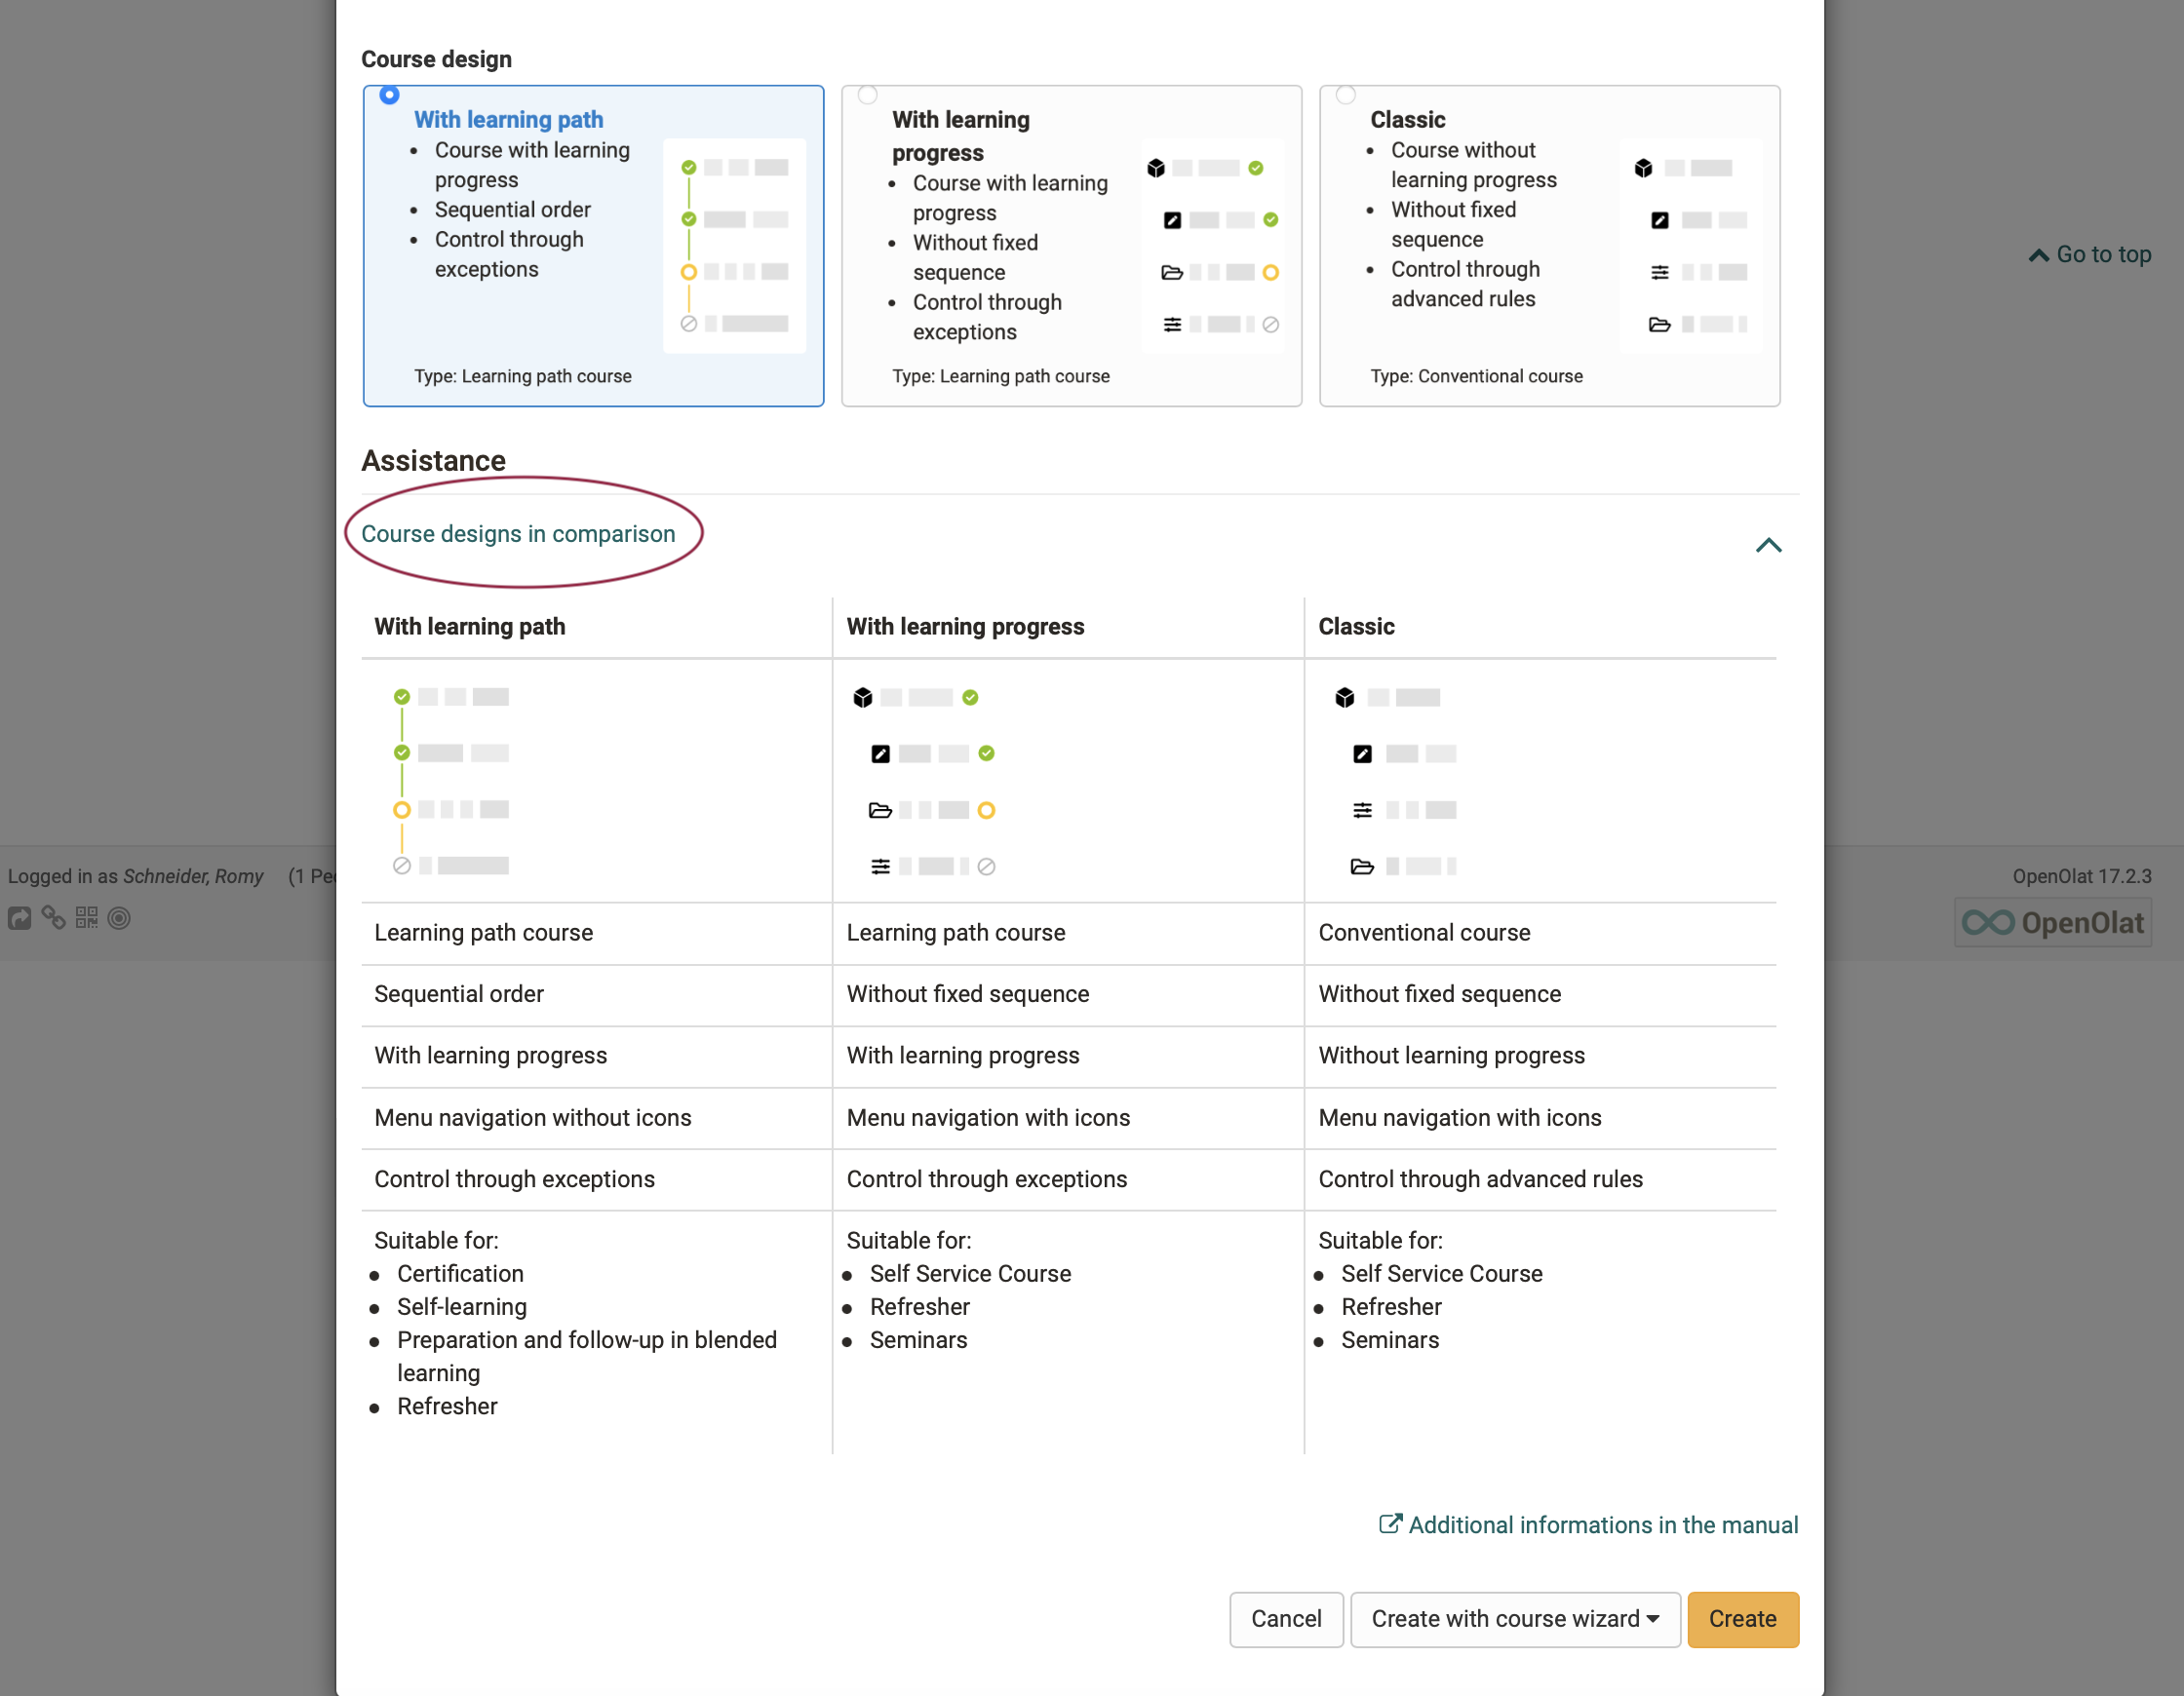
By clicking on the help "Course designs in comparison" you can learn about the differences of the course designs.
Note
It is possible to be guided through the creation of the course by a course wizard. In this manual, however, the procedure is presented in individual steps for better understanding.
(Call the wizard in the lower right corner.)

To complete this step, click on "Create".
4. Make course settings
Immediately after the new course is created, you will get to the settings. In each of the tabs there you can make detailed specifications. For the beginning we will use the default settings.
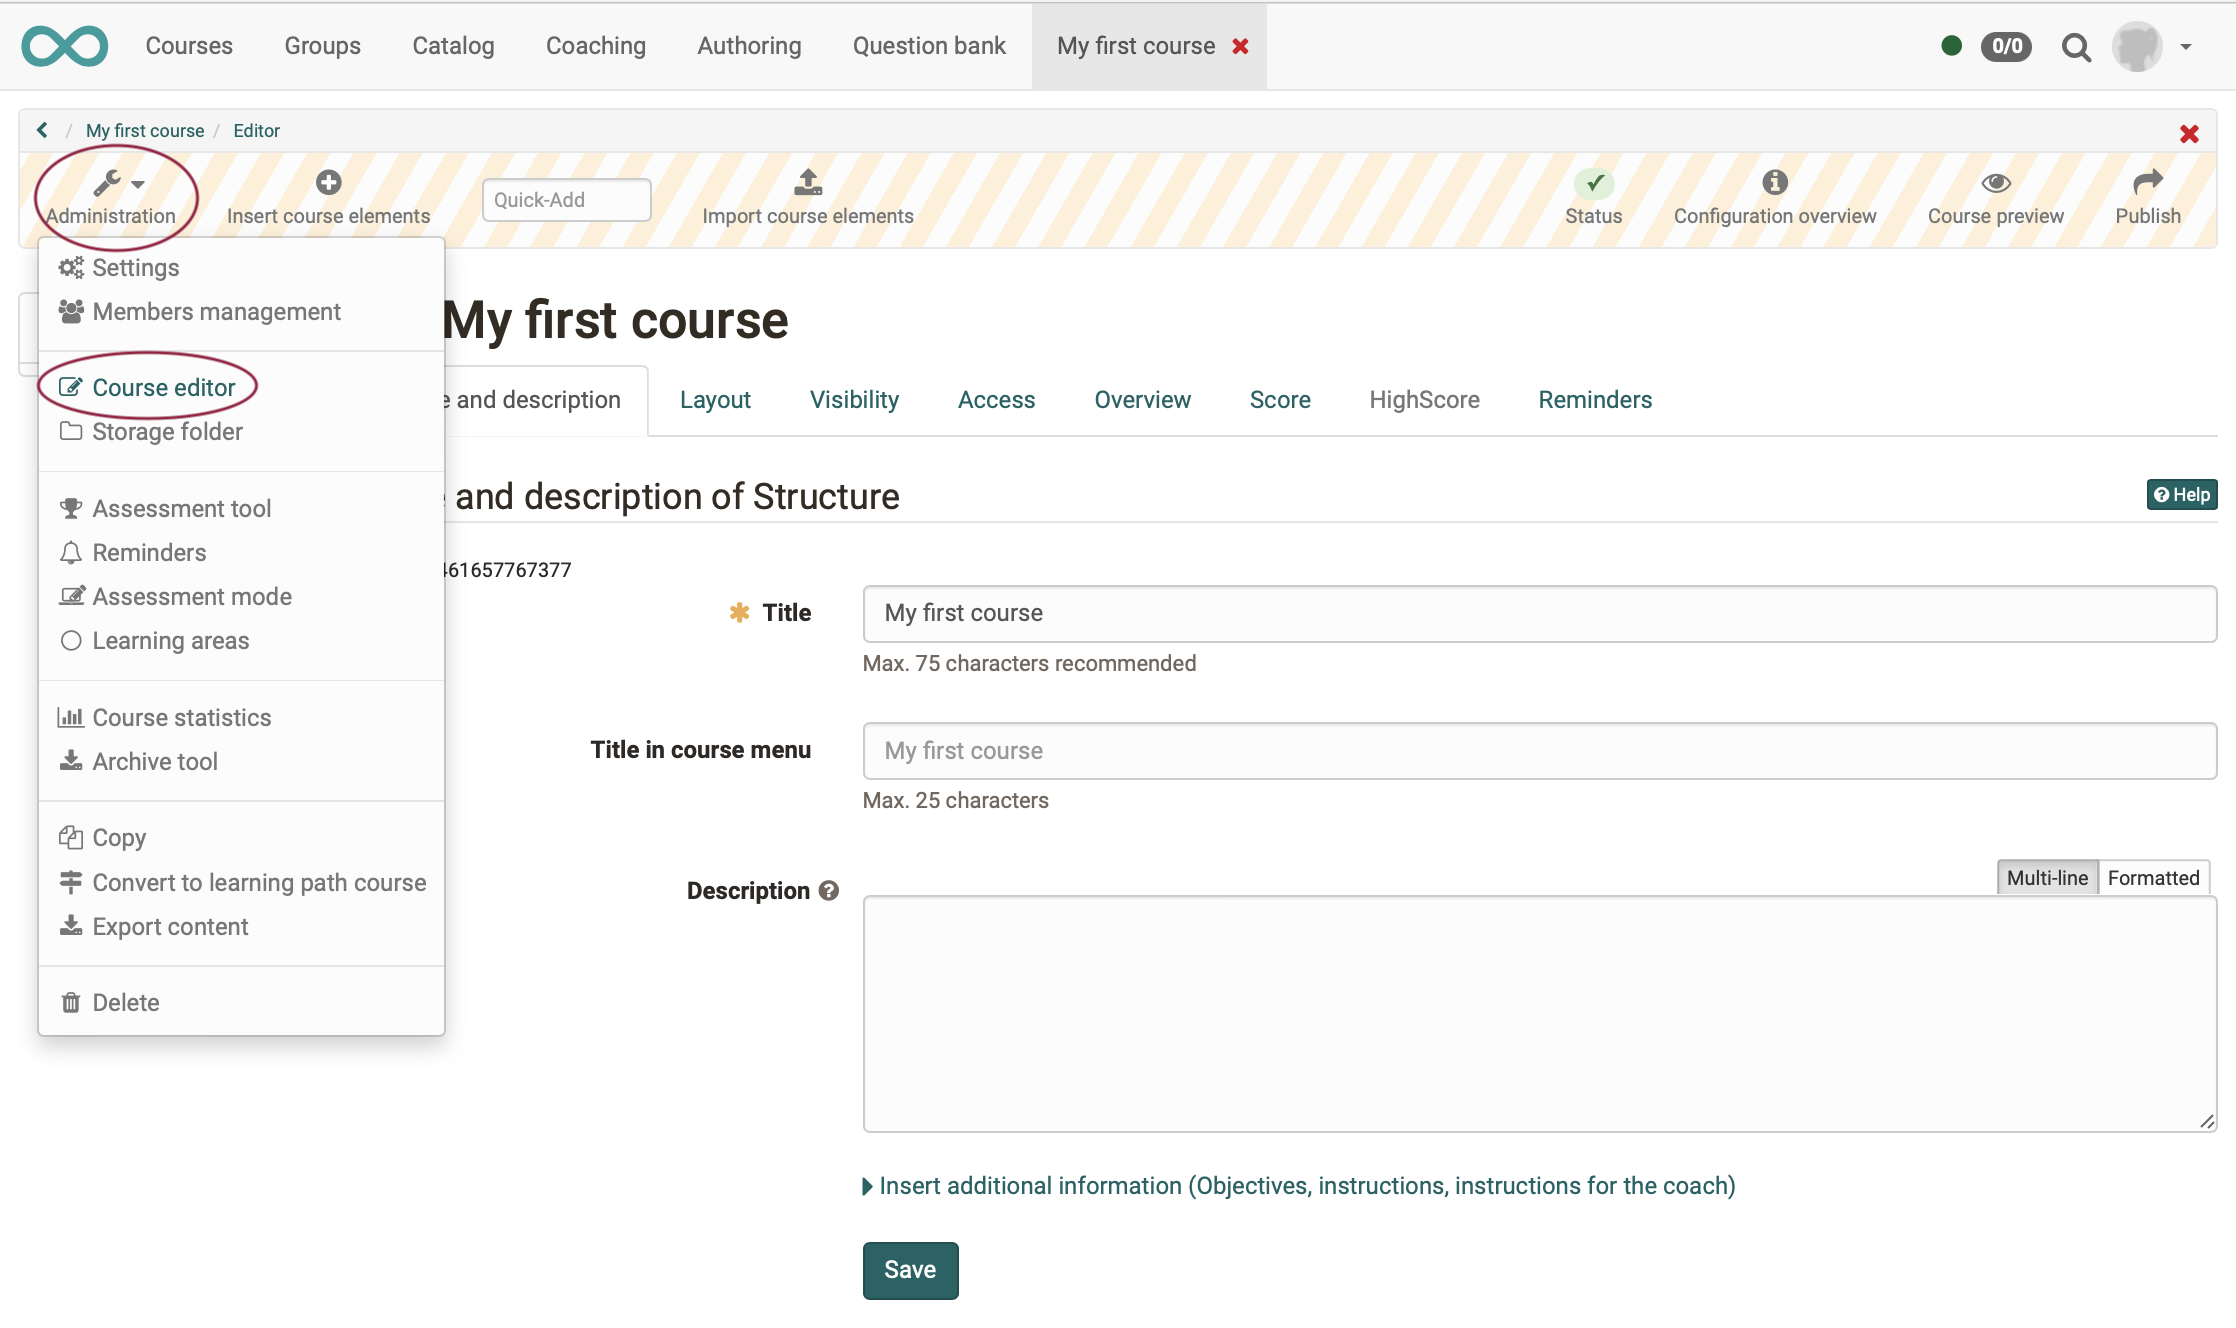
Later on you can recall and edit these course settings at any time under Administration > Settings.
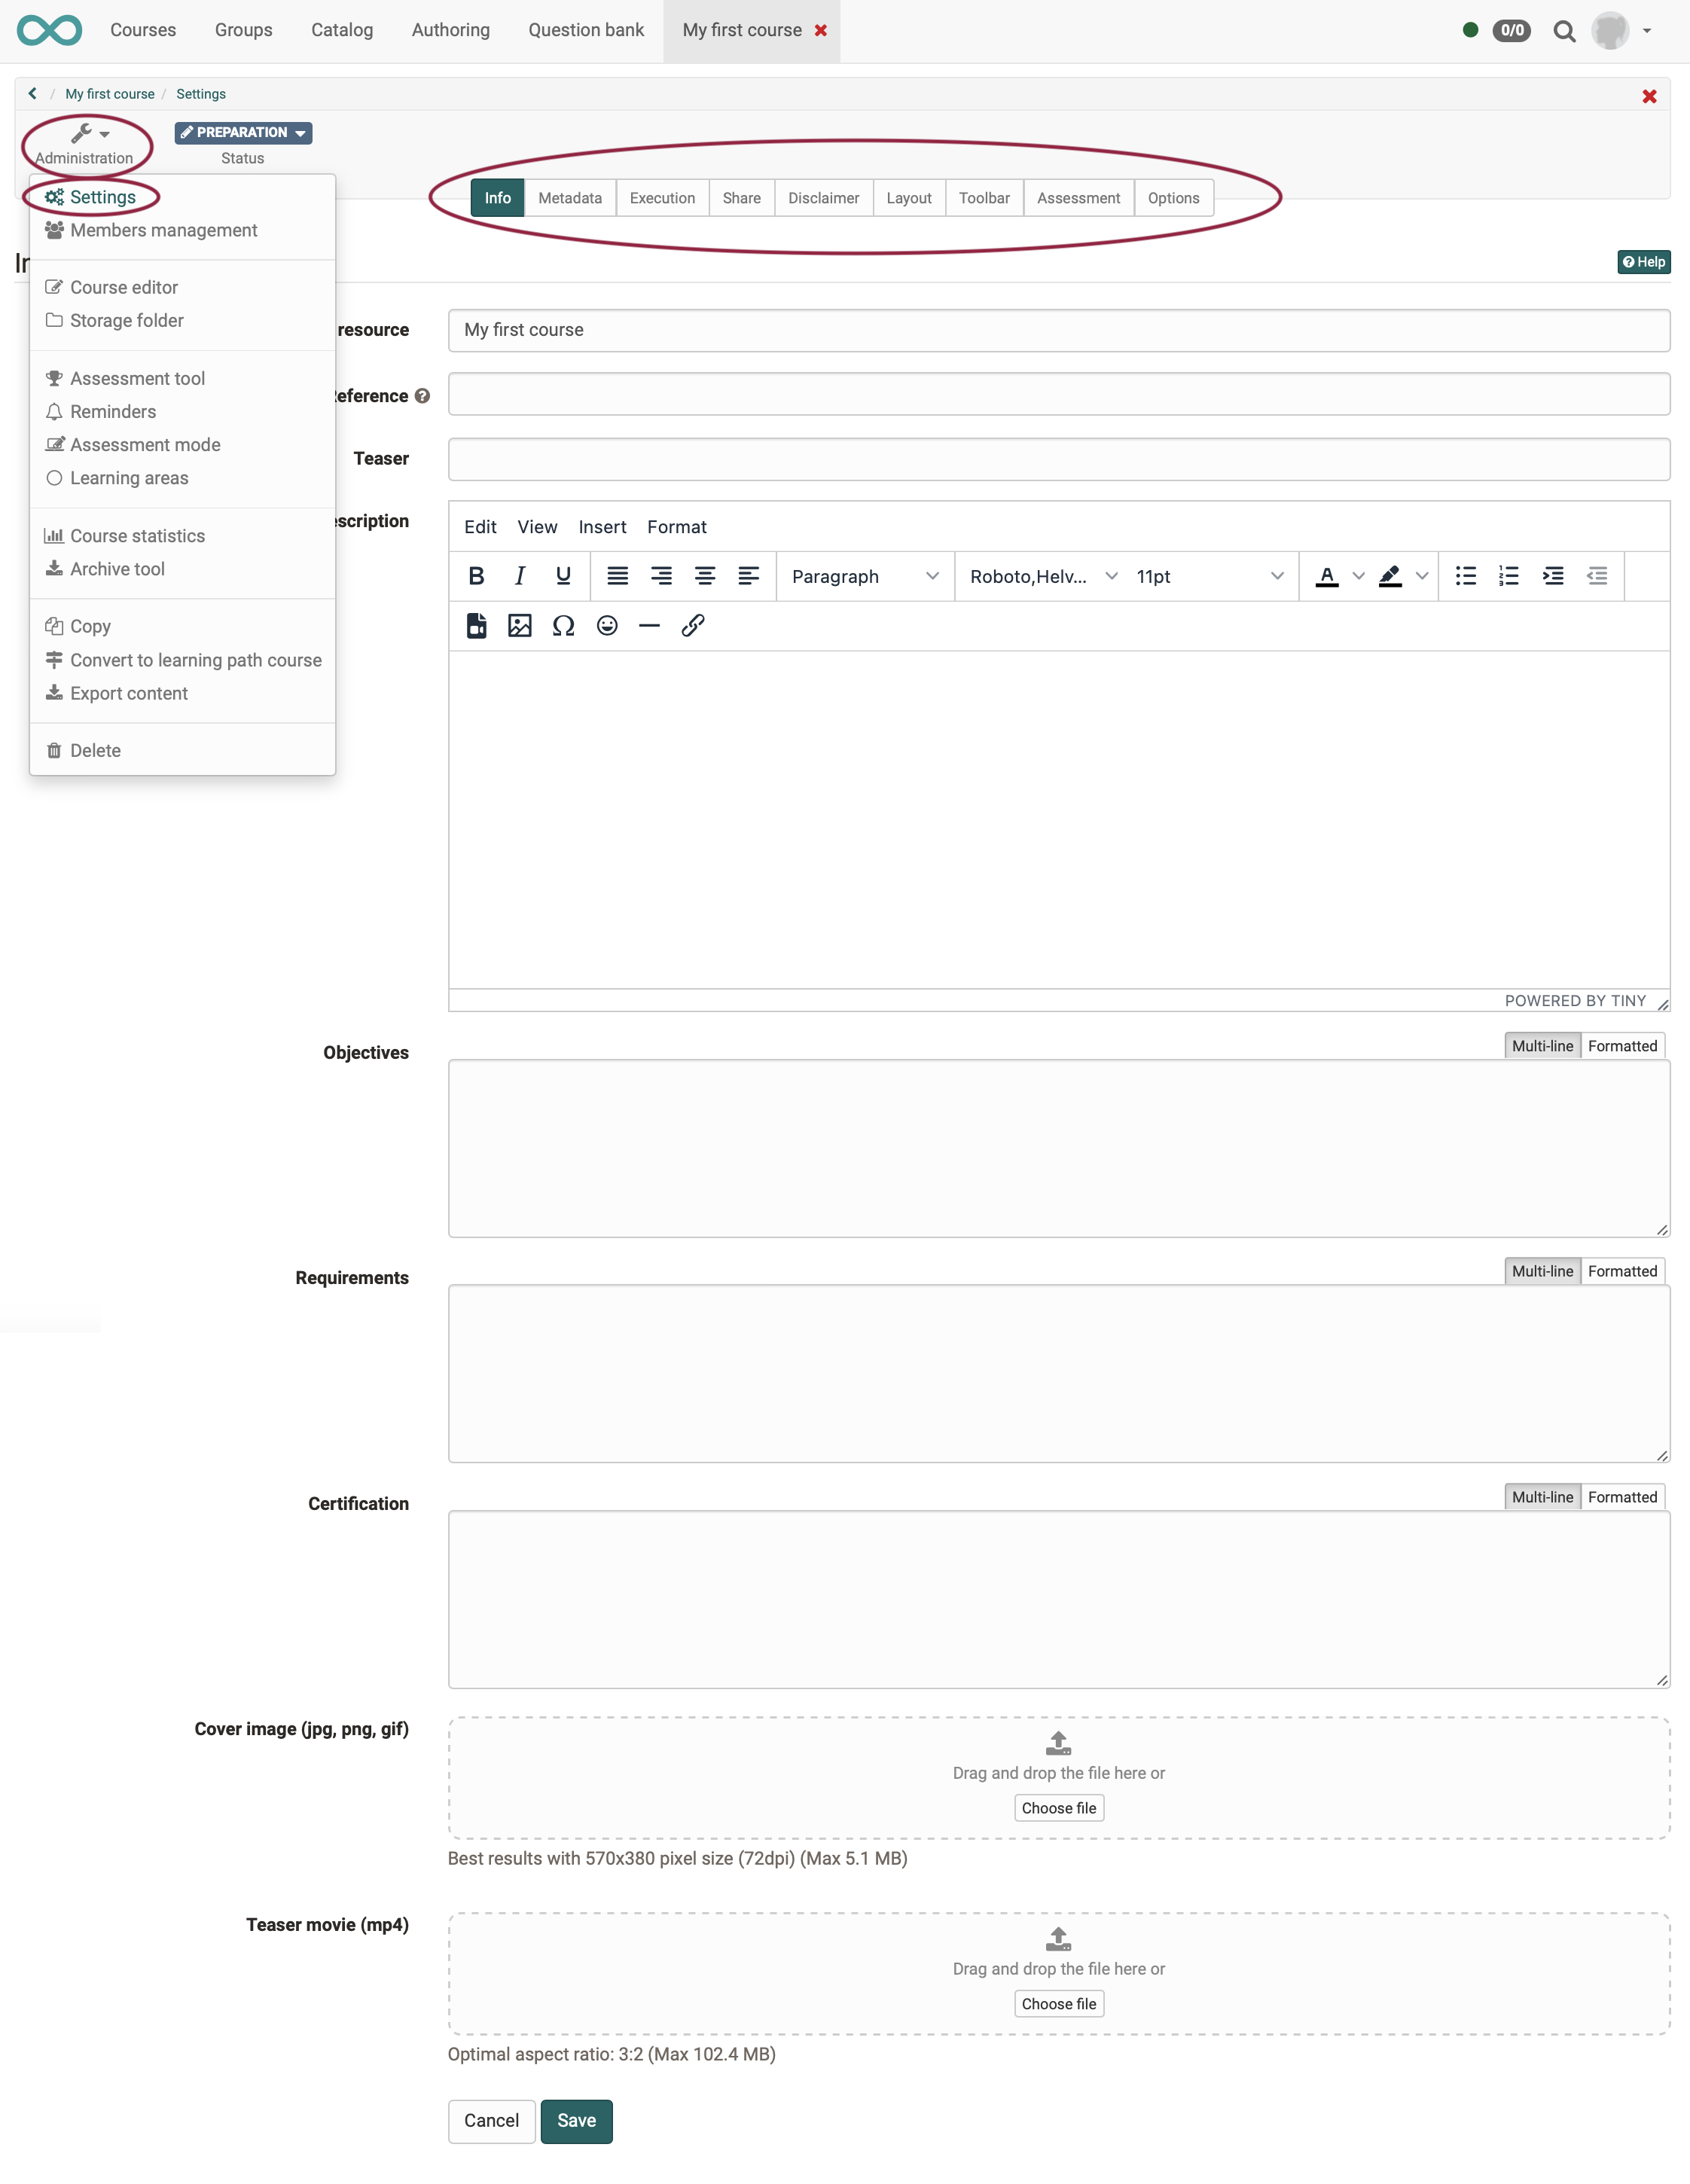
The settings made here apply to the course as a whole. If you have then inserted course elements in the next step, you can also make settings there. There, the settings apply only to the currently selected course element.
Hint
Don't forget to save!
5. Add course elements
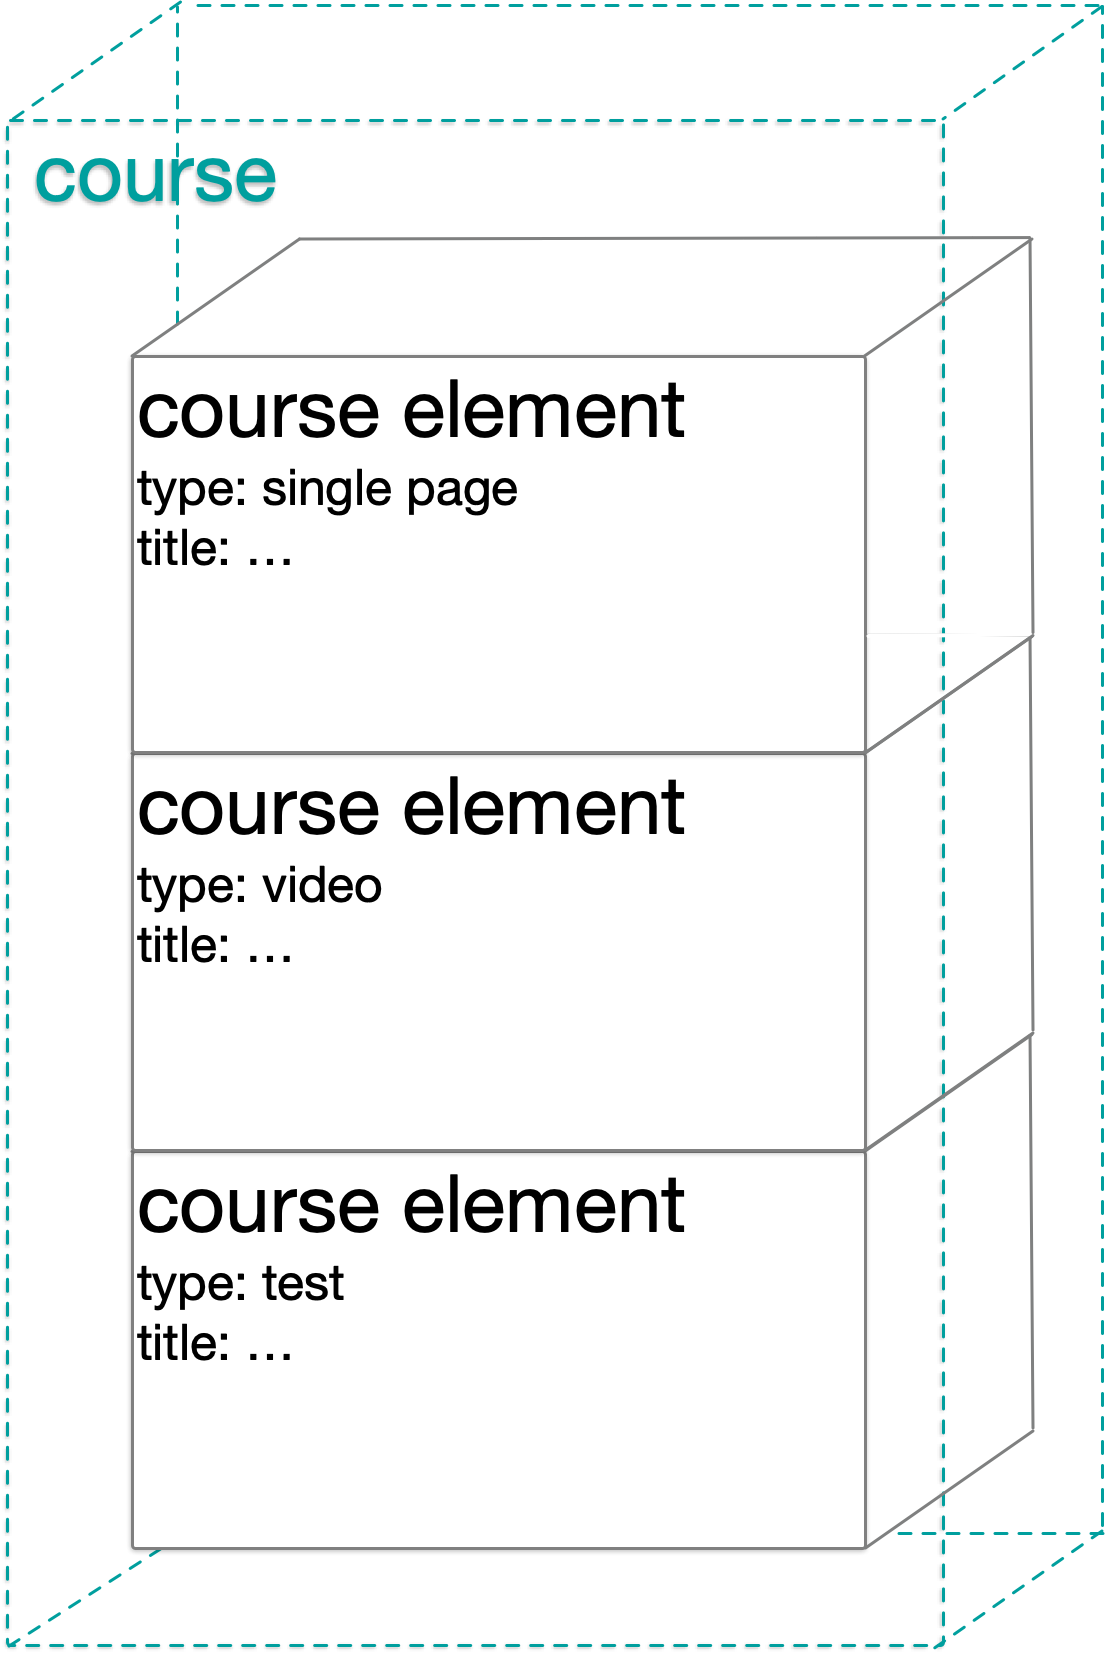
An OpenOlat course consists of course elements. The order of the selected course elements is reflected in the course menu.
To edit and add new course elements, open the course editor. You can recognize that you are in the editor by the shaded header.
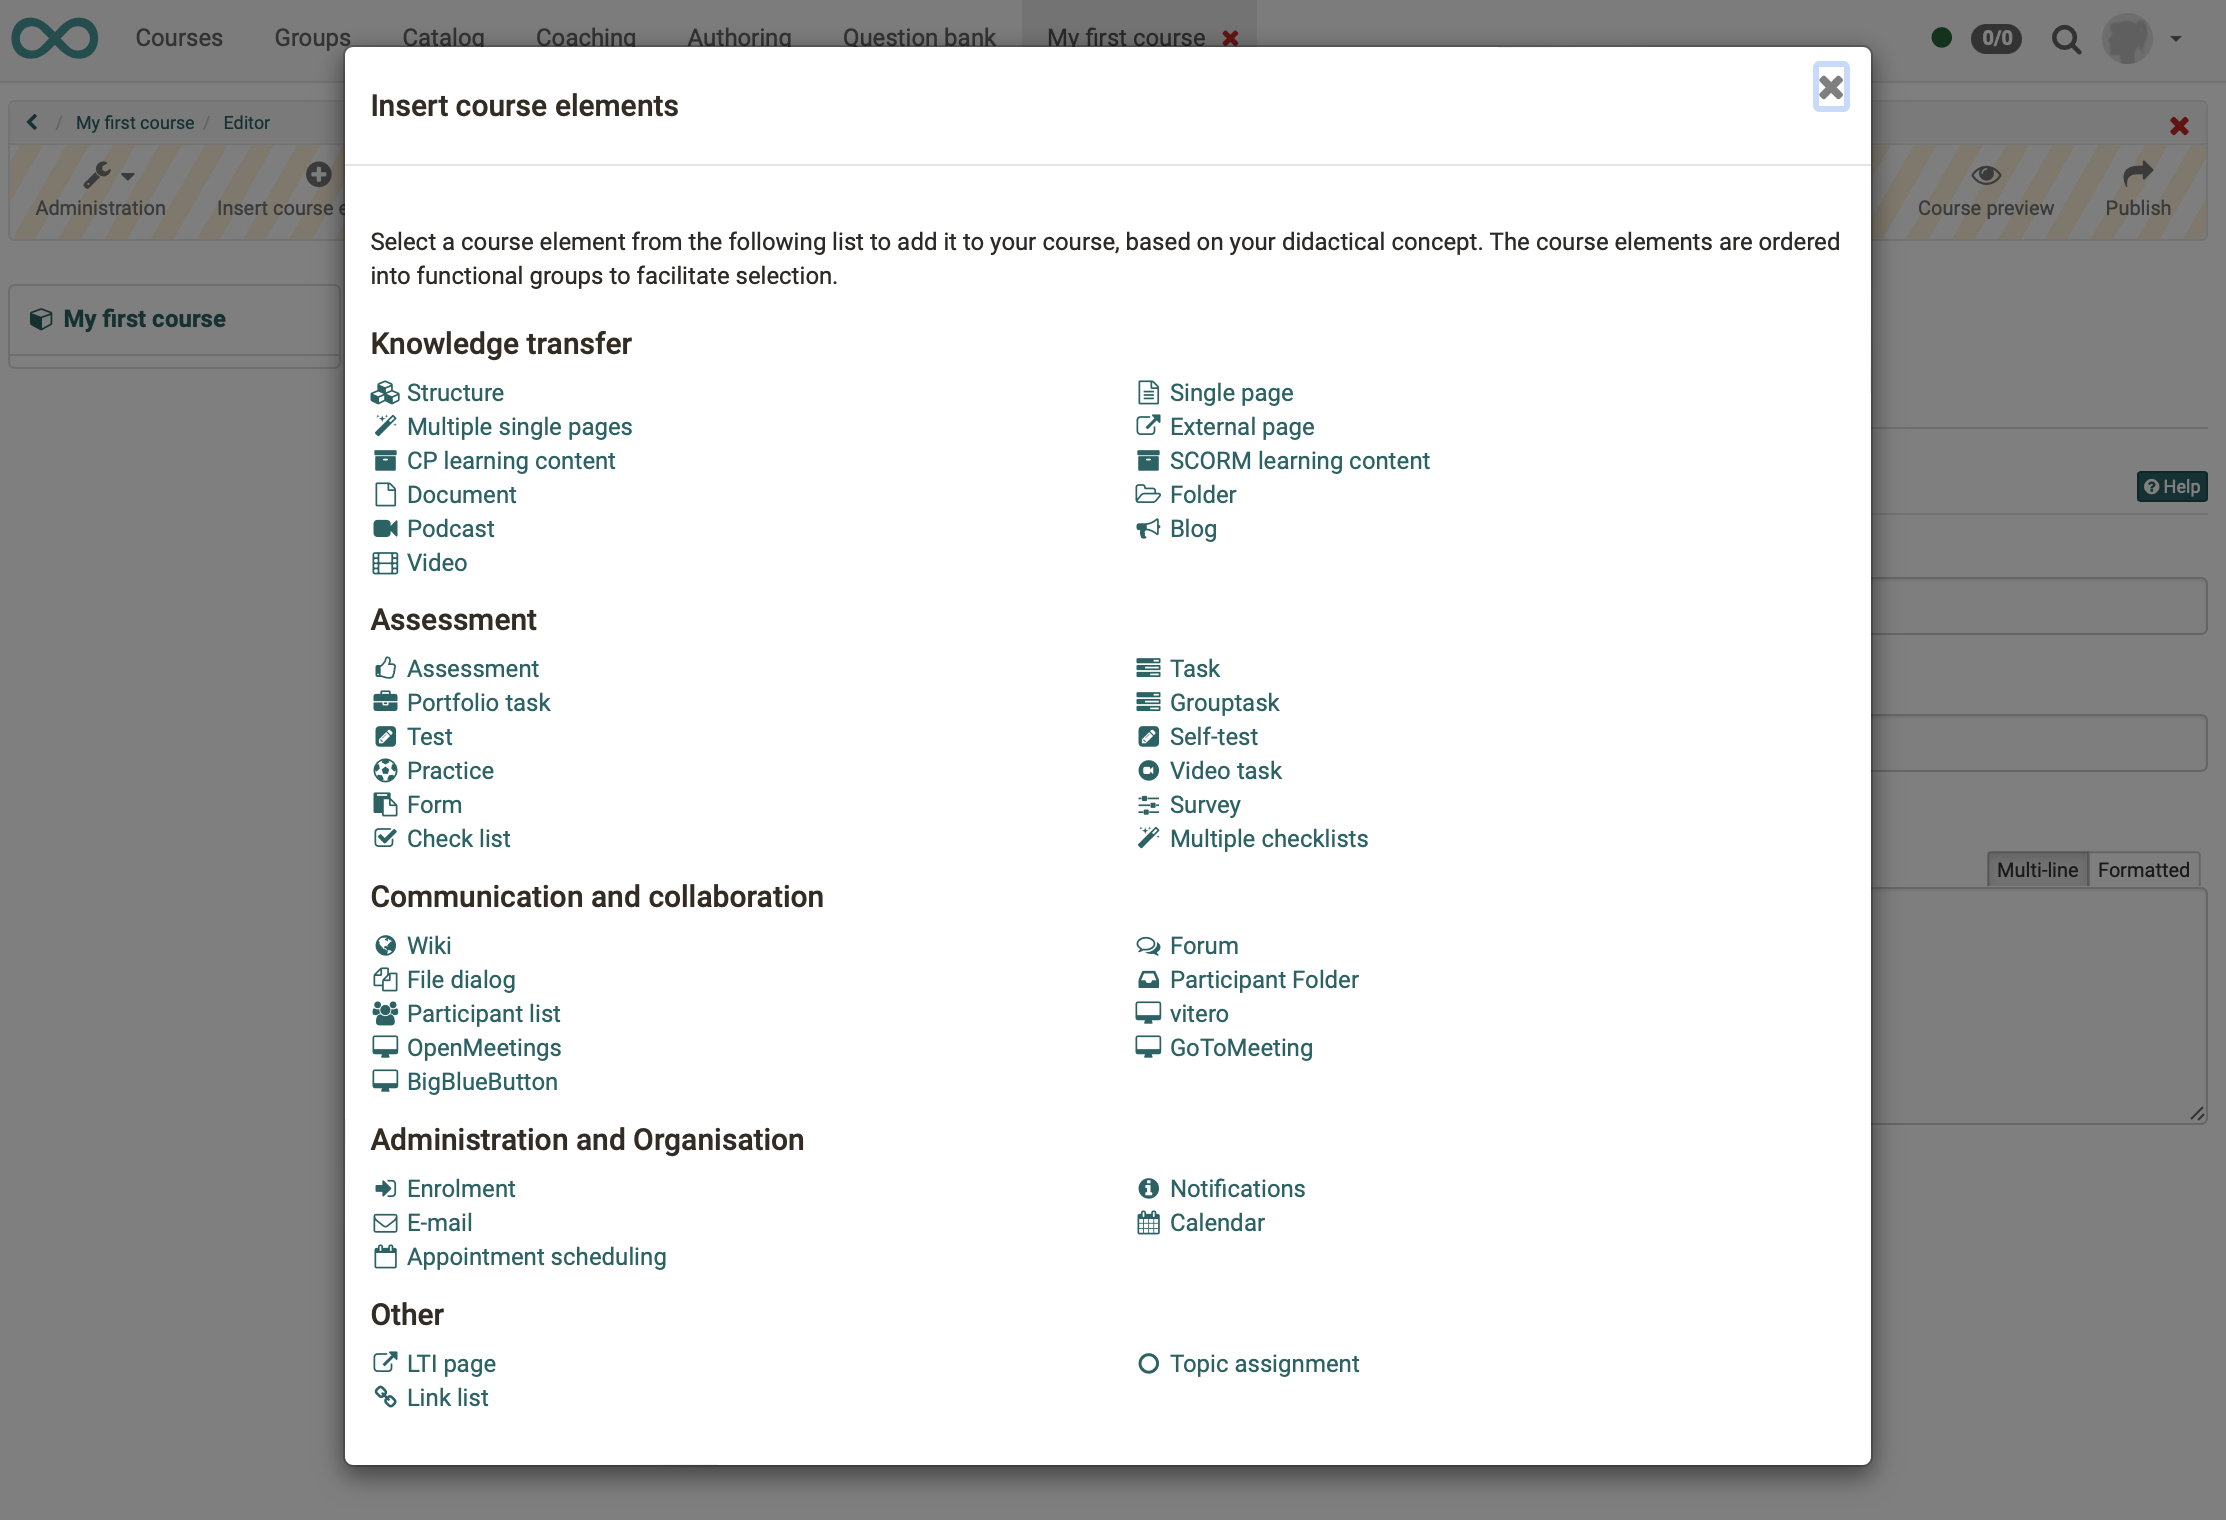
By clicking on the icon "Insert course elements" you open a selection of available course elements.

Clicking on one of the listed elements will insert a course element of this type in the course.
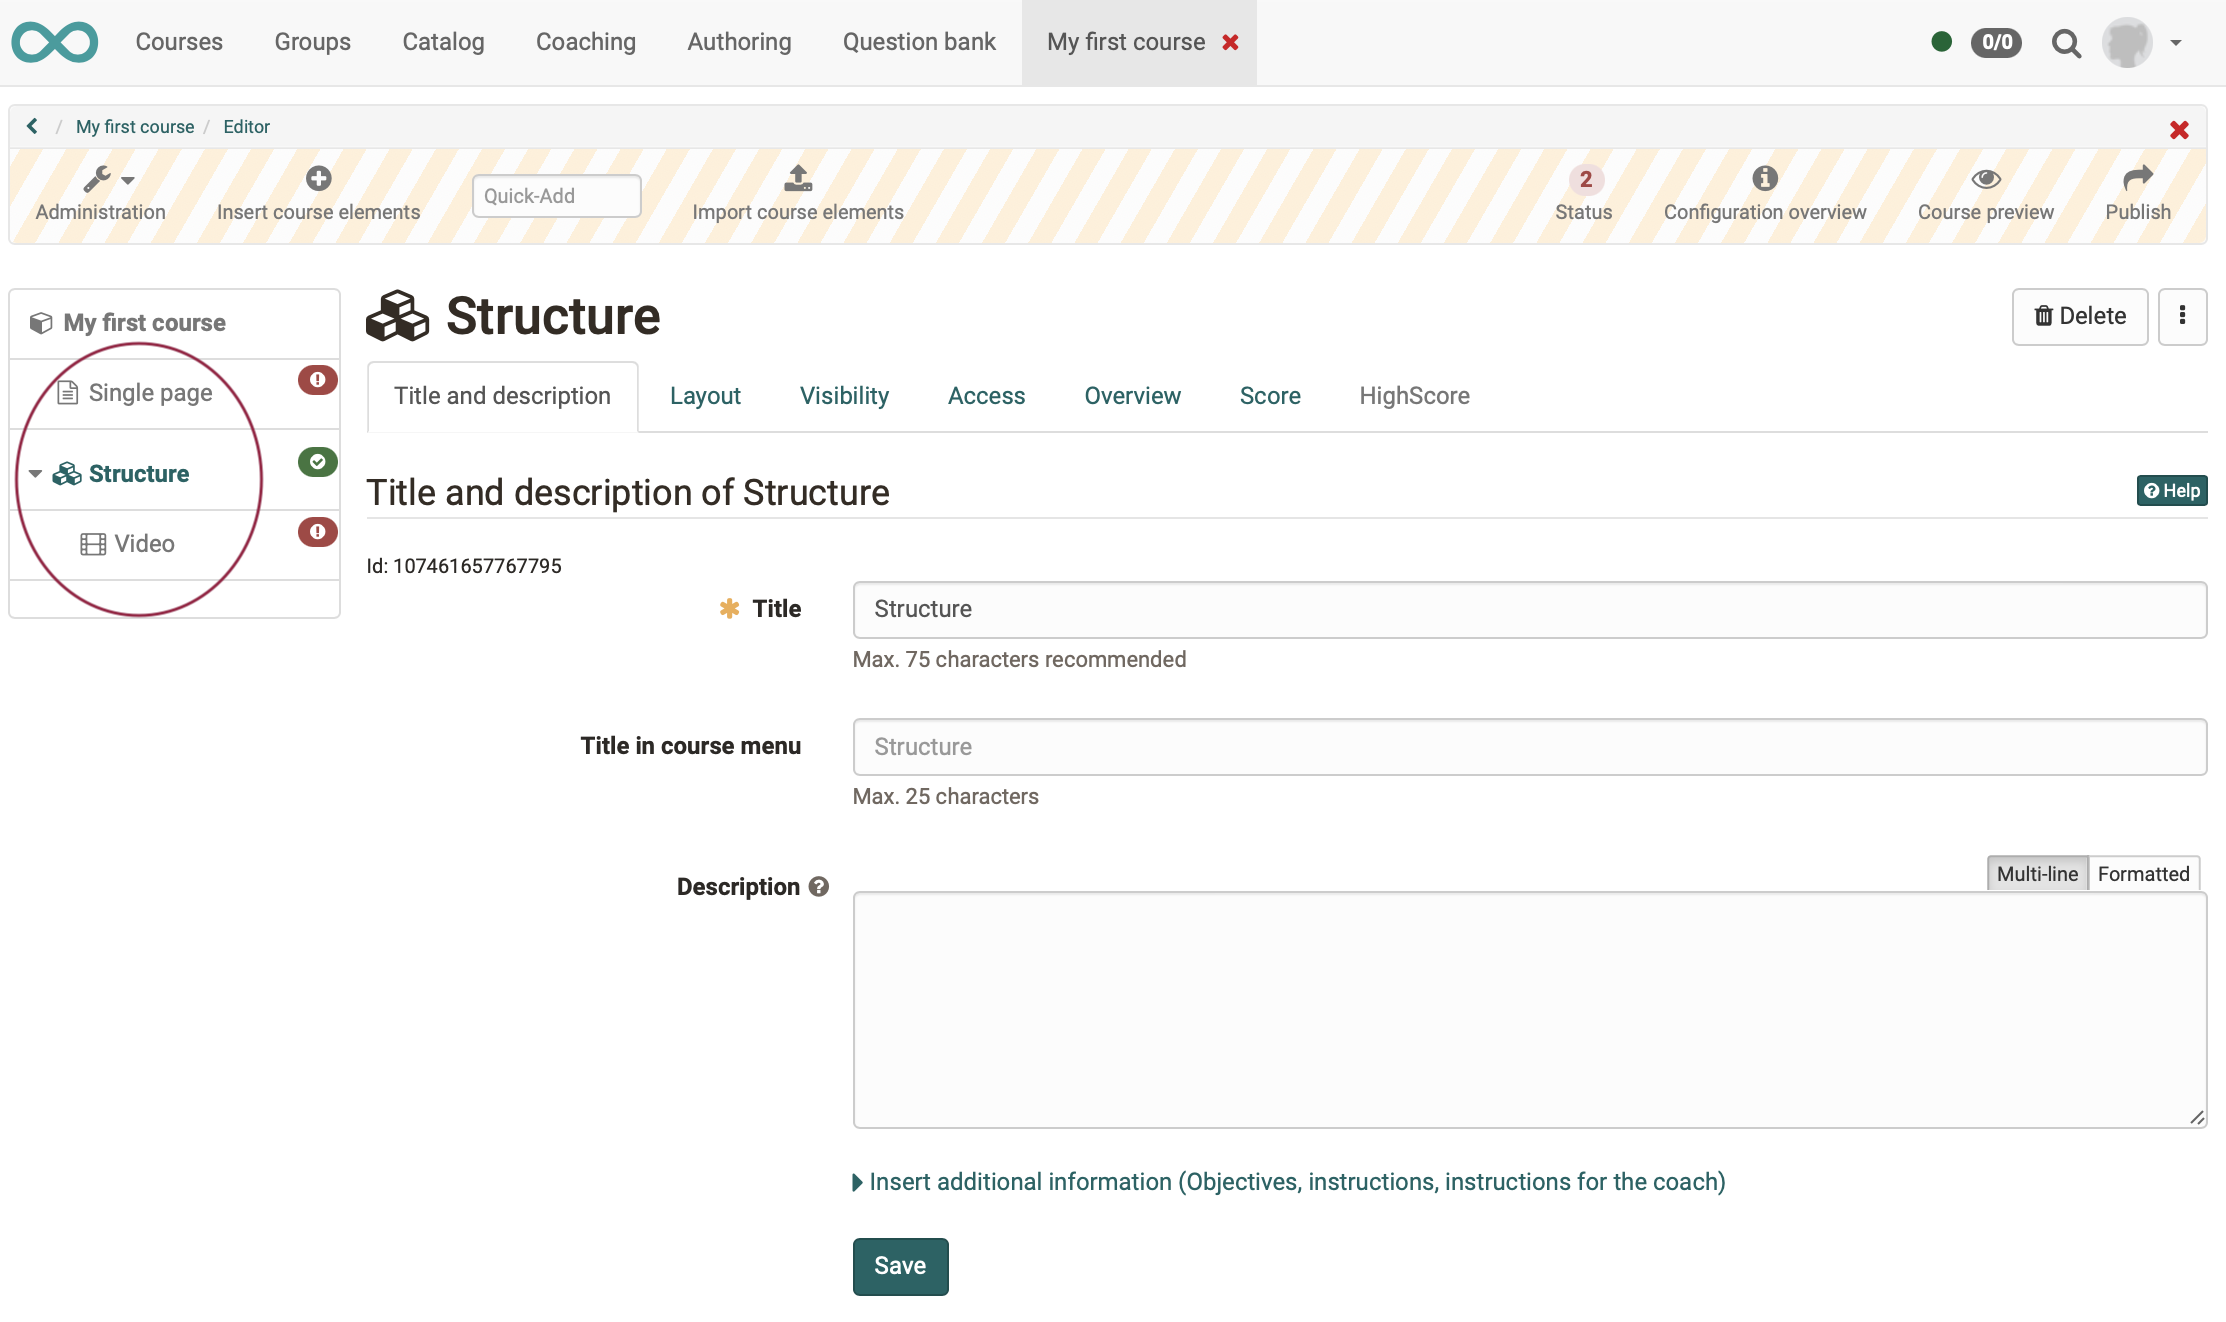
After insertion, the course elements can be moved in the course menu with the mouse button pressed. If you drag a course element onto a structure element, it will be placed there as a subordinate element. (Structure elements can be collapsed so that their content is hidden and the menu becomes clearer).
6. Configure course elements and add learning resource
Hint
To configure a course element, you remain in the course editor. (In contrast to configuring the course as a whole, see point 4).
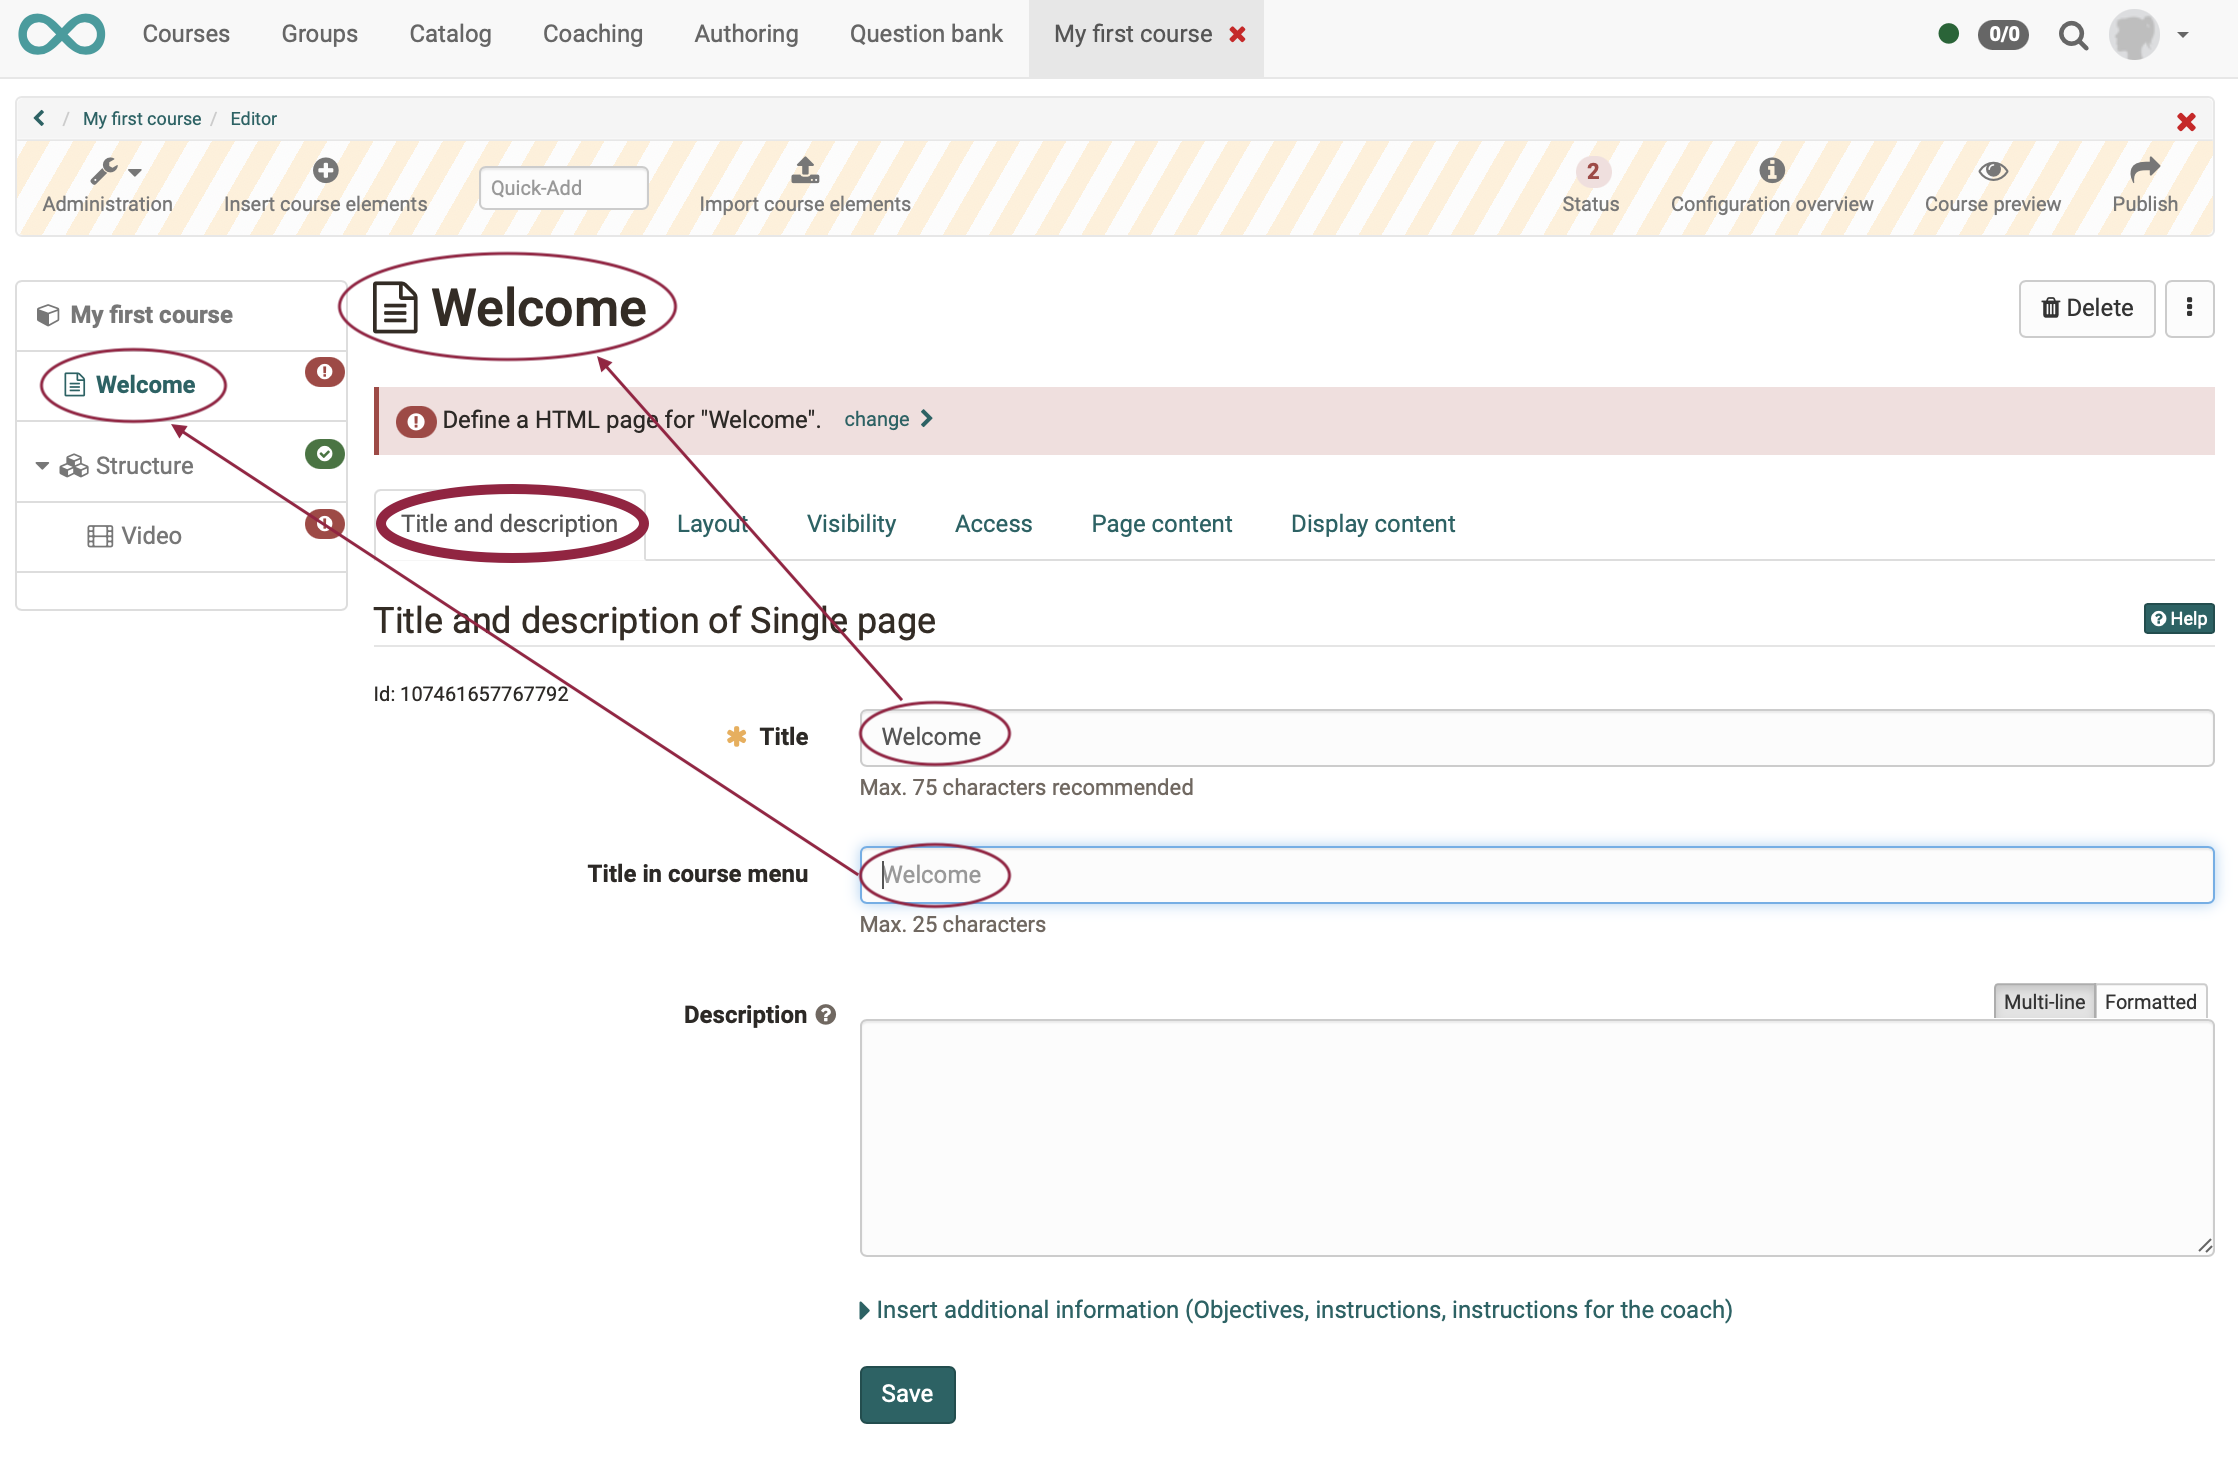
To edit a course element, select the course element on the left in the course menu. Then the options for configuring this course element are displayed in several tabs on the right.
Many course elements require a learning resource. Think of the course elements as containers into which a learning resource must be inserted.
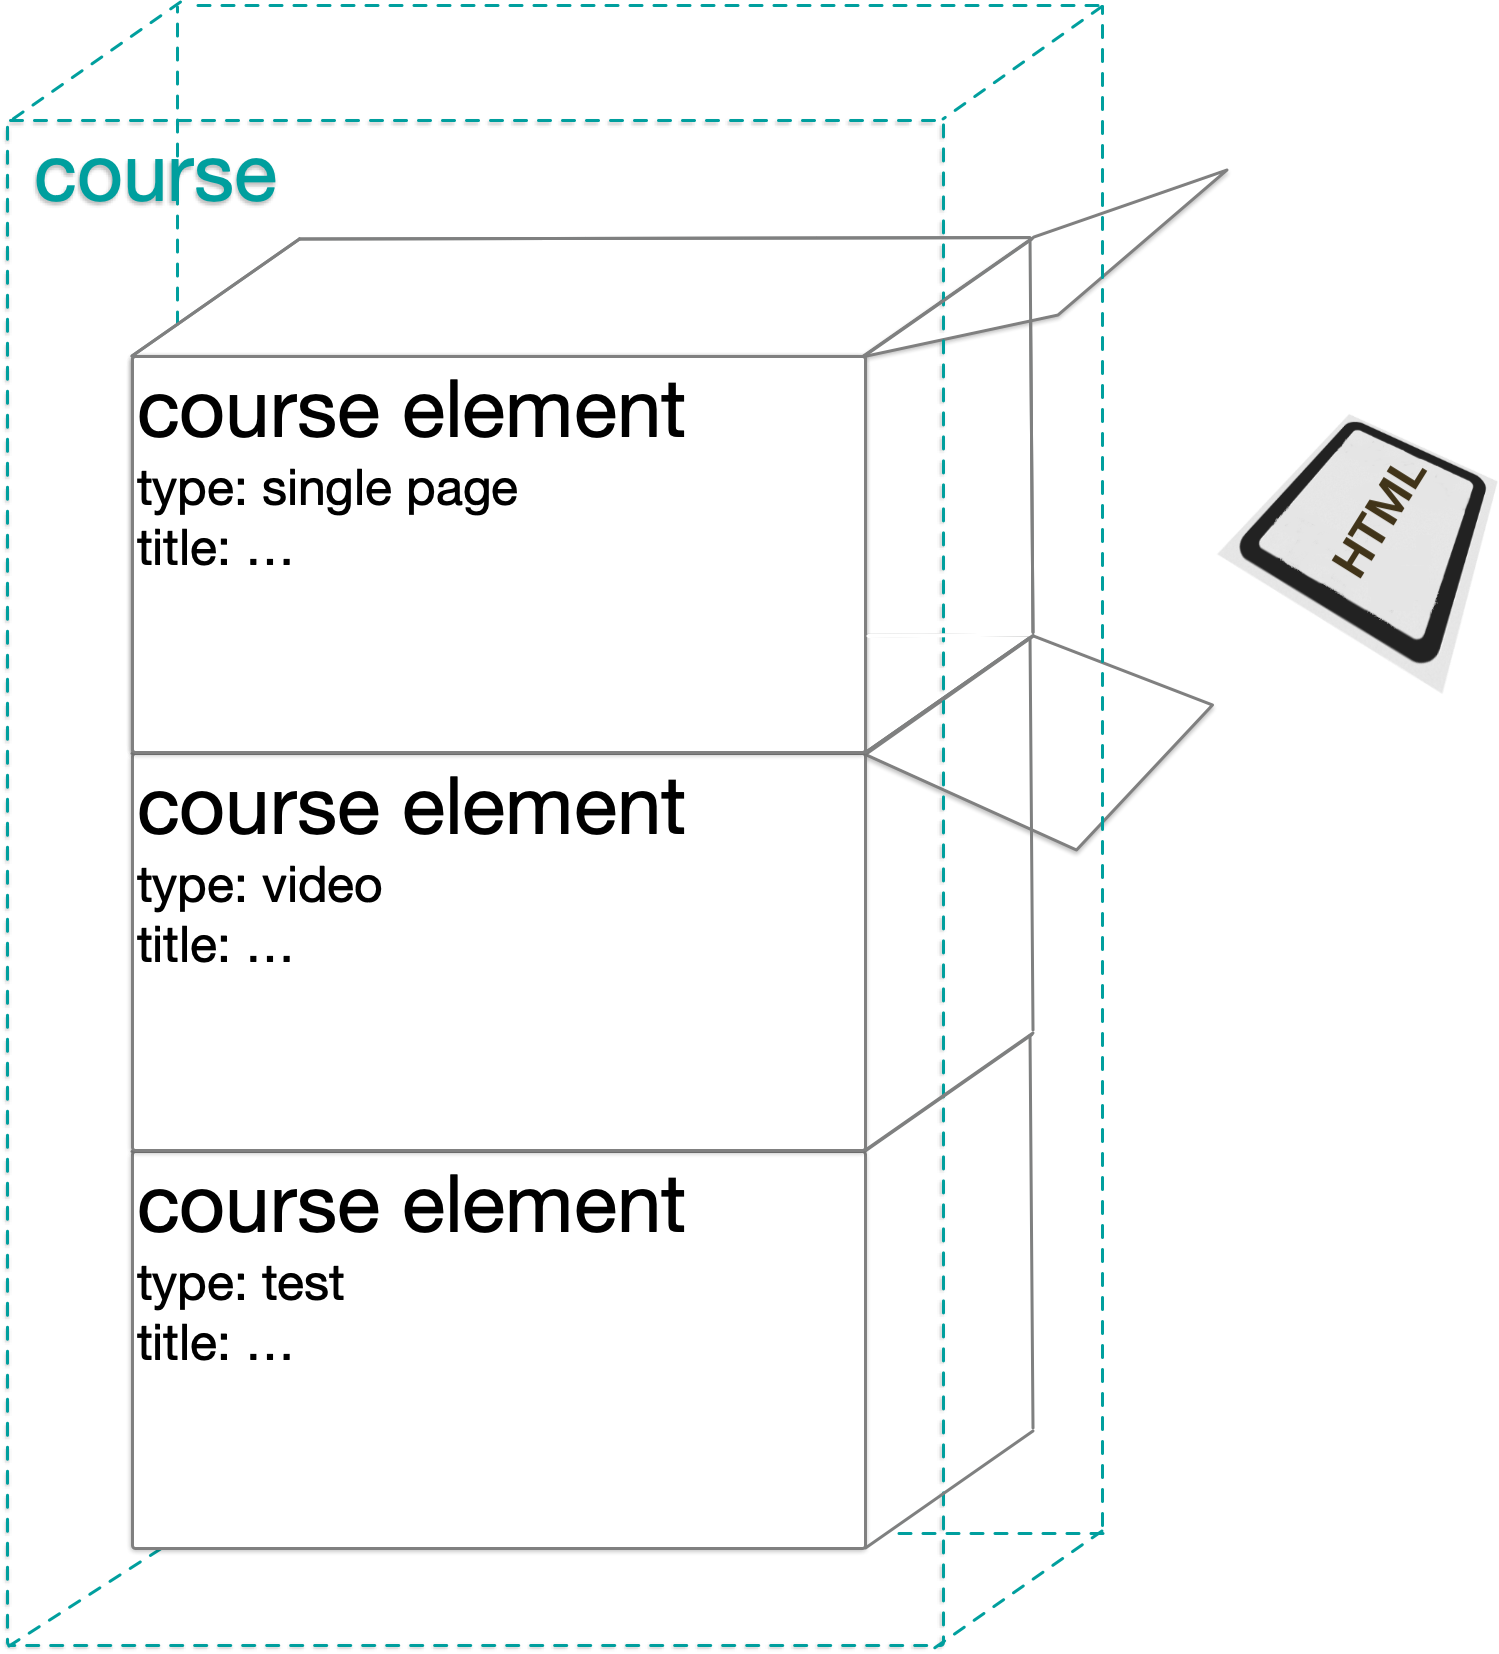
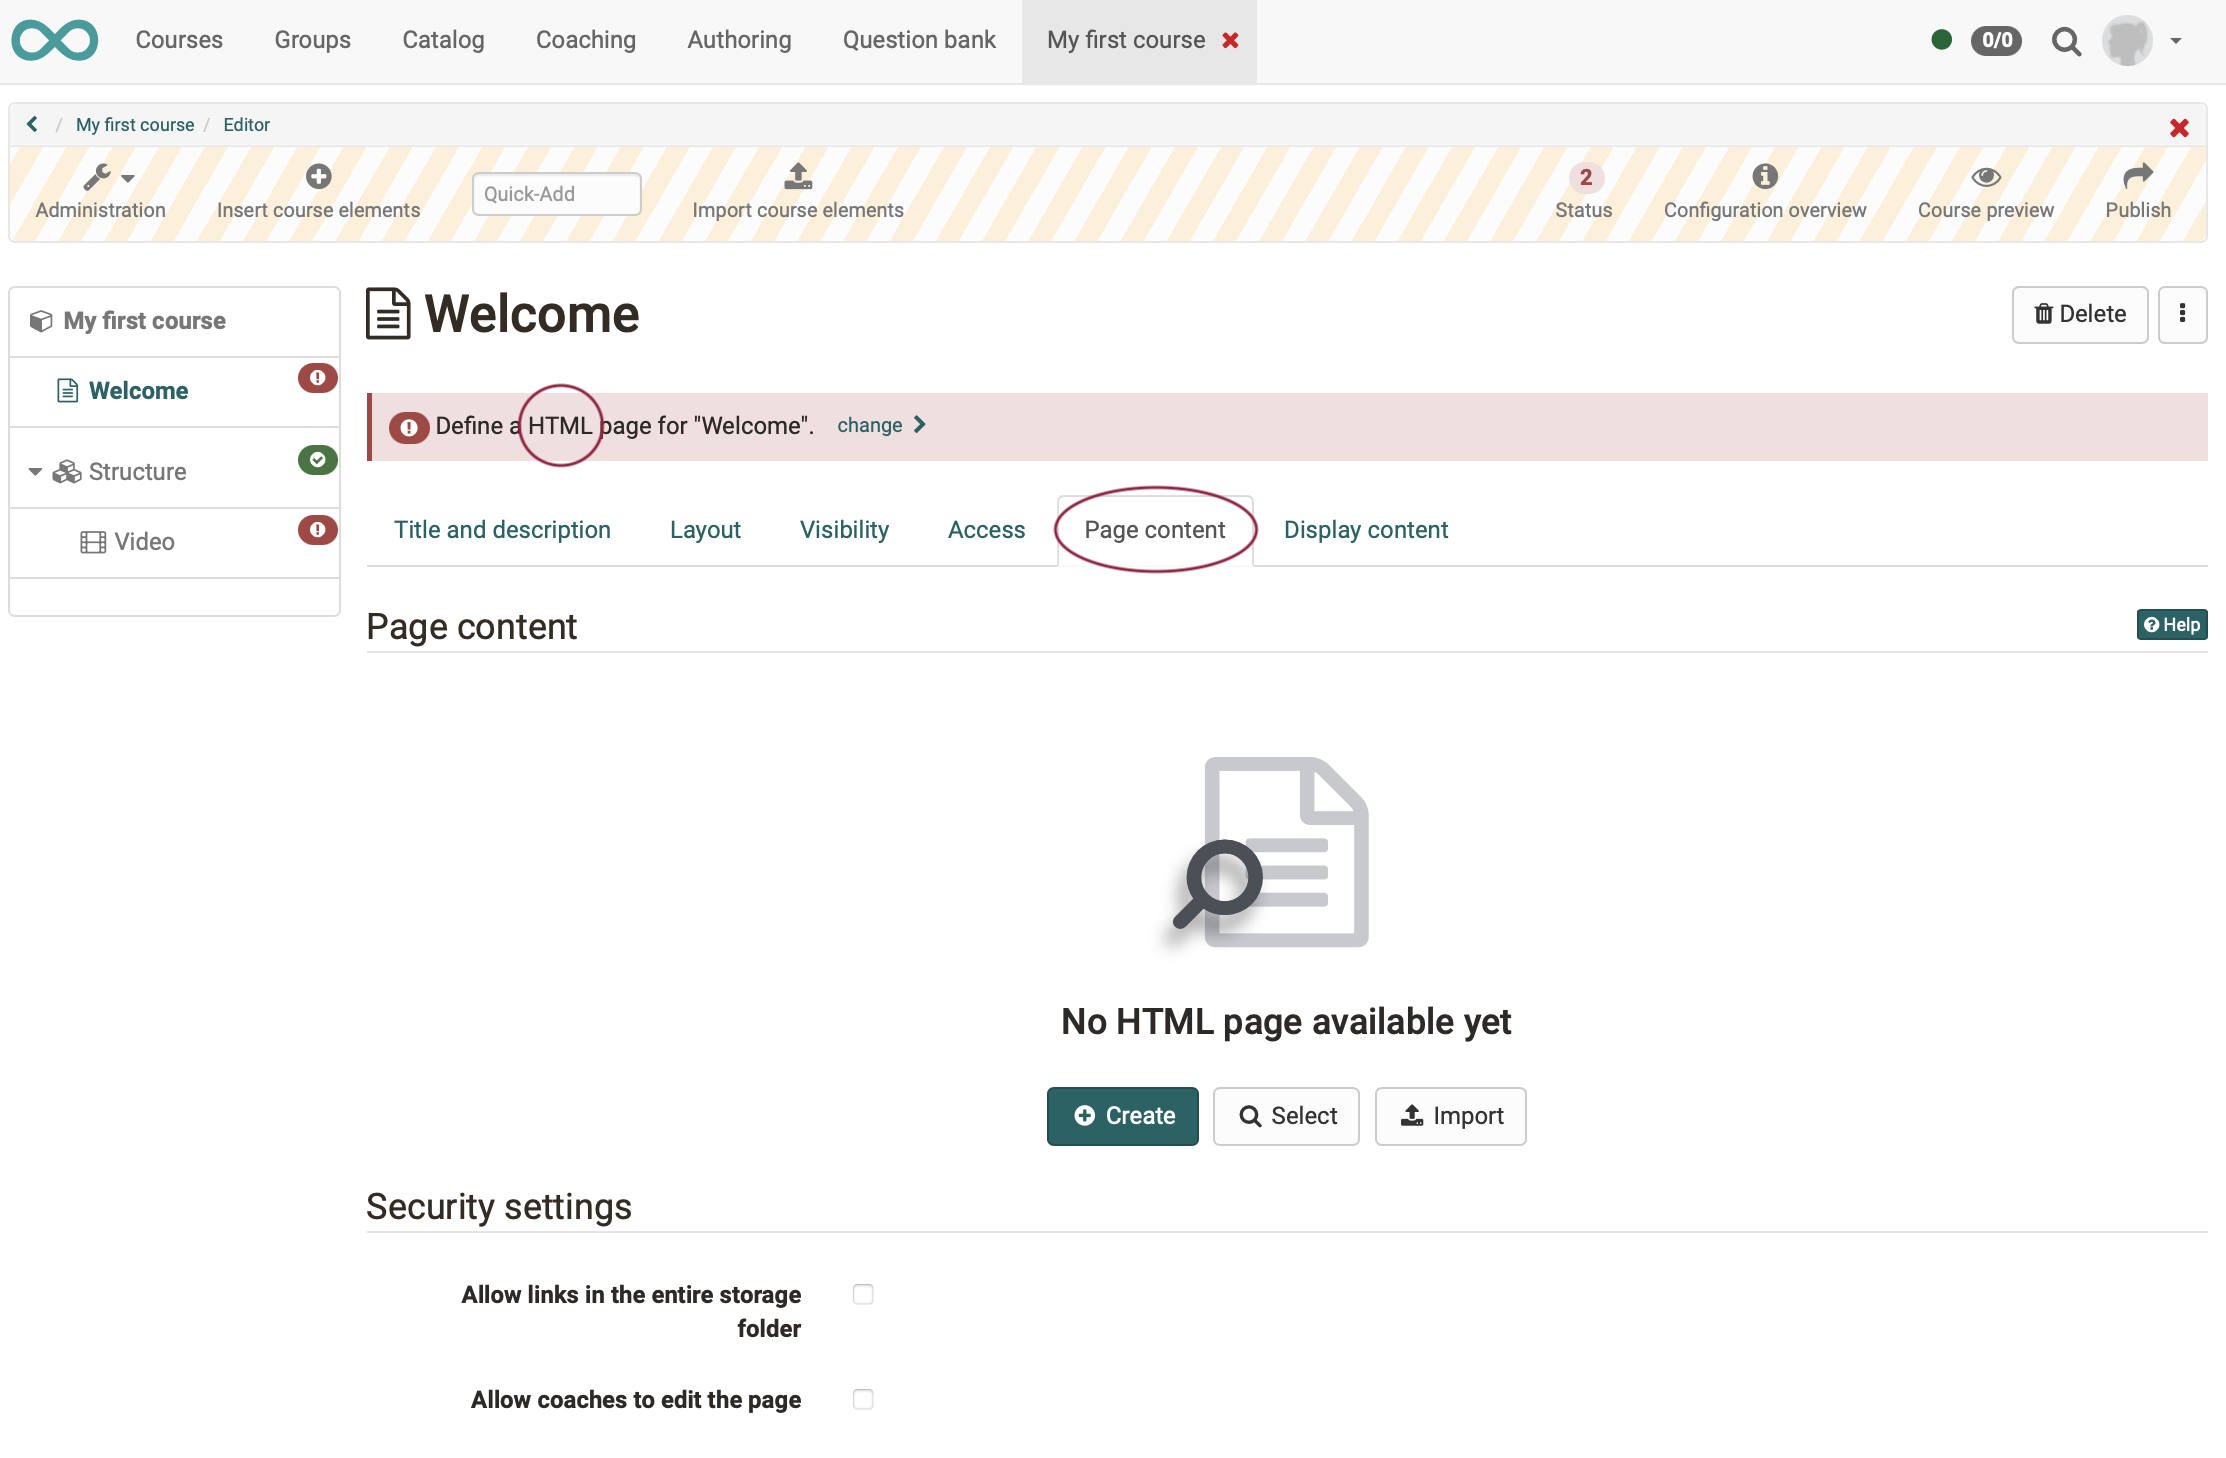
Example 1
The course element of the type "Single page" requires an HTML file as learning resource. In the tab "Page content" you can create a new HTML file, include an already existing one in OpenOlat or import an HTML file created elsewhere into OpenOlat.
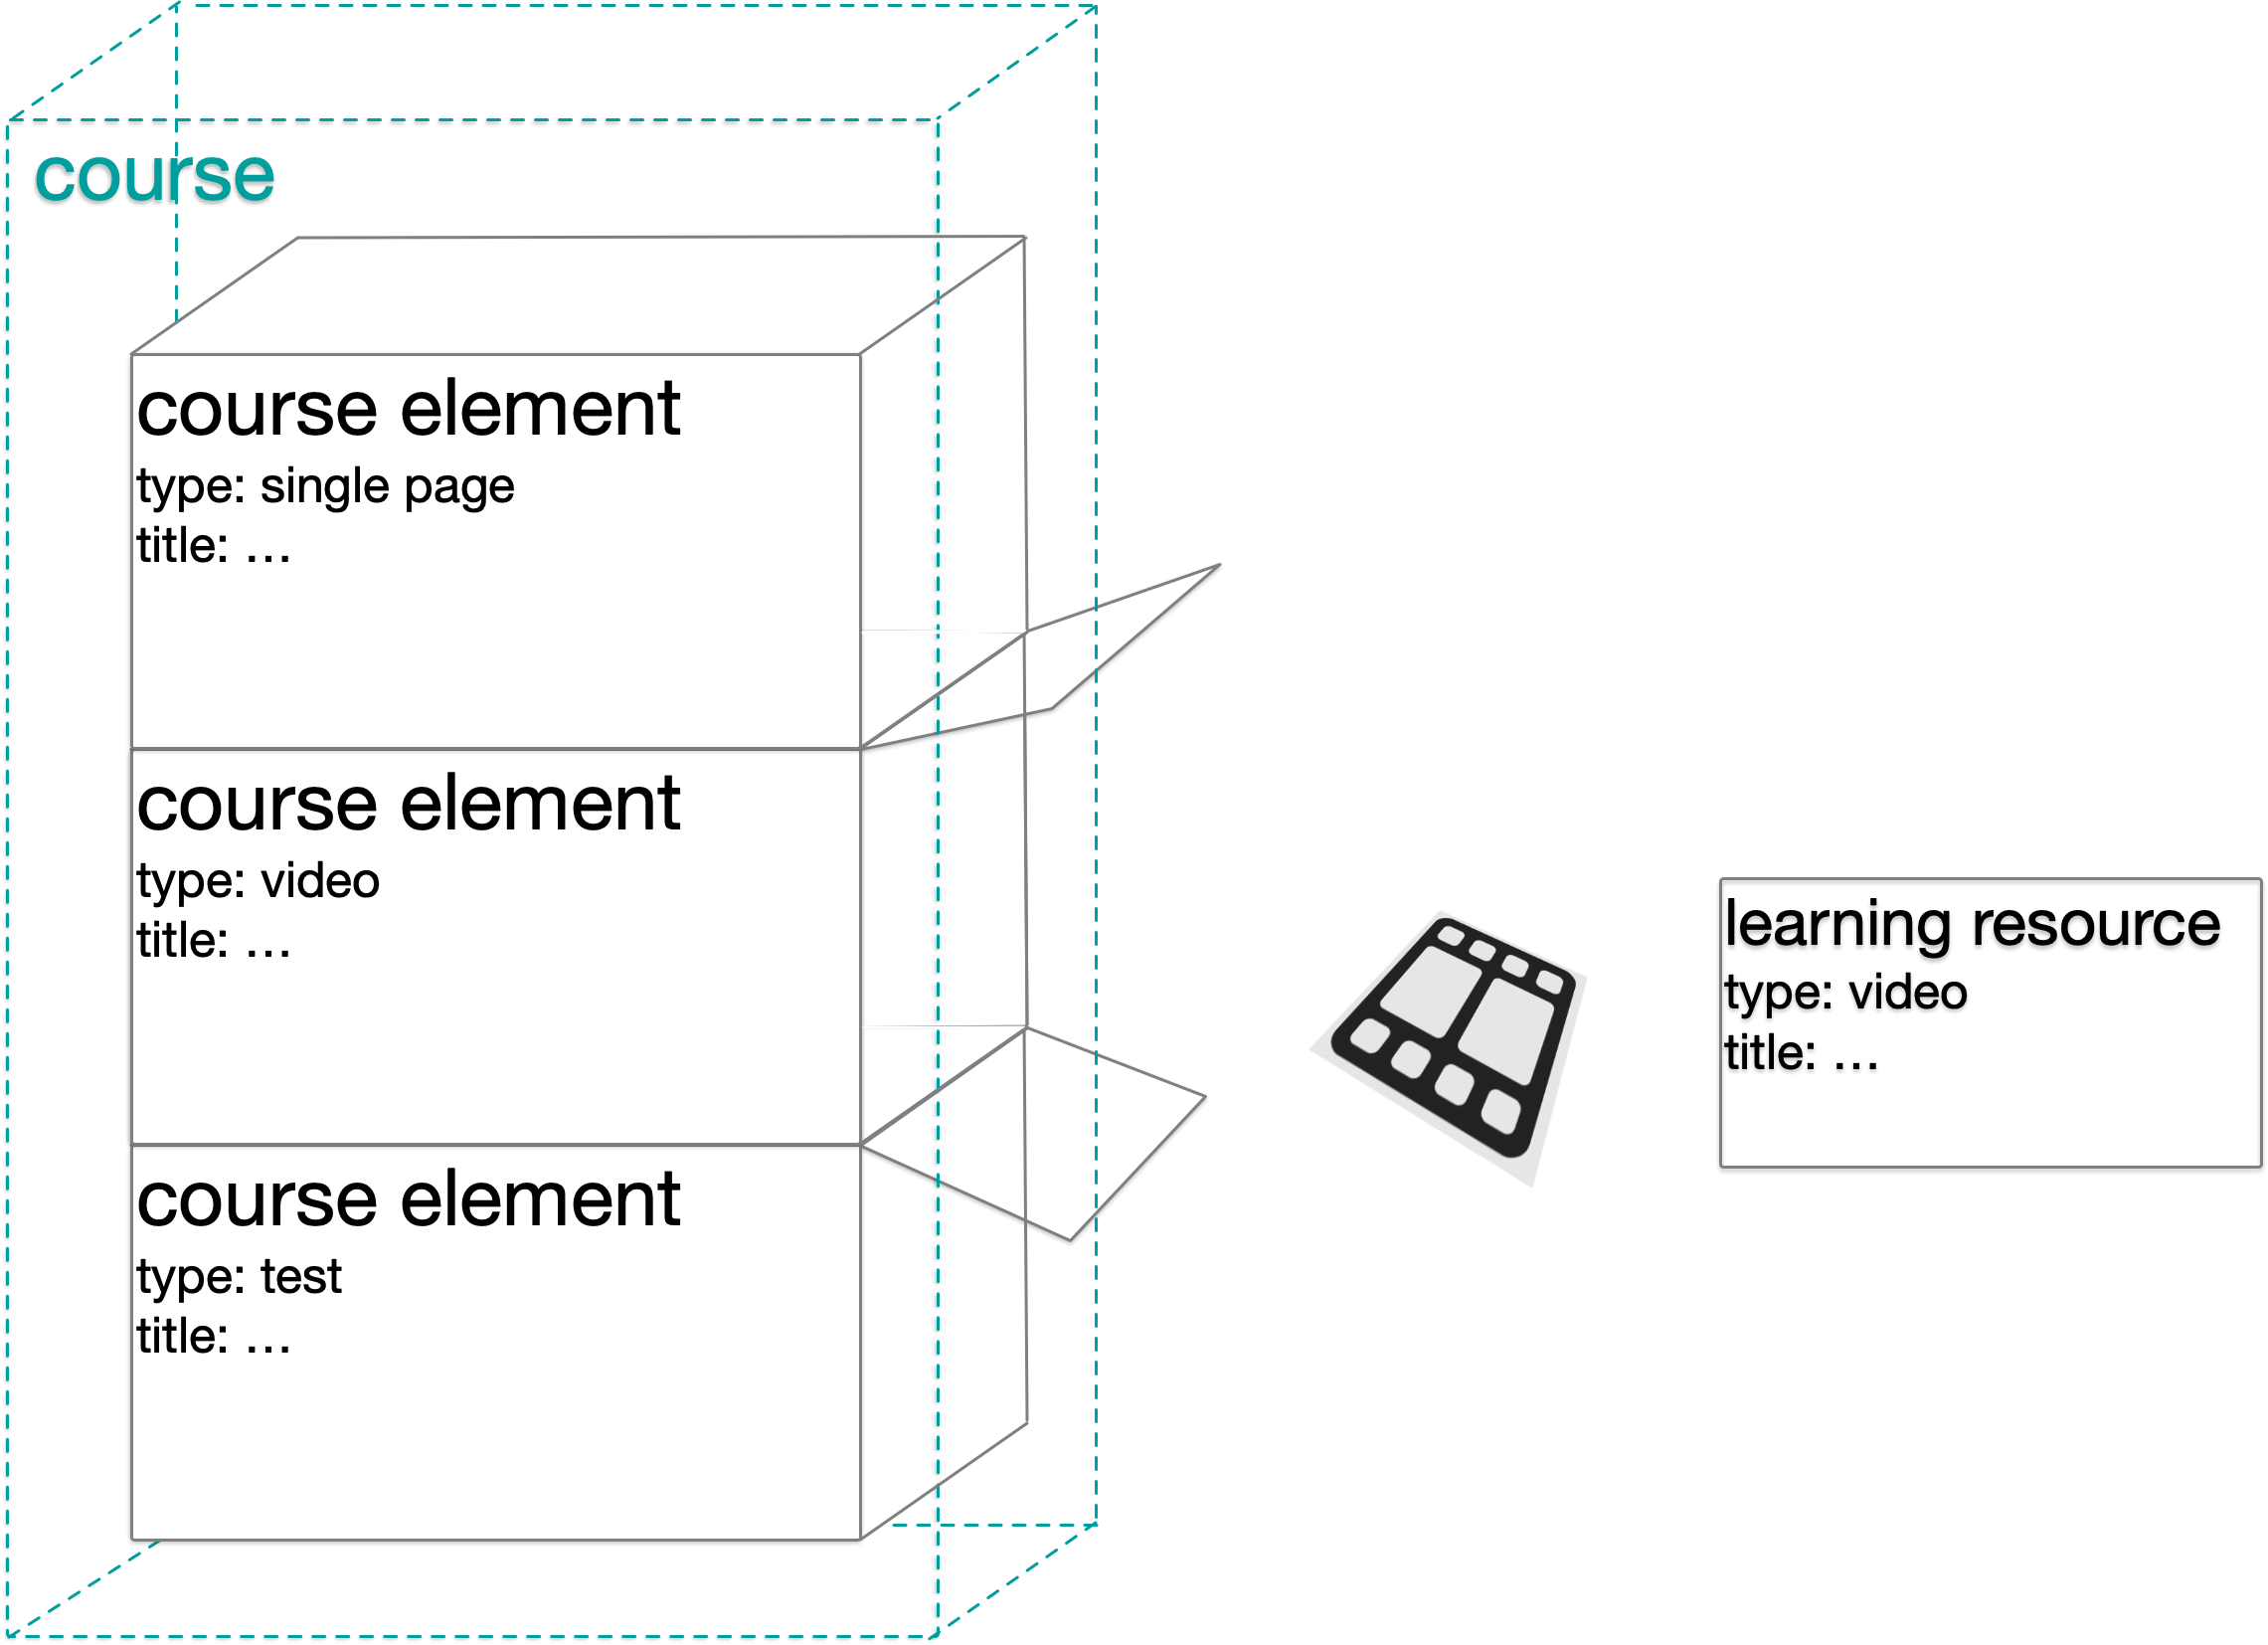
Example 2
The course element of the type "Video" requires an mp4 file as learning resource.
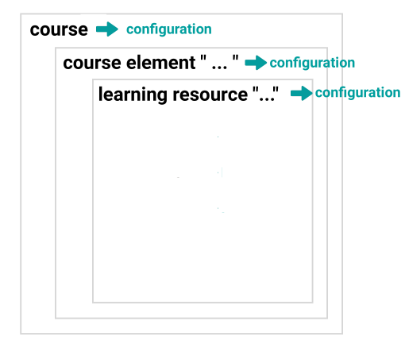
For example, if it is desired that the video is considered "viewed" when 95% has actually been viewed, then this configuration is done on the course element. The configuration is added on the container and not on the learning resource.
This concept has the advantage that the mp4 file (learning resource) can be exchanged without the course element disappearing from the course menu and having to be configured completely from scratch.
There are also configuration options of the learning resource, such as annotations (notes).
If the video learning resource is used in different courses and course elements, these annotations will be present in all course elements in which this learning resource is included.

7. Check your work result
In the course menu (as long as you are in the course editor) you will see small symbols on the course elements. They indicate if the configuration of a course element is still incomplete or incorrect.
In the header of the course editor, a click on the small red number (if there are errors) opens a popup that lists all incomplete course elements. There you can jump directly to the affected course elements.

When you work as an author in the course editor, you do it in the role of the owner of this course. After leaving the course editor (step 8), you can also switch to the participant view to check the work result.

8. Publish course
Are all desired course elements inserted and configured? To exit the course editor click on
- the "Publish" icon (step-by-step procedure)
or - the red cross in the upper right corner (abbreviated procedure)
or - the breadcrumb (abbreviated procedure)

When publishing (leaving the course editor) OpenOlat checks if the course is technically executable.
Hint
If a course element is not included in the menu after publishing, OpenOlat has discovered that this course element was incomplete and deactivated it for the executable course. When you go back to the course editor, this course element is still present there. It has a red icon because, for example, a learning resource is still missing. (See step 7)
Hint
Do not confuse "Publish" with "Change status to published" (step 10). After publishing, your course is not yet available to others. This happens only when you change the status to "published".
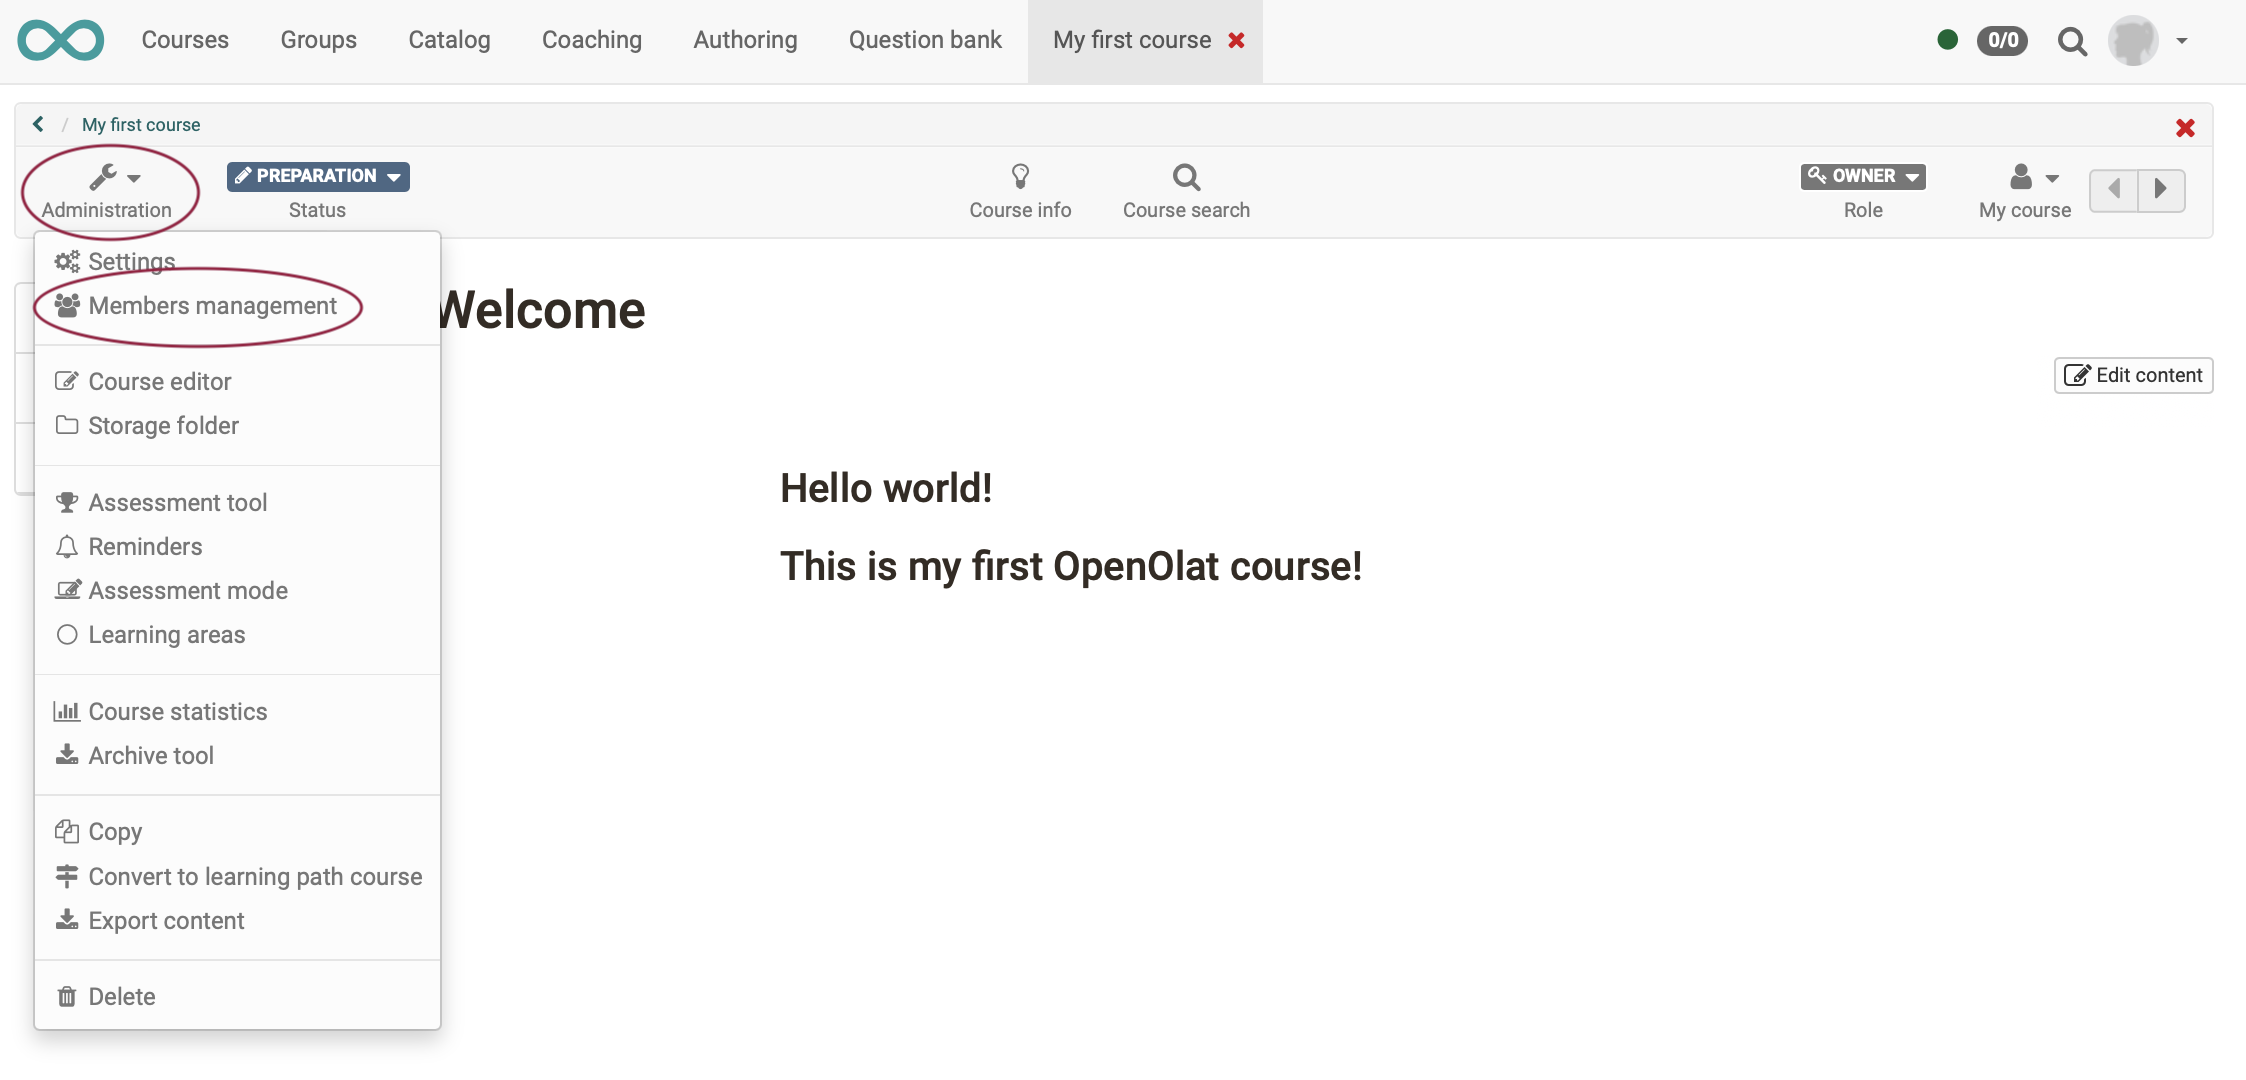
9. Add members
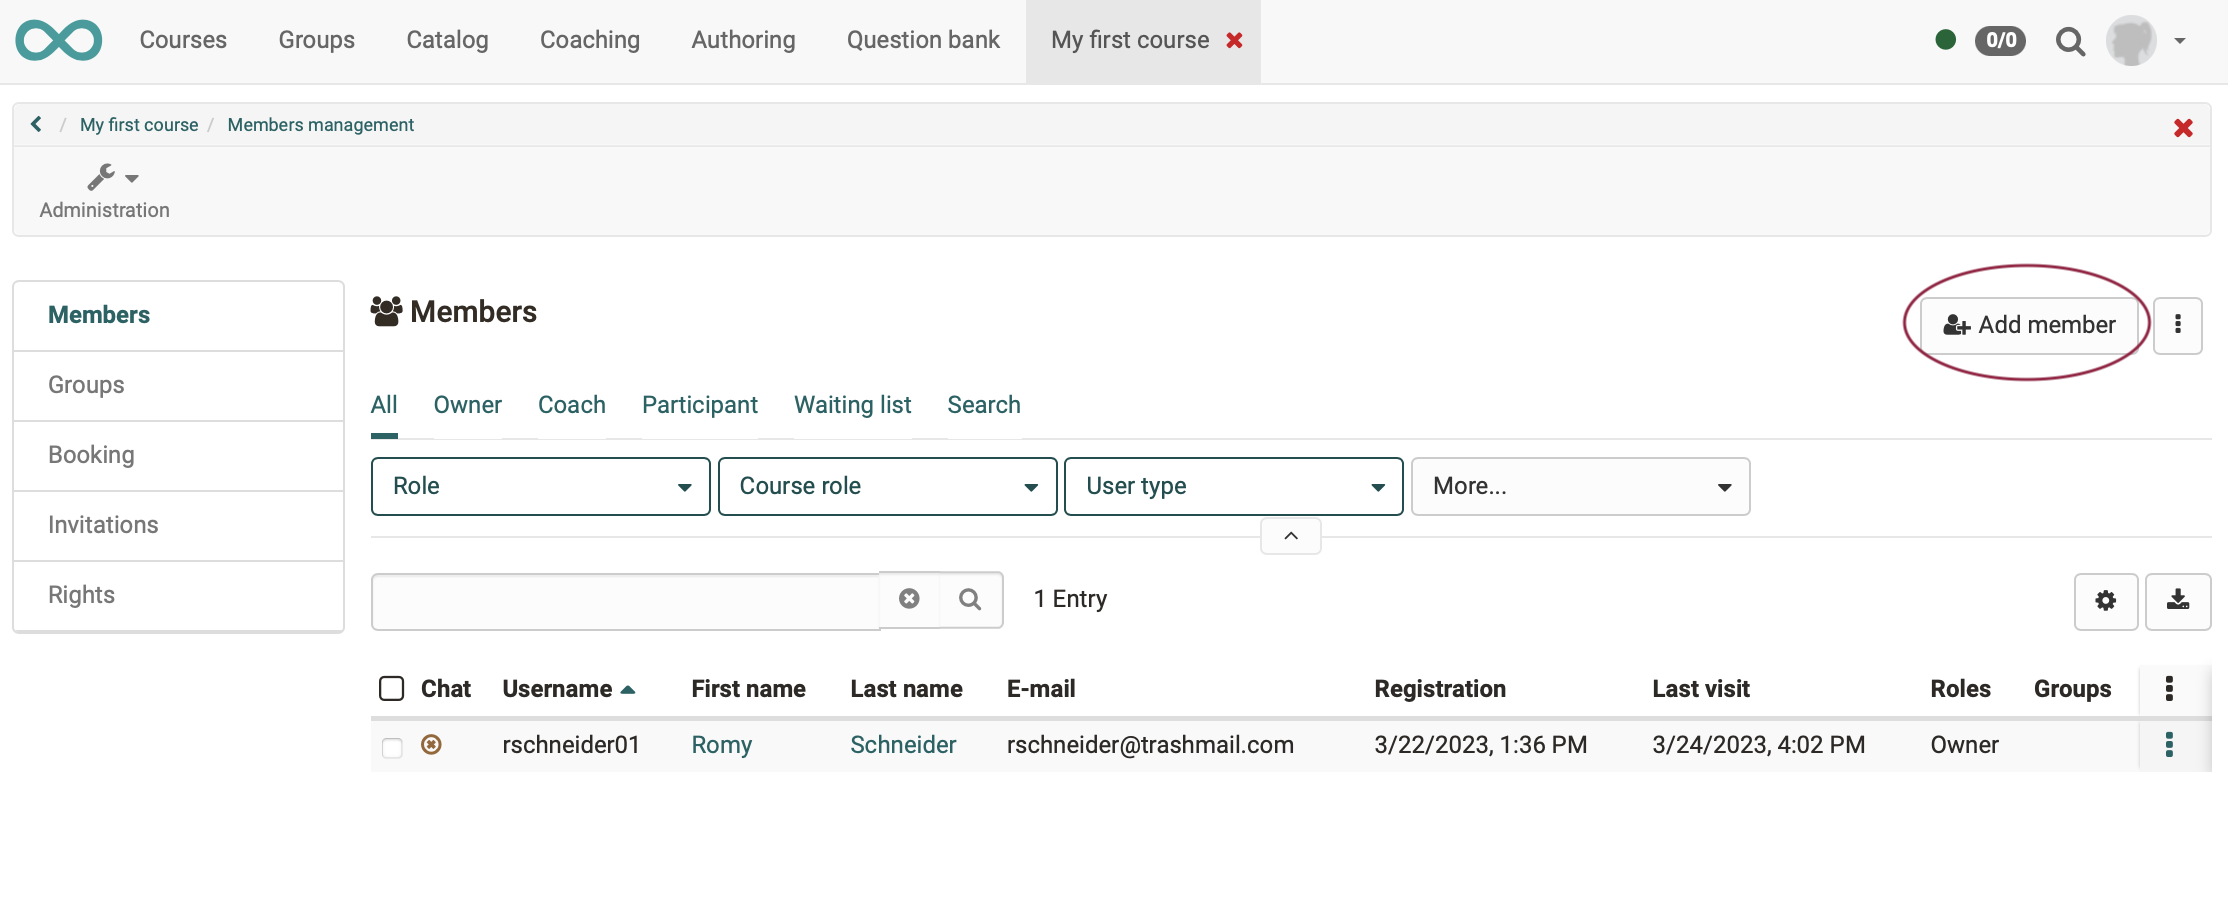
Your course is now ready to run, but has not yet the status "published". If you already know by name which people should have access to this course, you can add these people to the course as course members. To do this, go to the member administration of your course.
Note
There are various ways in which a course can obtain members. E.g. also by people registering themselves. More about this can be found elsewhere in the manual.
10. Change status
If a new course is created, it initially always has the status "Preparation". This means that only you as the author can see the course. It is located in the workshop (authoring area) on your personal workbench, so to speak.

By clicking on "Preparation" you can select another status. The following states are possible:

| Status | Access |
|---|---|
| Preparation | Only owners of this course have access to it. |
| Review | Only owners of this learning resource have access. All preparations for this learning resource have been completed and the content has been released for further review. |
| Access for coach | The course can be opened by coaches of this course in addition to the author (course owner). |
| Published | The course can now also be found in the "Courses" area. It can be opened and visited by all authorized persons (participants, coaches, possibly guests). |
| Finished | The course can still be opened and viewed by course members, but no more edits are possible (tests, forms, etc.) |
To make your first own course visible to other OpenOlat users now, change the status to "Published". The course has then been brought from your workbench to the sales floor, so to speak.
Display in catalog
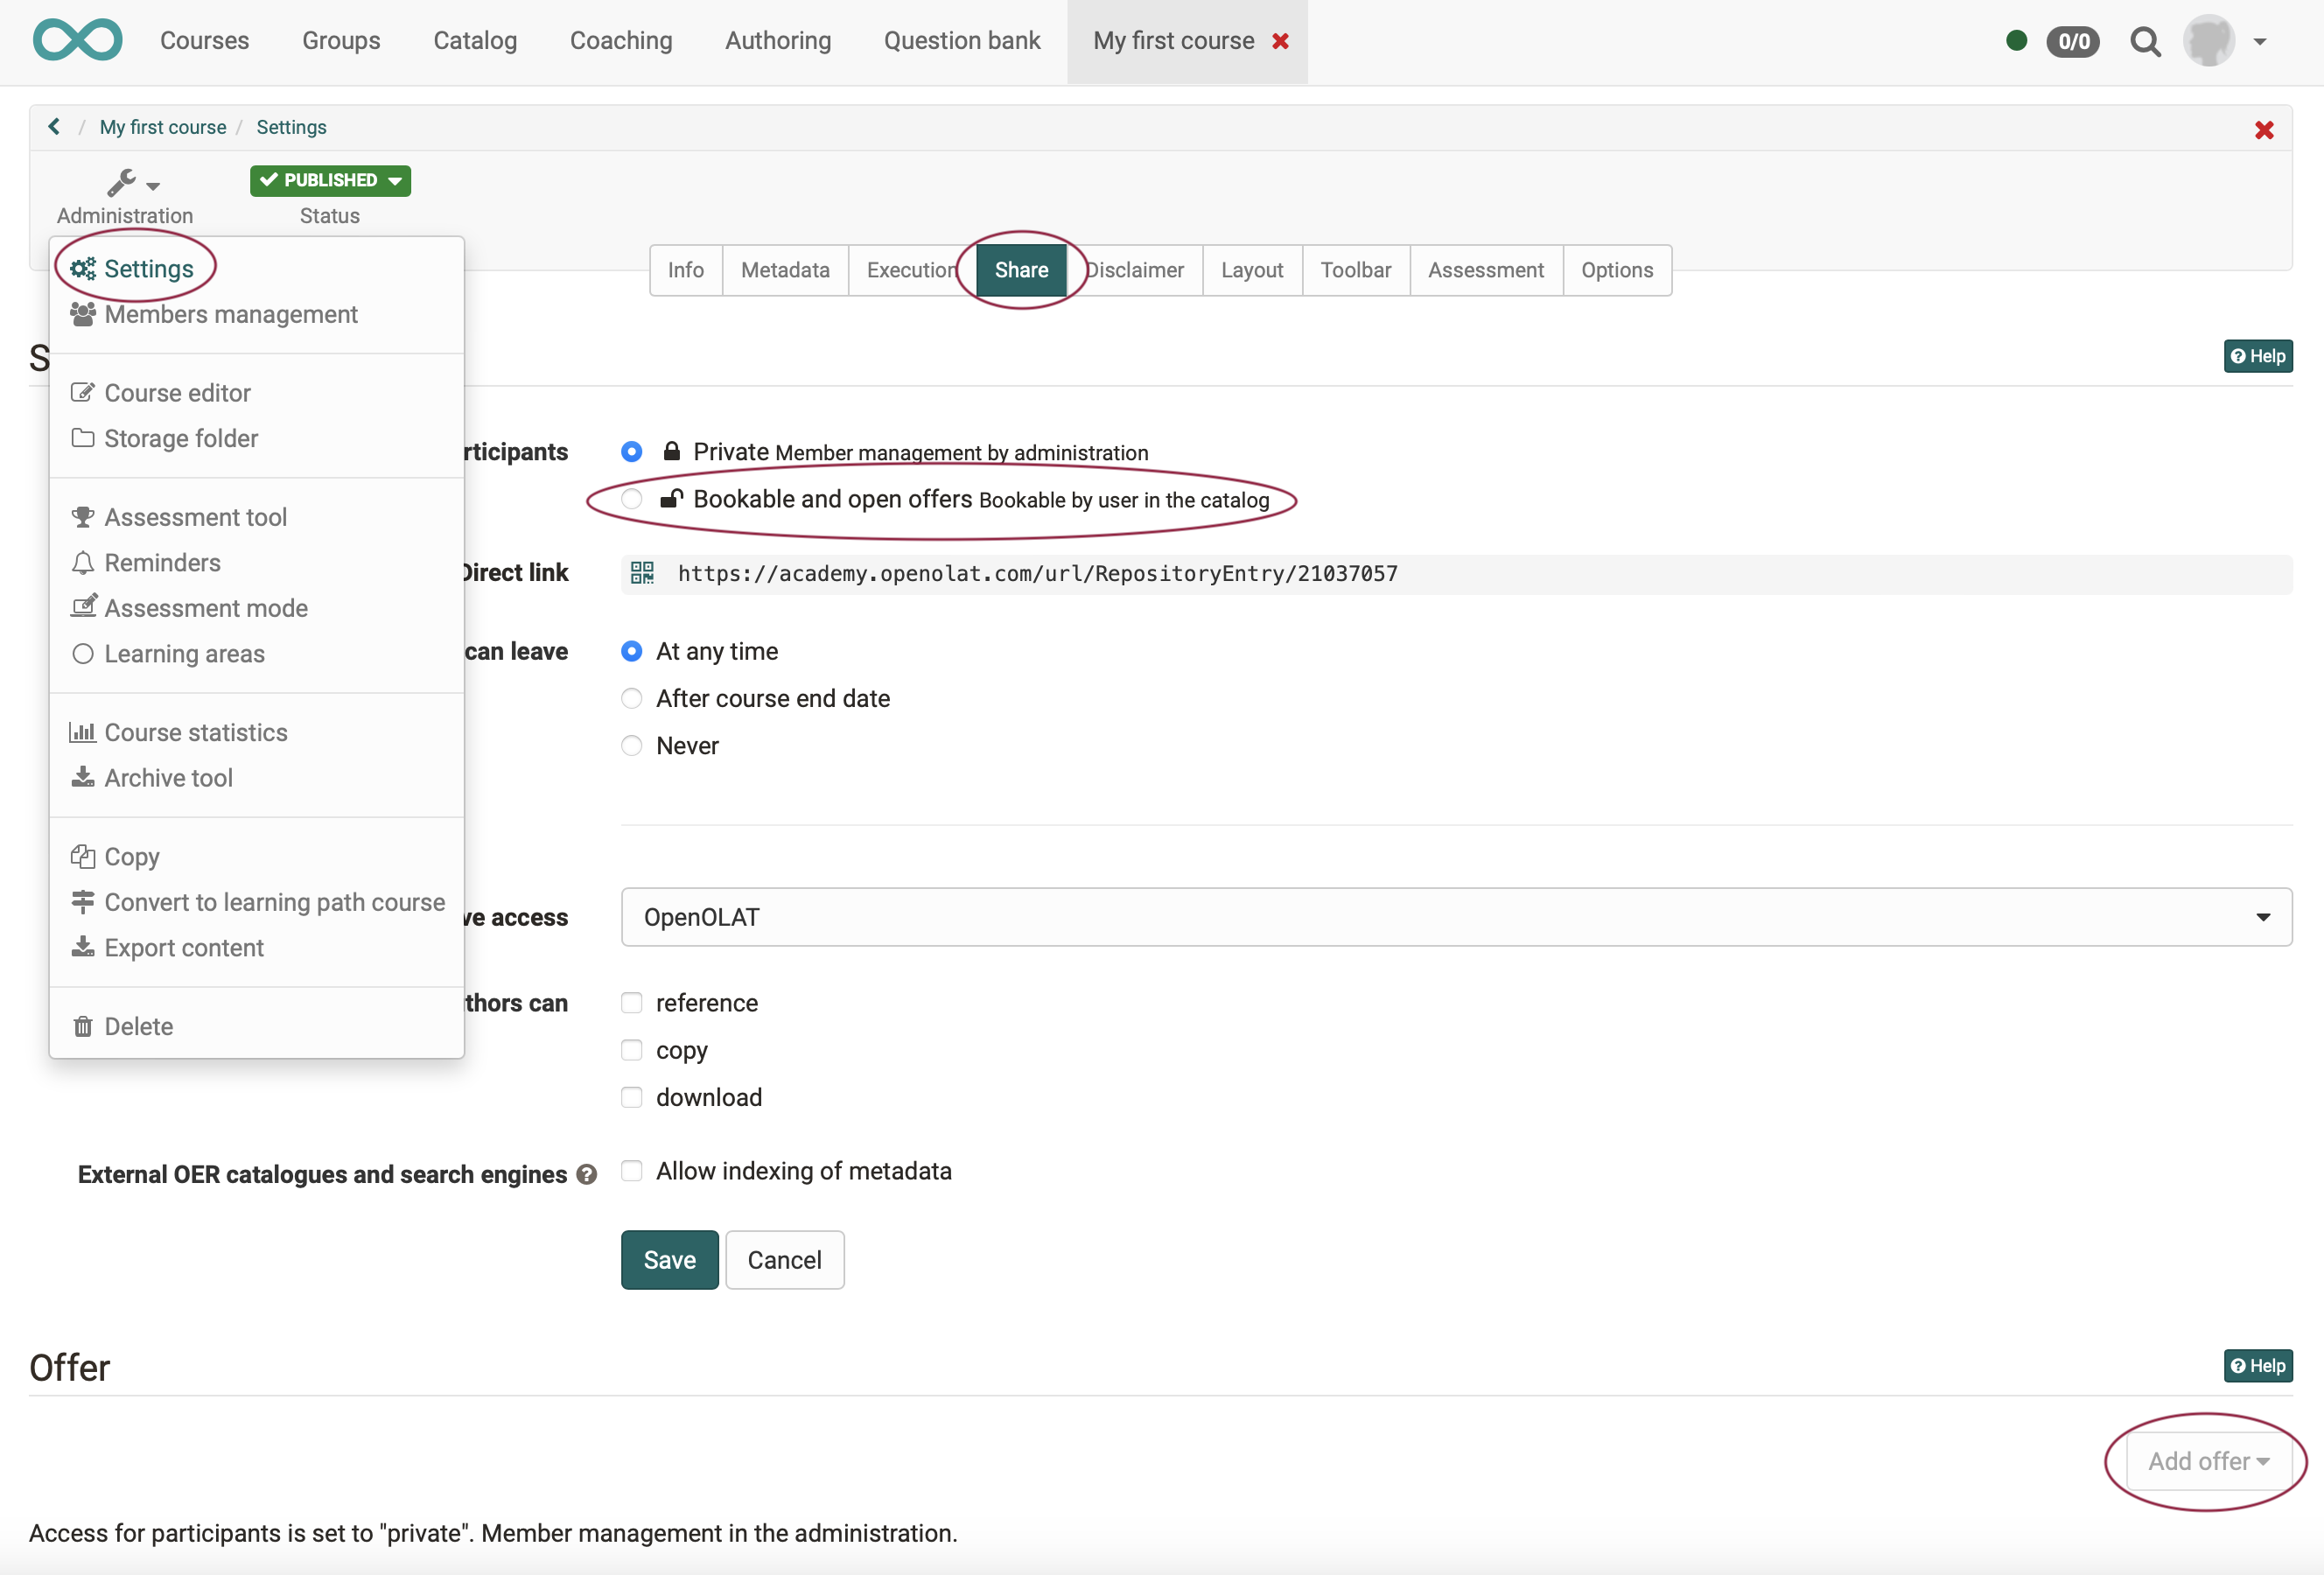
If you wish, you can also include your course in the OpenOlat catalog, figuratively putting it in the shop window.
To do this, you release it in the course settings.
Furthermore, an offer must be created for the catalog and the course must be made bookable. (Until now, we have only granted access to your course to manually selected members (= release "Private")).
Note
A prerequisite for publishing in the catalog is, of course, that a catalog has been set up by the administrator. You can recognize it by whether a "Catalog" menu option is displayed in your header.