Authoring - Create courses and learning resources
Create new OpenOlat learning resources
In Authoring, the "Create" button opens a menu with the learning resources you can create:
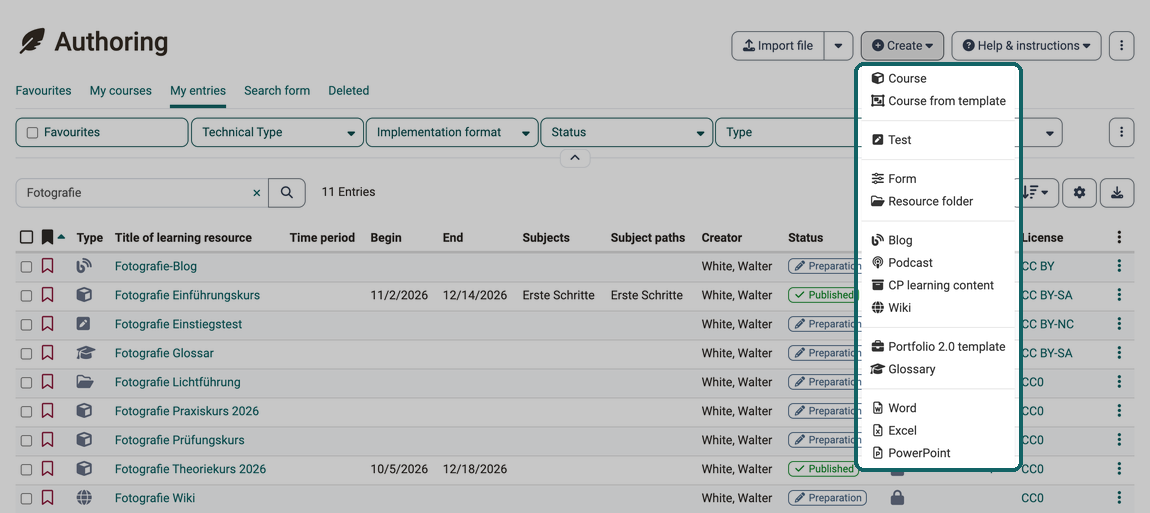
Some entries only appear in the menu if the system administration has switched on the corresponding function: form, wiki and portfolio 2.0 template via the respective module, Word, Excel and PowerPoint via a document editor.
The "Create" and "Import file" buttons are shown to authors, learning resource managers and administrators.
The specific creation process is described on the following pages:
-
Creating courses
User manual article | Detailed instructions -
Creating a course from a template
User manual article -
Creating tests
User manual article | Detailed instructions -
Creating forms
User manual article | Detailed instructions -
Creating resource folders
User manual article | Detailed instructions -
Creating blogs
User manual article | Detailed instructions -
Creating podcasts
User manual article | Detailed instructions -
Creating CP learning content
User manual article | Detailed instructions -
Creating wikis
User manual article | Detailed instructions -
Creating portfolio 2.0 templates
User manual article -
Creating glossaries
User manual article -
Creating Word, Excel and PowerPoint files
User manual article
Tip
If you want to build your courses systematically and use learning resources in multiple courses, it is recommended to create the learning resources in Authoring instead of in the course elements of the courses.
Import learning resources
Import file
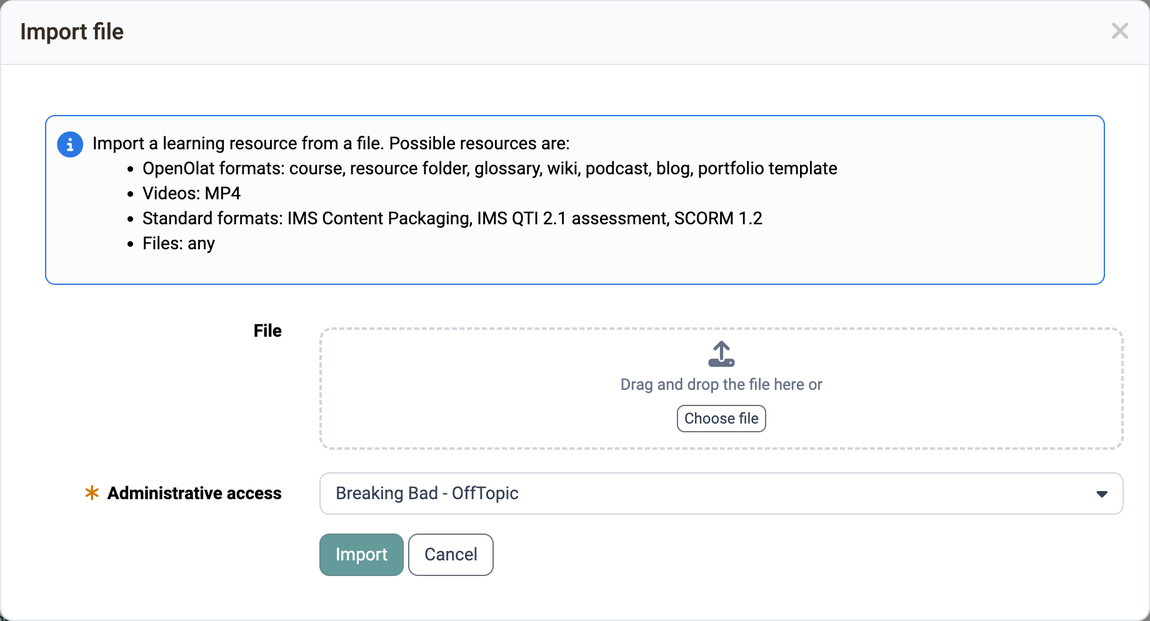
Learning resources created outside OpenOlat or exported from another OpenOlat system can be imported into OpenOlat, provided they are in a compatible format. You can import learning resources exported from OpenOlat, videos in MP4 format, the standard formats IMS Content Packaging, IMS QTI 2.1 assessment and SCORM 1.2, as well as any files.
In the "Import file" dialog, you upload the file in the "File" field and select under "Administrative access" the organisation to which the learning resource is assigned. After the upload, the dialog shows the detected type and the field "Title of learning resource" with the title from the file, which you can adjust.
If the imported learning resource uses other learning resources, for example a course with a wiki or a test, the dialog also shows "Referenced resources". The option "import and link" is preselected: OpenOlat also imports the learning resources used and links them. After importing a course, publish it in the course editor so that its content is visible to you and other OpenOlat users.
At the end of the import, OpenOlat opens the settings of the learning resource on the "Metadata" tab. There you check the title and reference and make further configurations, for example the license.
Embed via URL
External media can also be embedded via URL without uploading the file to OpenOlat. To do so, open the selection menu next to the "Import file" button in Authoring and select "Embed via URL".

Based on the URL, OpenOlat automatically detects the appropriate resource type and creates a corresponding learning resource in which the medium is linked. For videos, this creates a Learning resource video; all functions of the OpenOlat video editor are then available.
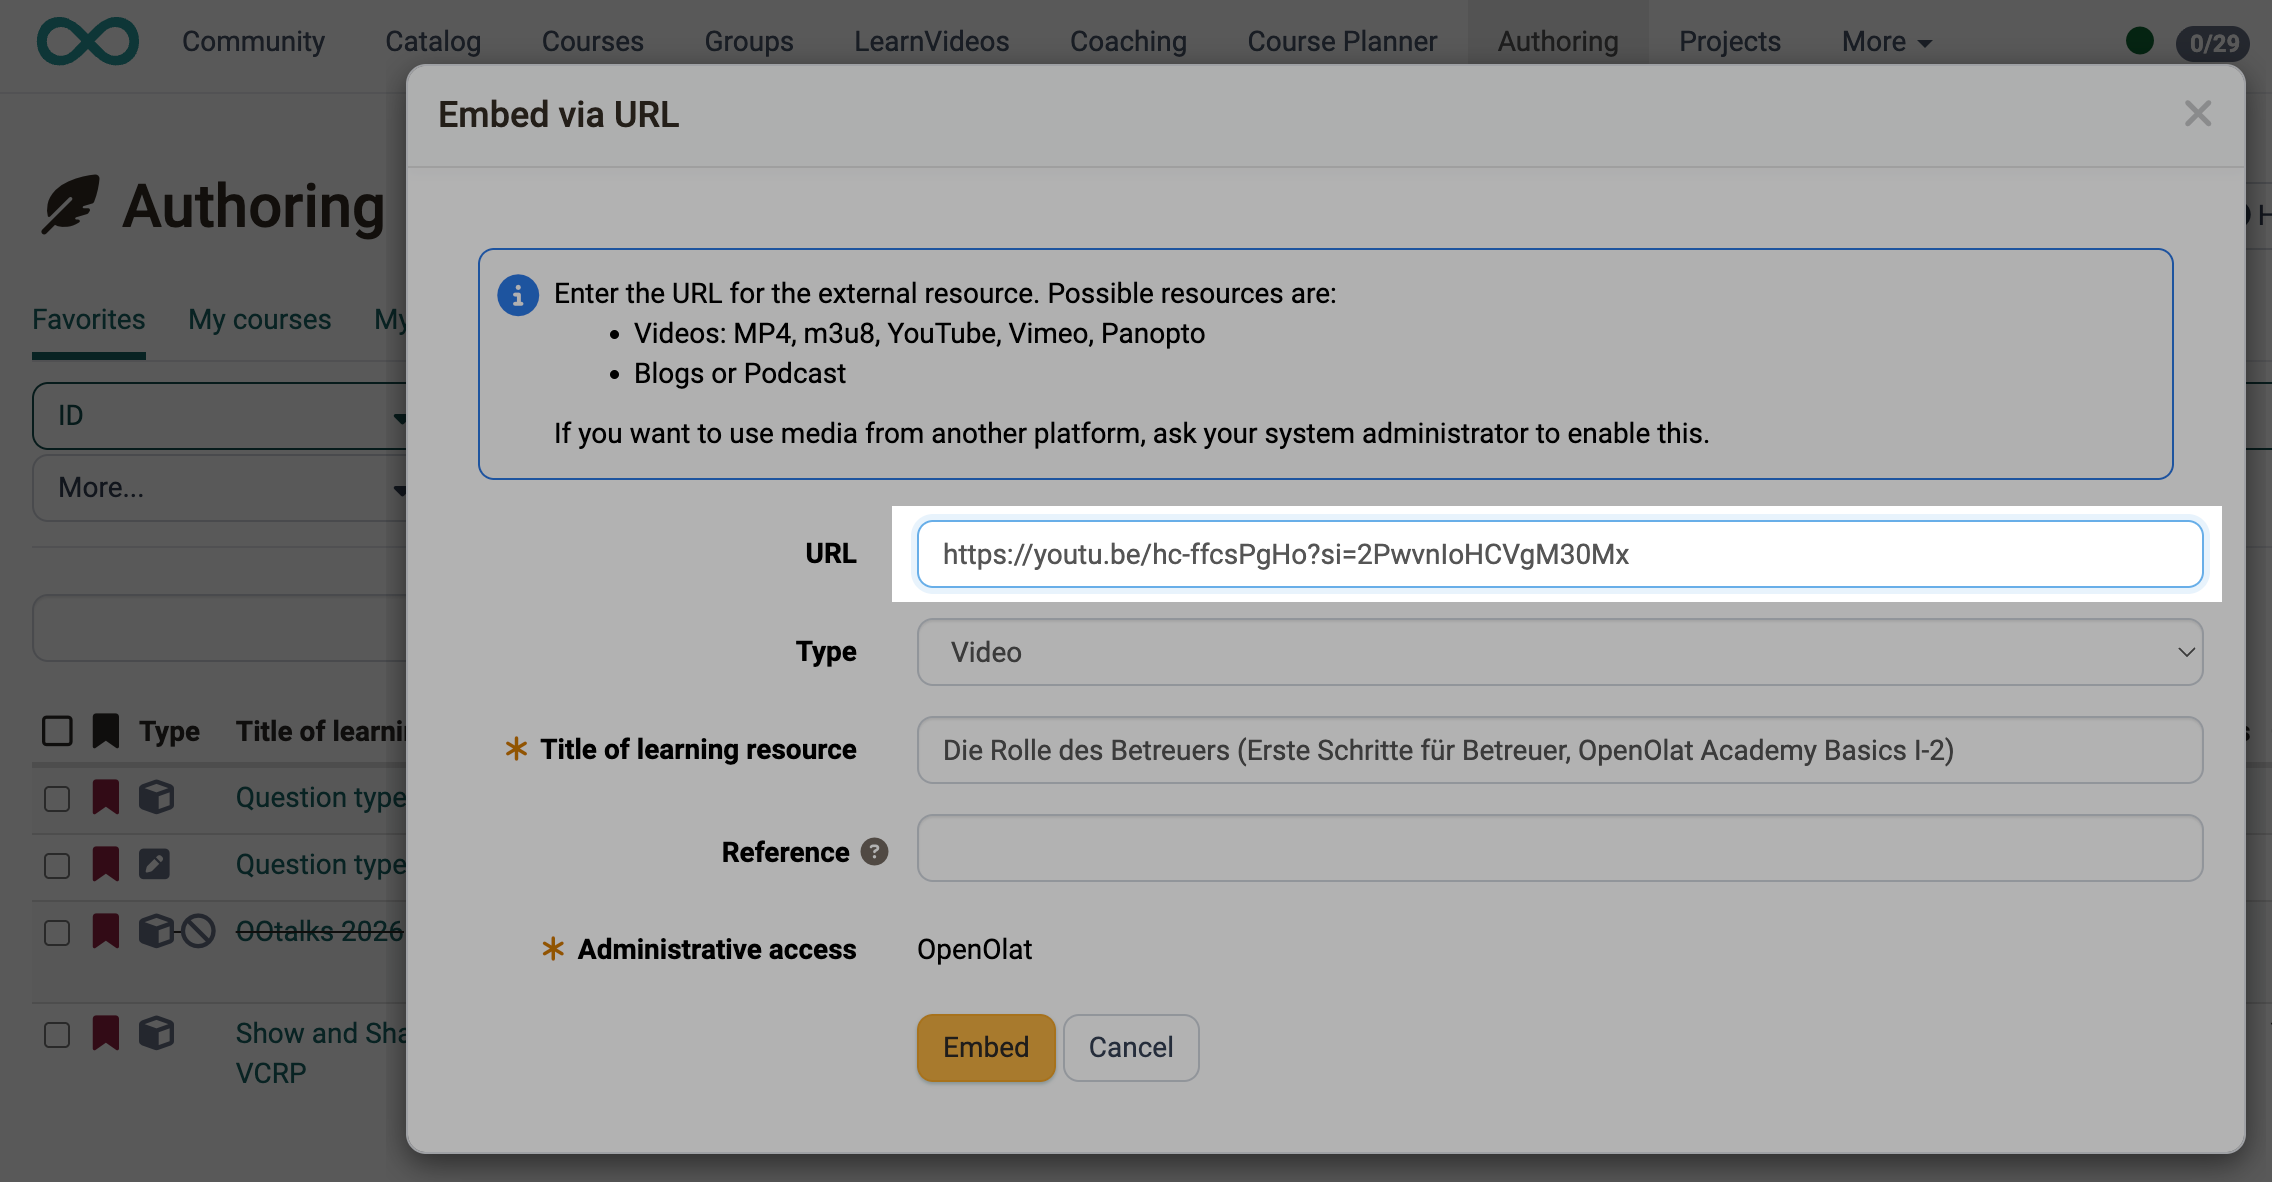
The following resources are supported:
- Videos: MP4, m3u8, YouTube, Vimeo, Panopto
- Blog or Podcast
Media from additional platforms can be enabled by the system administration as media servers if required, under:
Administration > Login > Security > Tab "Media server"
More about this under Security.
The dialog contains the following fields:
| Field | Description |
|---|---|
| URL | Link to the external resource. After entering it, OpenOlat automatically determines the type and, if available, the title of the medium. |
| Type | The detected resource type. If several types match the URL, select the desired one here. |
| Title of learning resource | Mandatory field. Name of the new learning resource. For videos, the title is prefilled from the source and can be adjusted. |
| Reference | Optional external identifier, displayed on the course overview page, see Reference. |
| Administrative access | Mandatory field. Organisation to which the learning resource is administratively assigned. |
Click "Embed" to create the learning resource.
Further information
Mentioned on this page
External Tools: Overview >
Creating Courses >
How do I create my first OpenOlat course? >
Creating Tests >
How do I proceed when I create a test? >
Forms - Overview >
How do I create a form learning resource? >
Resource folder >
How can I use the same files in several courses? >
Blog: Overview >
How do I create a blog? >
Podcast: Overview >
How do I create a podcast? >
Create CP learning content >
How do I create a content package? >
Creating Wikis >
How do I create a wiki? >
Portfolio template: Creation >
Glossary >
Various Types of Learning Resources >
Course Settings - Tab Metadata >
Learning resource: Video >
Security >
Further reading
Authoring - Overview >
Course Settings >
youtube
Voraussetzungen für Autoren
Funktionsprinzipien
Kurse erstellen und bearbeiten
Überblick Testing
Wie funktionieren Tests in OpenOlat?
Kursbausteine konfigurieren
Test-Lernressource erstellen
Fragen erstellen
Tests erstellen/bearbeiten