Absence management
Profile
| Name | Absence management |
|---|---|
| Available since | Release 14.1 (OO-4214) |
What does absence management enable?
The absence management displayed in the main navigation refers to cross-course absence management by authorized persons with the role of absence manager.
Users with this role process dispensations and appeals, for example. This administrative task goes beyond the simple recording that takes place in a specific course, and is therefore assigned to a separate role.
Absences can also be queried or recorded in other places.
Links to explanations of the remaining points can be found under further information and in the learning resources.
Where can I find the absence management?
Authorized users can find the cross-course absence management in the main navigation:

Note
The menu item may also be located elsewhere in the main navigation. If there are many items displayed in the main navigation, "Absence management" may be located under "More" on the far right.
Who can use the absence management?
Course owners decide whether absence management is used in a particular course.
The recording of individual absences is then usually the responsibility of the coaches. That is why they will find the tools for recording absences in the courses or in the Coaching area.
Participants record their own absences/notices of absence/appeals in the personal menu >.
The absence management displayed in the main navigation and described below is available to absence managers, principals and administrators. In cross-course absence management, all absences can be accessed in the overview, and authorized persons can manage all absences comprehensively.
Activation of the "Events and absences" module
As with all modules, general activation is carried out by administrators. For absence management to be available in the main navigation, the "Events and absences" module must be switched on in the system administration:
Administration > Modules > Events / Absences
Find out more under Module Events and Absences.
In a specific course, OpenOlat switches on the Event & absence management itself as soon as an event is created for the course with "Add event", for example in the Course Planner. Course owners can switch it on and off manually and configure it for the course in the course administration:
Course > Administration > Settings > Tab "Execution" > Section "Configuration of Event & Absence management in course"
Find out more, also about the cases in which OpenOlat does not switch the function on itself, under Course Settings - Tab Execution.
What are the main functions/components of absence management?
After opening the absence management, the main functions are displayed as tabs:
Tab Cockpit
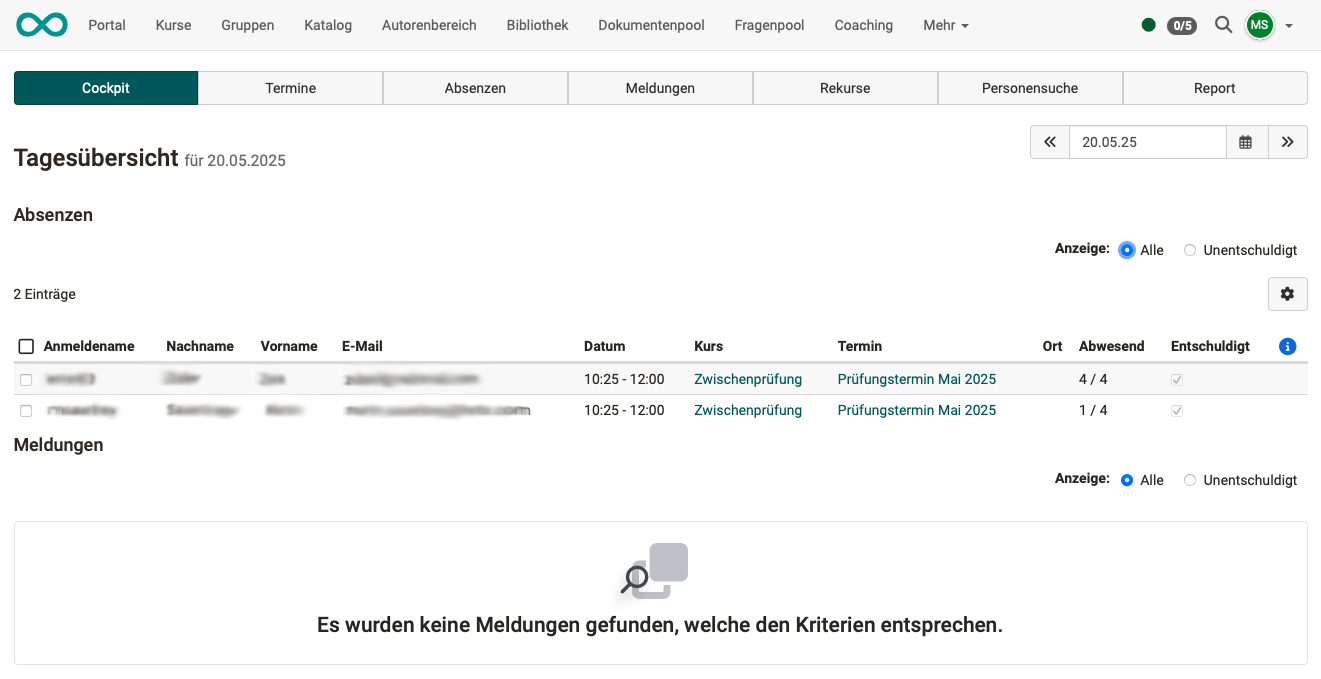
The cockpit displays the absences and notices of a day in two sections below each other. The current day is displayed by default, but any other day can be selected in the top right corner.
In both sections, under Display you choose whether the list shows all entries (All) or only the unauthorized ones (Unauthorized). This switch is available if the option Authorized absences is switched on in the system administration: Administration > Modules > Events / Absences, tab "Configuration". This also applies to the tabs Absences and Notices.
Tab Events
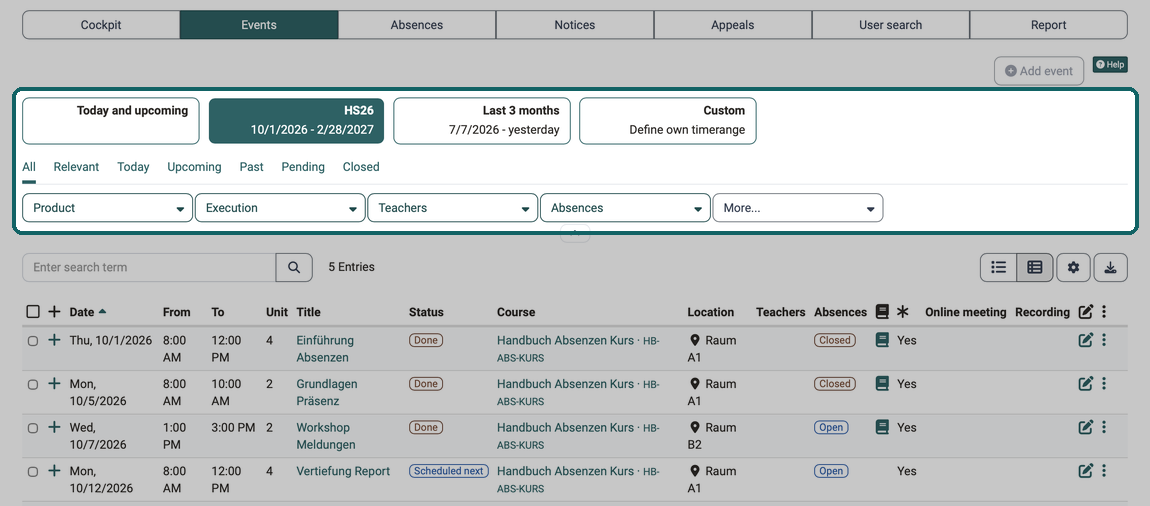
The tab Events lists the events across courses. Use the period buttons, the quick filters and the filters to narrow down the list. You only see the "Product" filter if you manage at least one product.
At the top right, absence managers and administrators see the "Add event" button. It is greyed out here because neither an implementation nor a product is selected. You create events in the Course Planner, more on this under Course Planner: Events.
Tab Absences
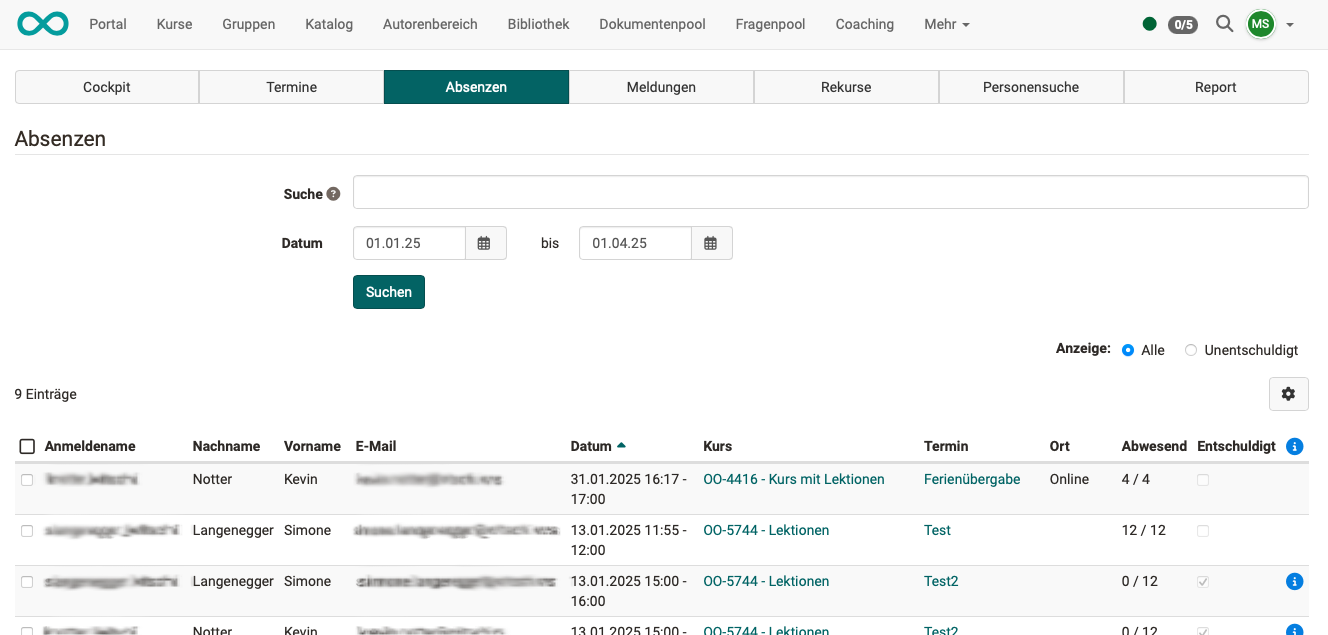
You can use the search field to search for users, teachers, course titles and events. You narrow down the period with the date range. Under Display you choose whether the list shows all absences (All) or only the unauthorized ones (Unauthorized).
Tab Notices
The tab Notices lists the notices of absence and dispensations. Use the buttons Record new absence, Record new dispensation and Record new notice of absence to record a notice for a person.
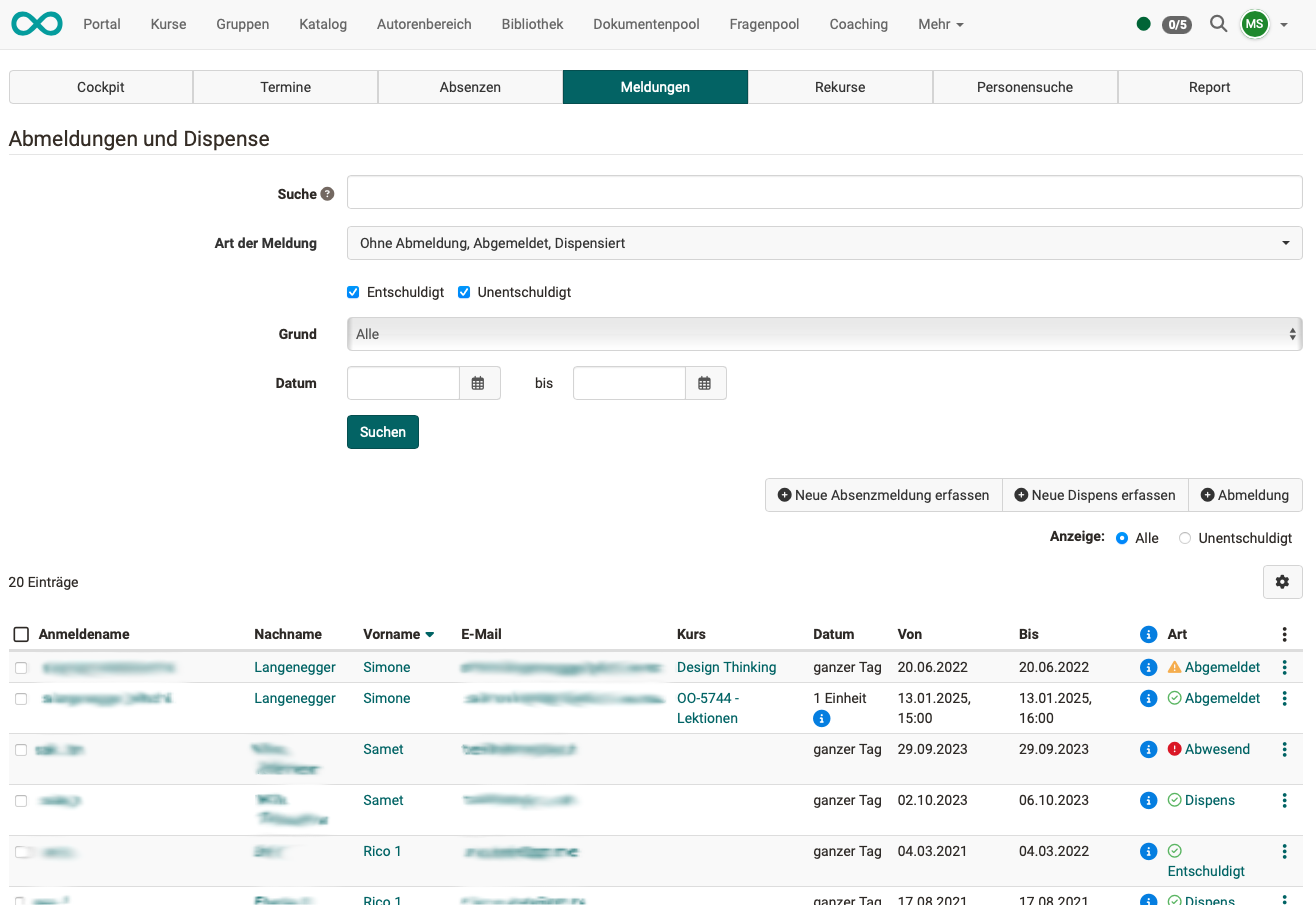
You can use the search field to search for users, teachers, course titles and events. The filters Type of notice, Reason and Date narrow down the list further. If authorized absences are switched on, you use the checkboxes Authorized and Not authorized to set which notices the search finds. Under Display you choose between All and Unauthorized.
Tab Appeals
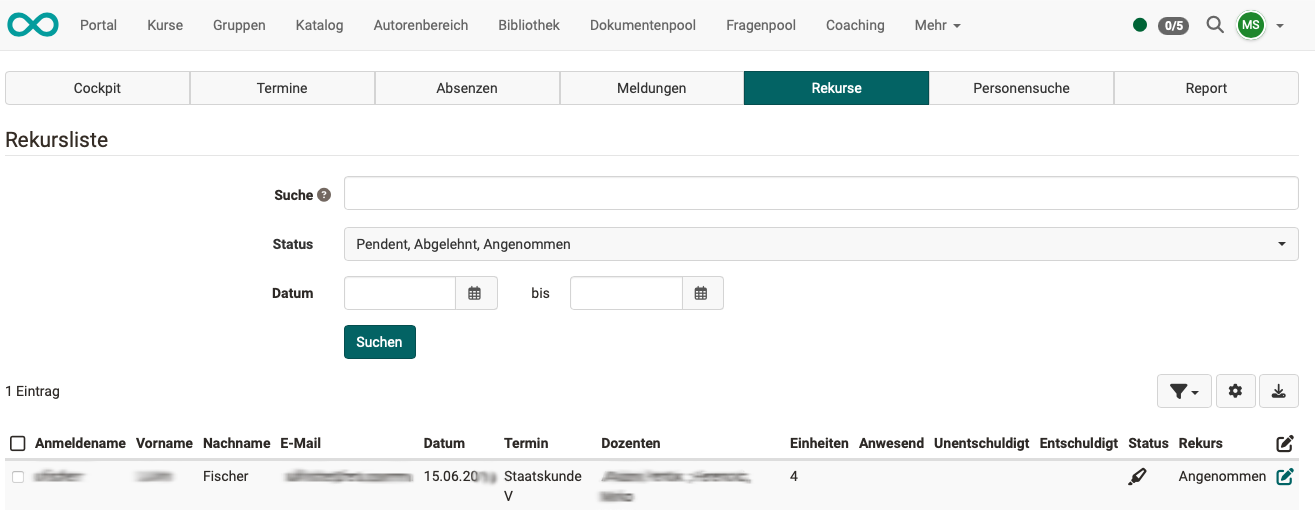
An appeal must be lodged within the specified appeal period. Administrators set the appeal period system-wide in the system administration: Administration > Modules > Events / Absences, tab "Configuration".
You can use the search field to search for users, teachers and events. The Status filter shows the appeals by their state: pending, rejected or accepted. Use Date to narrow down the period.
Tab User search
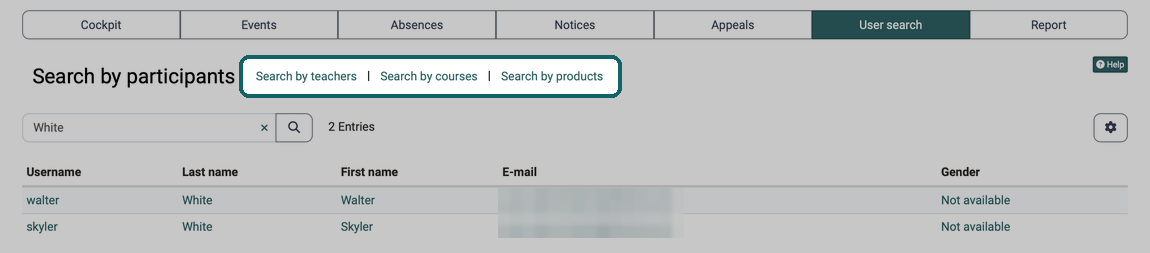
The user search finds participants. Use the links next to the title to switch to the search by teachers, by courses or by products.
Tab Report
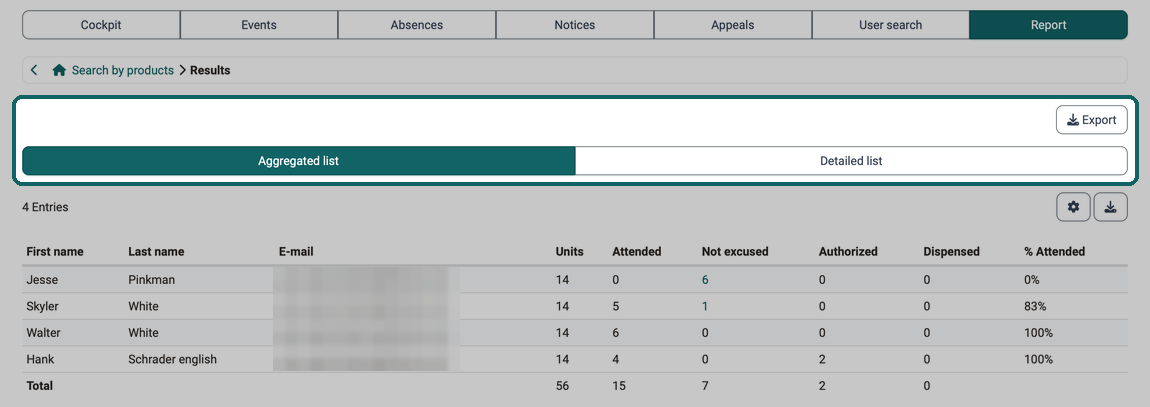
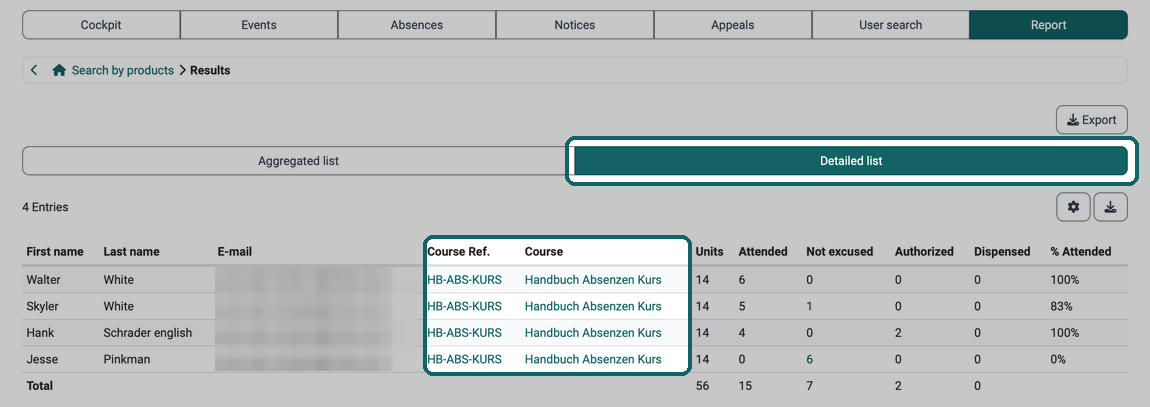
The report summarizes the attendances per person: as an Aggregated list across all courses or as a Detailed list per course. The tab first opens a search form; the lists appear after the search. Use Export to download the result. The report only takes into account courses with the status "Published" or "Finished".
Further information
Mentioned on this page
Events and absences >
Personal tools: Absences >
Module Events and Absences >
Course Settings - Tab Execution >
Course Planner: Events >
Further reading
Basic concept events and absences >
Toolbar: Events >
Coaching - Overview >