Working with Visual Studio Code
Setup
Follow the steps below to checkout and work on the OpenOlat documentation using Visual Studio Code for non-techies. To learn more about the structure and how to test and compile the documentation please refere to documentation README.
Make sure you installed the development environment first.
1) Install Visual Code Studio
Download and install the software from the Visual Code Studio website. It is available for free for Mac, Windows and Linux.
On the Mac the installation is very simple:
brew install --cask visual-studio-code
2) Clone the OpenOlat-docs repository
The public repository is available at the following Git URL:
https://github.com/OpenOLAT/OpenOLAT-docs.git

Note
The repository at GitHub is a read-only repository. If you are frentix staff and want to modify the repo, please ask for our interal Git Repo. Ask the Sys-Admin staff how to generate an SSH key to access the repository.
Modifying pages
1) Open a page for editing
Use the project explorer to find the page you want to edit.

Tip
It is best to edit the different language versions at the same time. Additional languages of pages have the same page name and the language code in the file ending. E.g. index.md for the English page and index.de.md for the German version.
2) Open a local preview
There are two ways of using the Visual Studio Code preview feature: 1. Side-by-Side 2. In separate tab
Choose which fits better to your workflow / screen size
Preview Side-by-Side
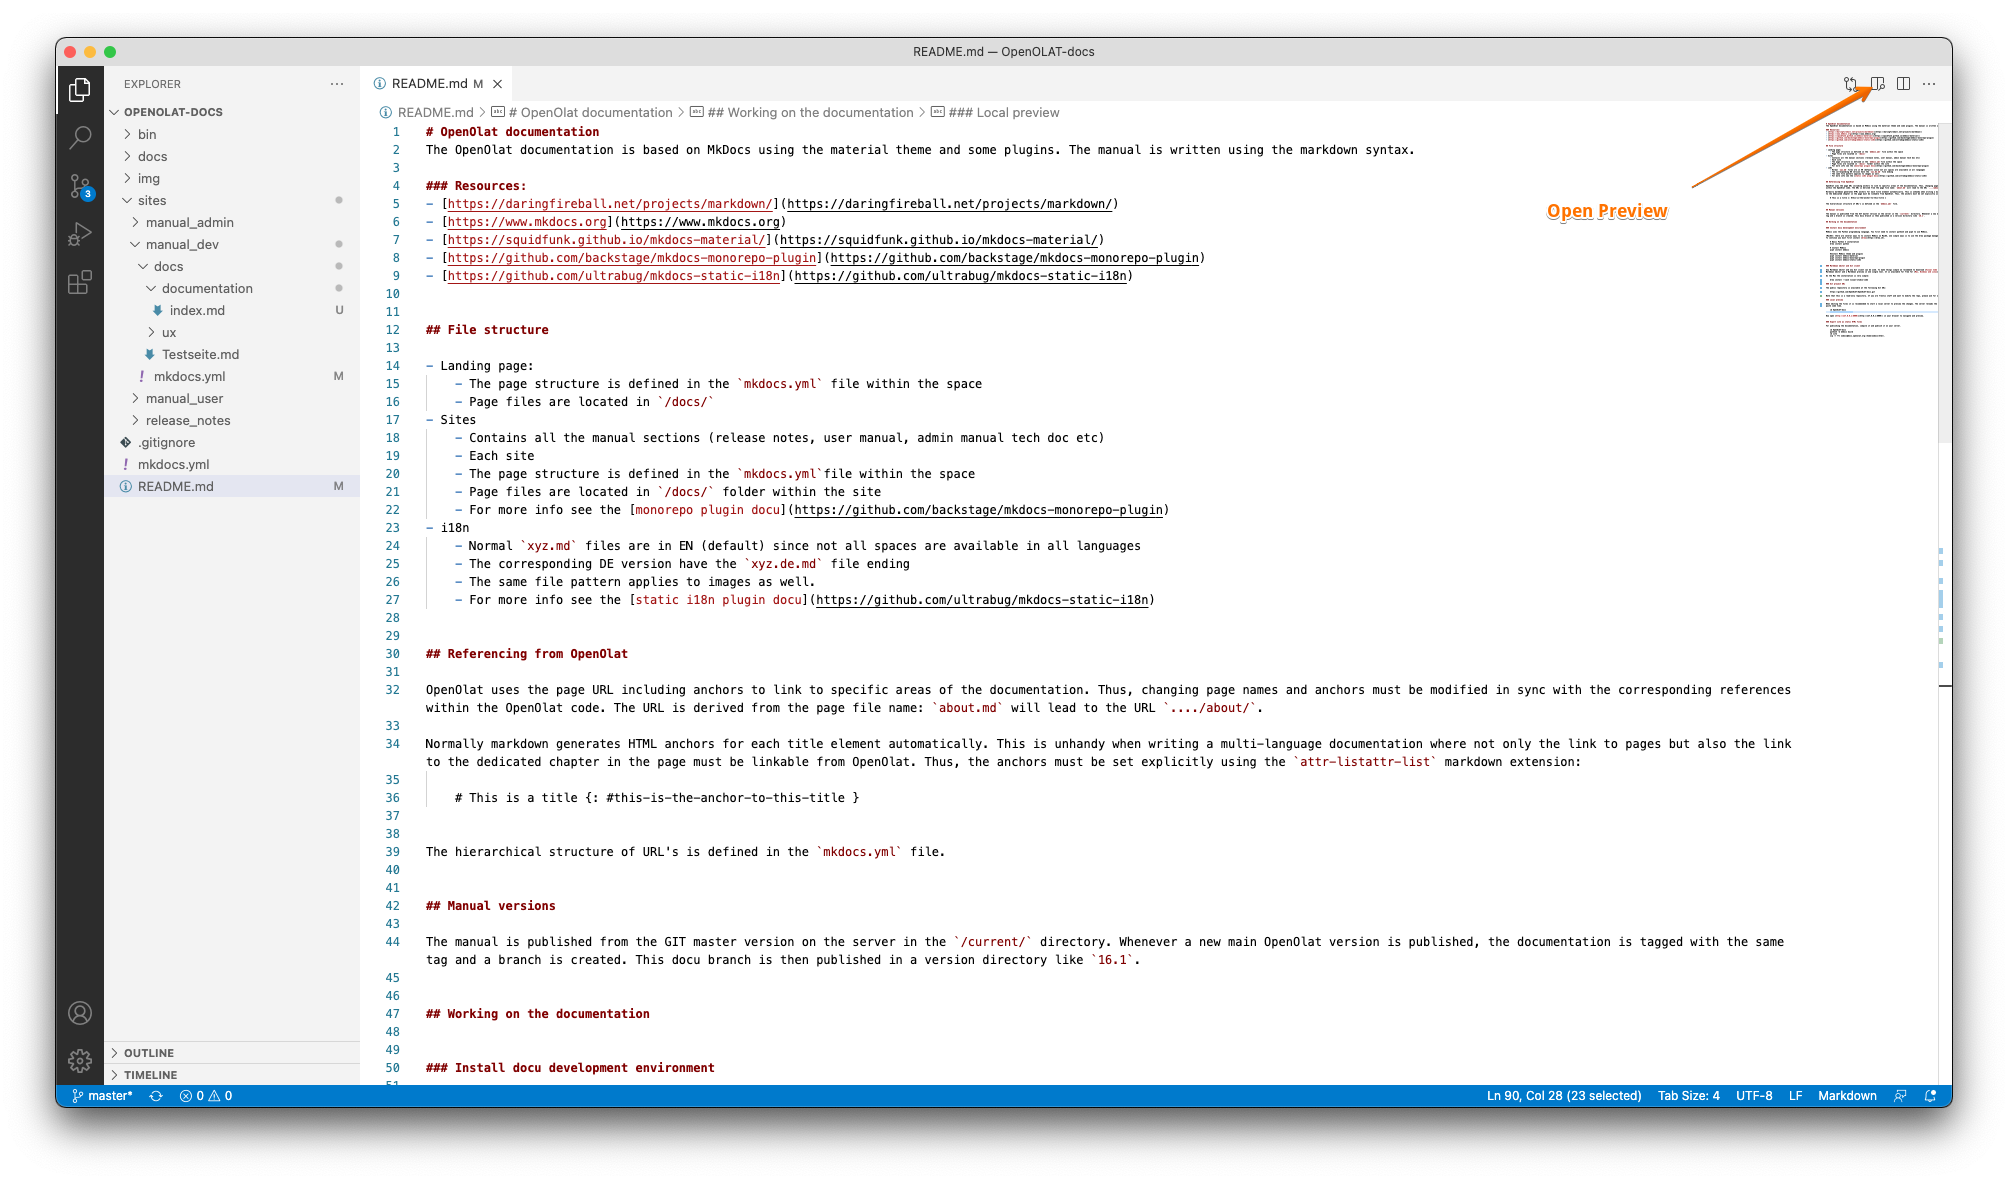

Preview in separate tab

Push changes to the repository
1) Review changes before pushing
Pull changes from the server
It is important to always pull changes from the server before you start the

Important
Please, always pull before you stage, commit or push stuff. This is important to reduce the problems of conflicts.
Review the changes you made
Review every file you changed. Always. You can always go back to the editor or revert your changes.

Attention
Carefully review all your changes and test them with python3 -m mkdocs serve with your browser before you commit and push your changes! You need write permissions on the repository for beeing able to push.
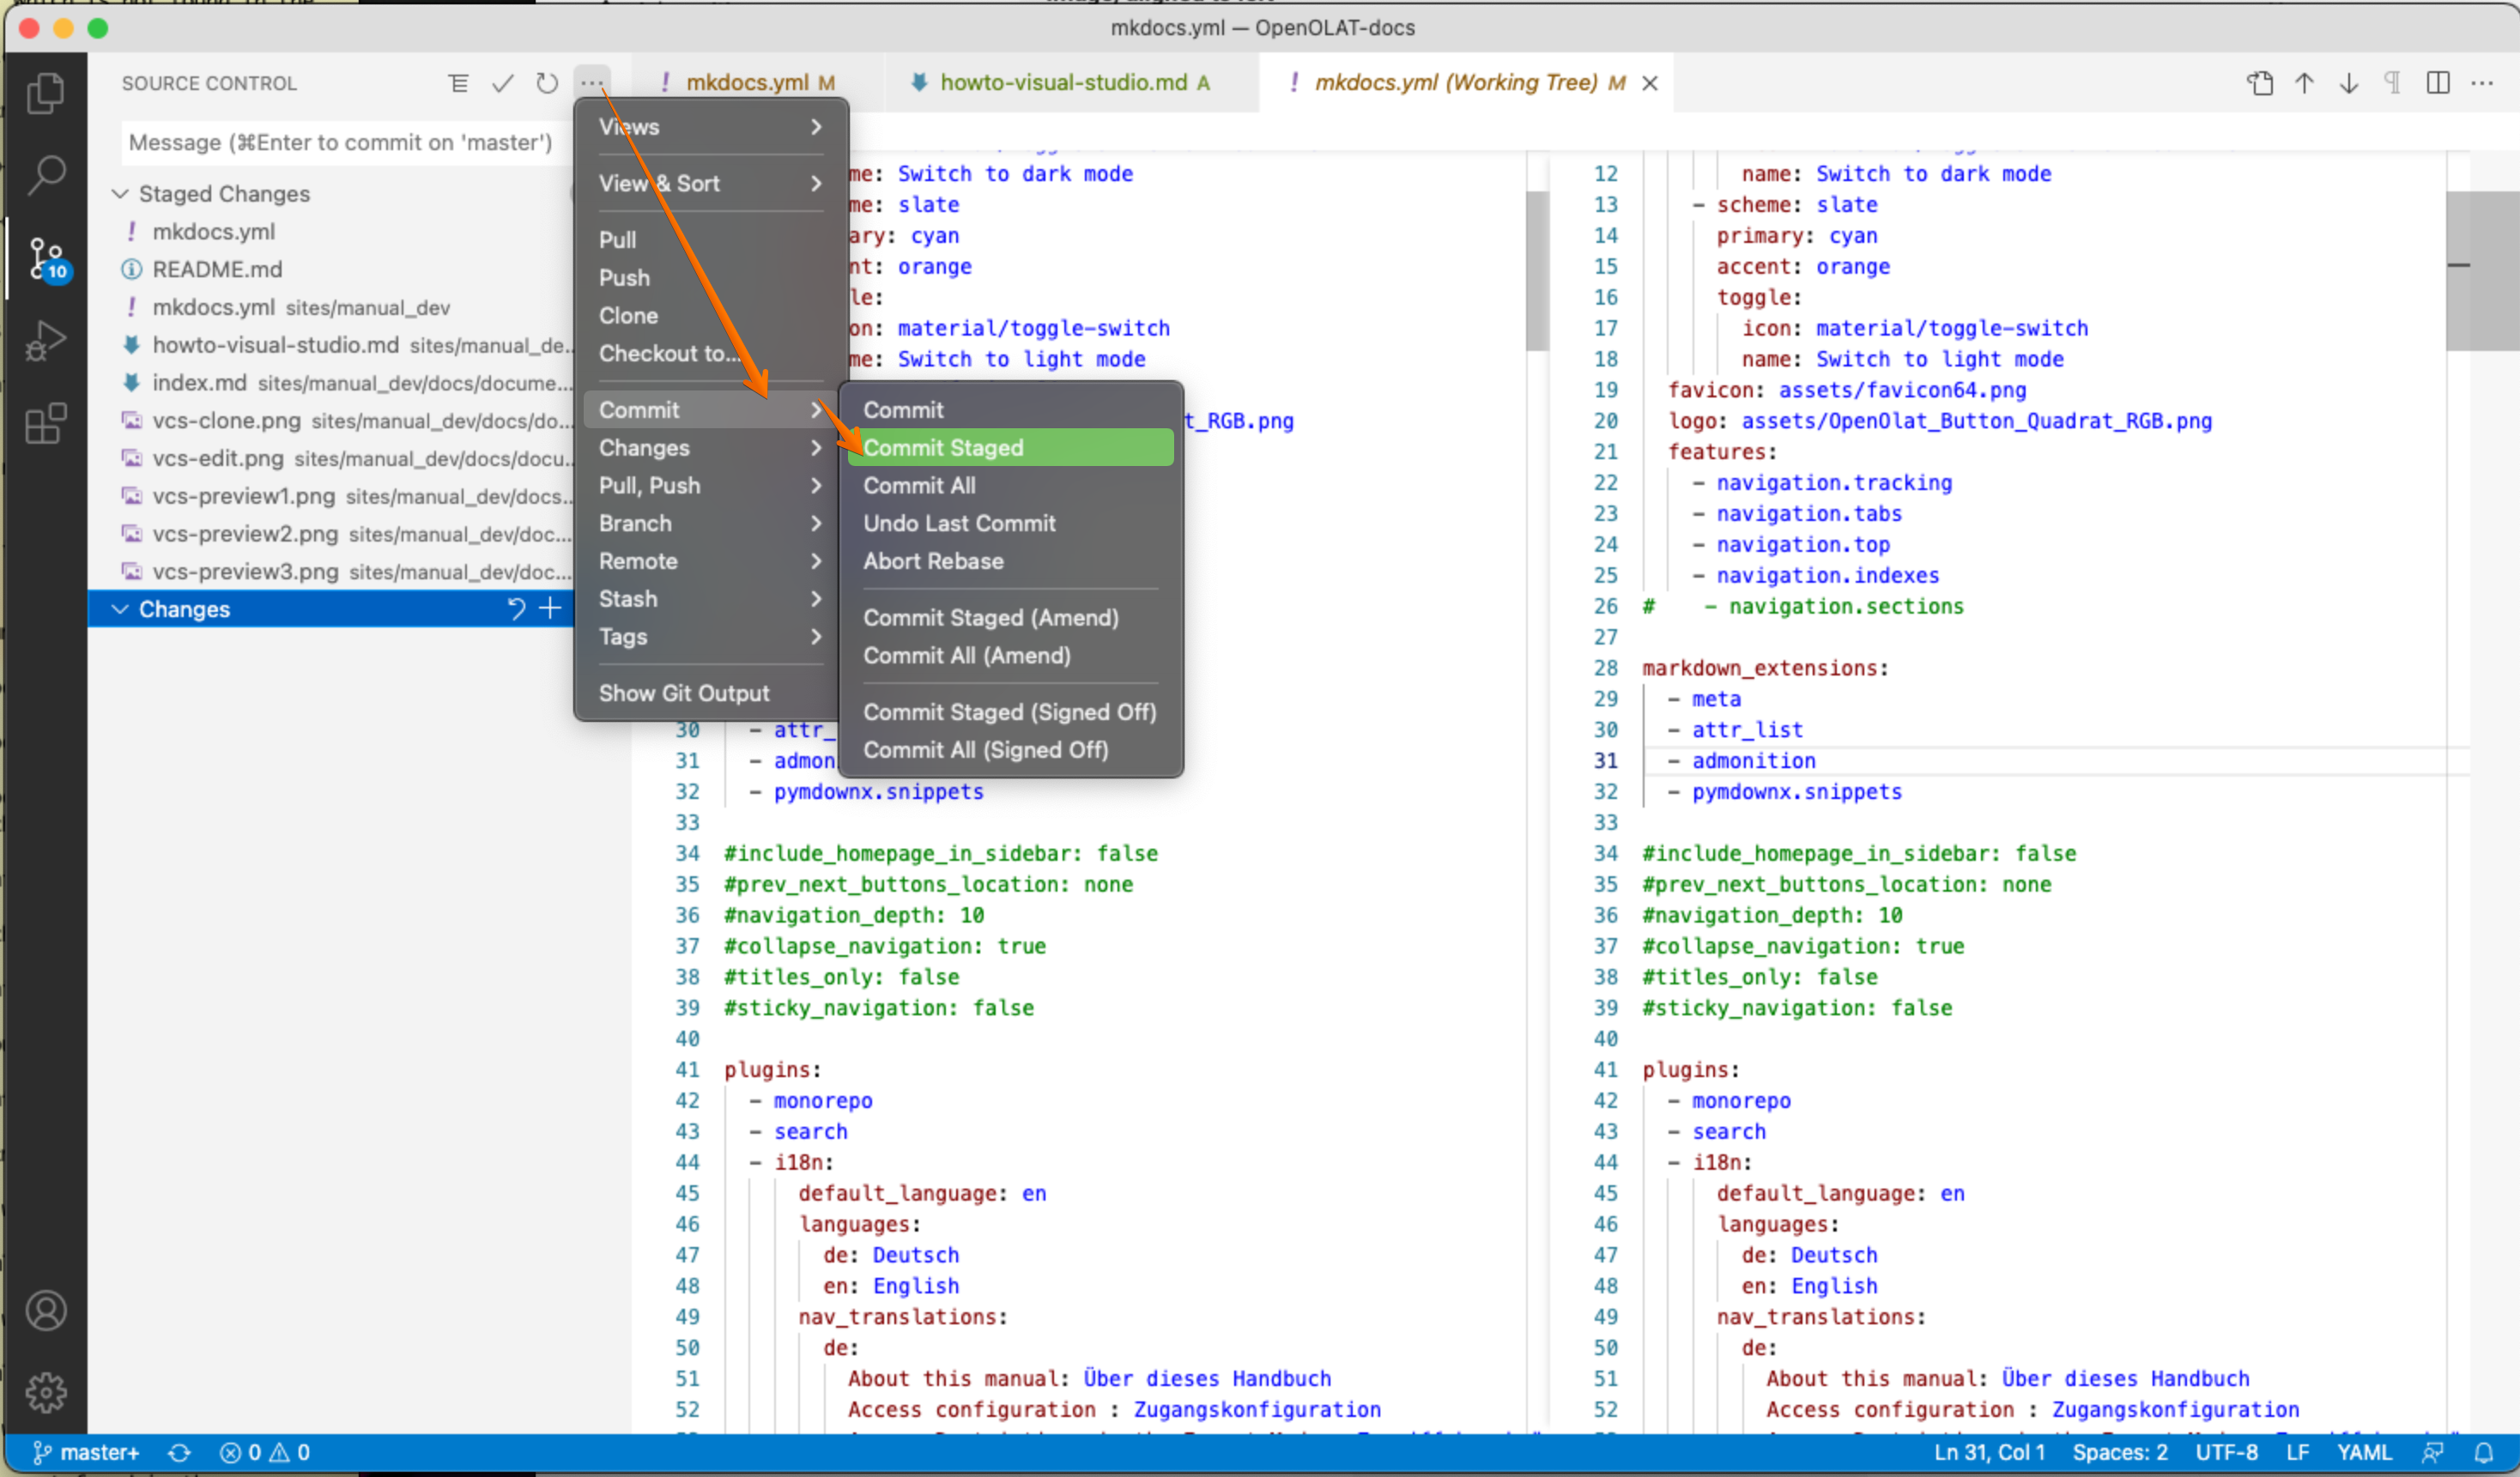
2) Stage and commit your changes
Next step is to prepare your canges for the repository. This is done by staging and then commiting the changes to your local repository clone. At this point everything is still local on your computer and not on the server.
Stage

Commit
Next is to commit the staged changes to you local repository

Hint
Add a meaningfull message that helps other team members to understand the scope of your change. If the change is about an OpenOlat issue, add the issue to the message. Example:
OO-5897 Adding more screnshots to Visual-Studio-Code howto
3) Sync and push the changes to the server
You are ready to go now. One last step is to sync and push your changes.

Help: I have a conflict!
Ask your tech staff for help to fix this.
Help: Revert and go back
You can always revert your changes and go back to the last version from the server
