The menu "Settings" of the "Administration" offers further central configurations for your OpenOlat course.
Each learning resource, not just courses, have a menu "Settings". Furthermore, the settings of conventional and learning path courses vary slightly.

Info
Here you define further information on the course or learning resource. This information is also visible to interested parties without course access under (Course)info. This includes, for example: Title, relevant description, certificate, cover image and teaser movie. The learning resource appears under the title in the alphabetical course list and for queries via the search mask. Further information can be found here.
Metadata
Here you can enter other things that appear under "Info" e.g. the names of the teachers of the course. Also, the course can be assigned to a given didactic type such as self-study course or examination course. Especially relevant is the entry of the license of the course.
Execution
Here you can activate the "Lecture and Absence Management" if activated by the administrator, convert existing conventional courses into learning path courses or, in case of learning path courses, define how the learning progress is calculated on the basis of the number of course elements or on the basis of the learning time of the course elements.
Share
In this tab you define how and for whom a course or a learning resource is released. Further information on setting up the appropriate access configuration can be found here.
Catalog
As soon as a learning resource has been activated it can be inserted in the catalog with the help of the info page. Just select "Course" --> "Catalogue entries". Afterward you choose the category to which your learning resource should be related to by using "Add to catalog". Learning resources can be inserted more than once at different spots in your catalog, just repeat the before mentioned step. All selected categories will be displayed under "Catalogue entries", where you can delete them as well.
The entire OpenOlat catalogue can be viewed by all users in the "Courses" menu.
Only enter your courses in the catalog when they are finished and should be visible to the users.
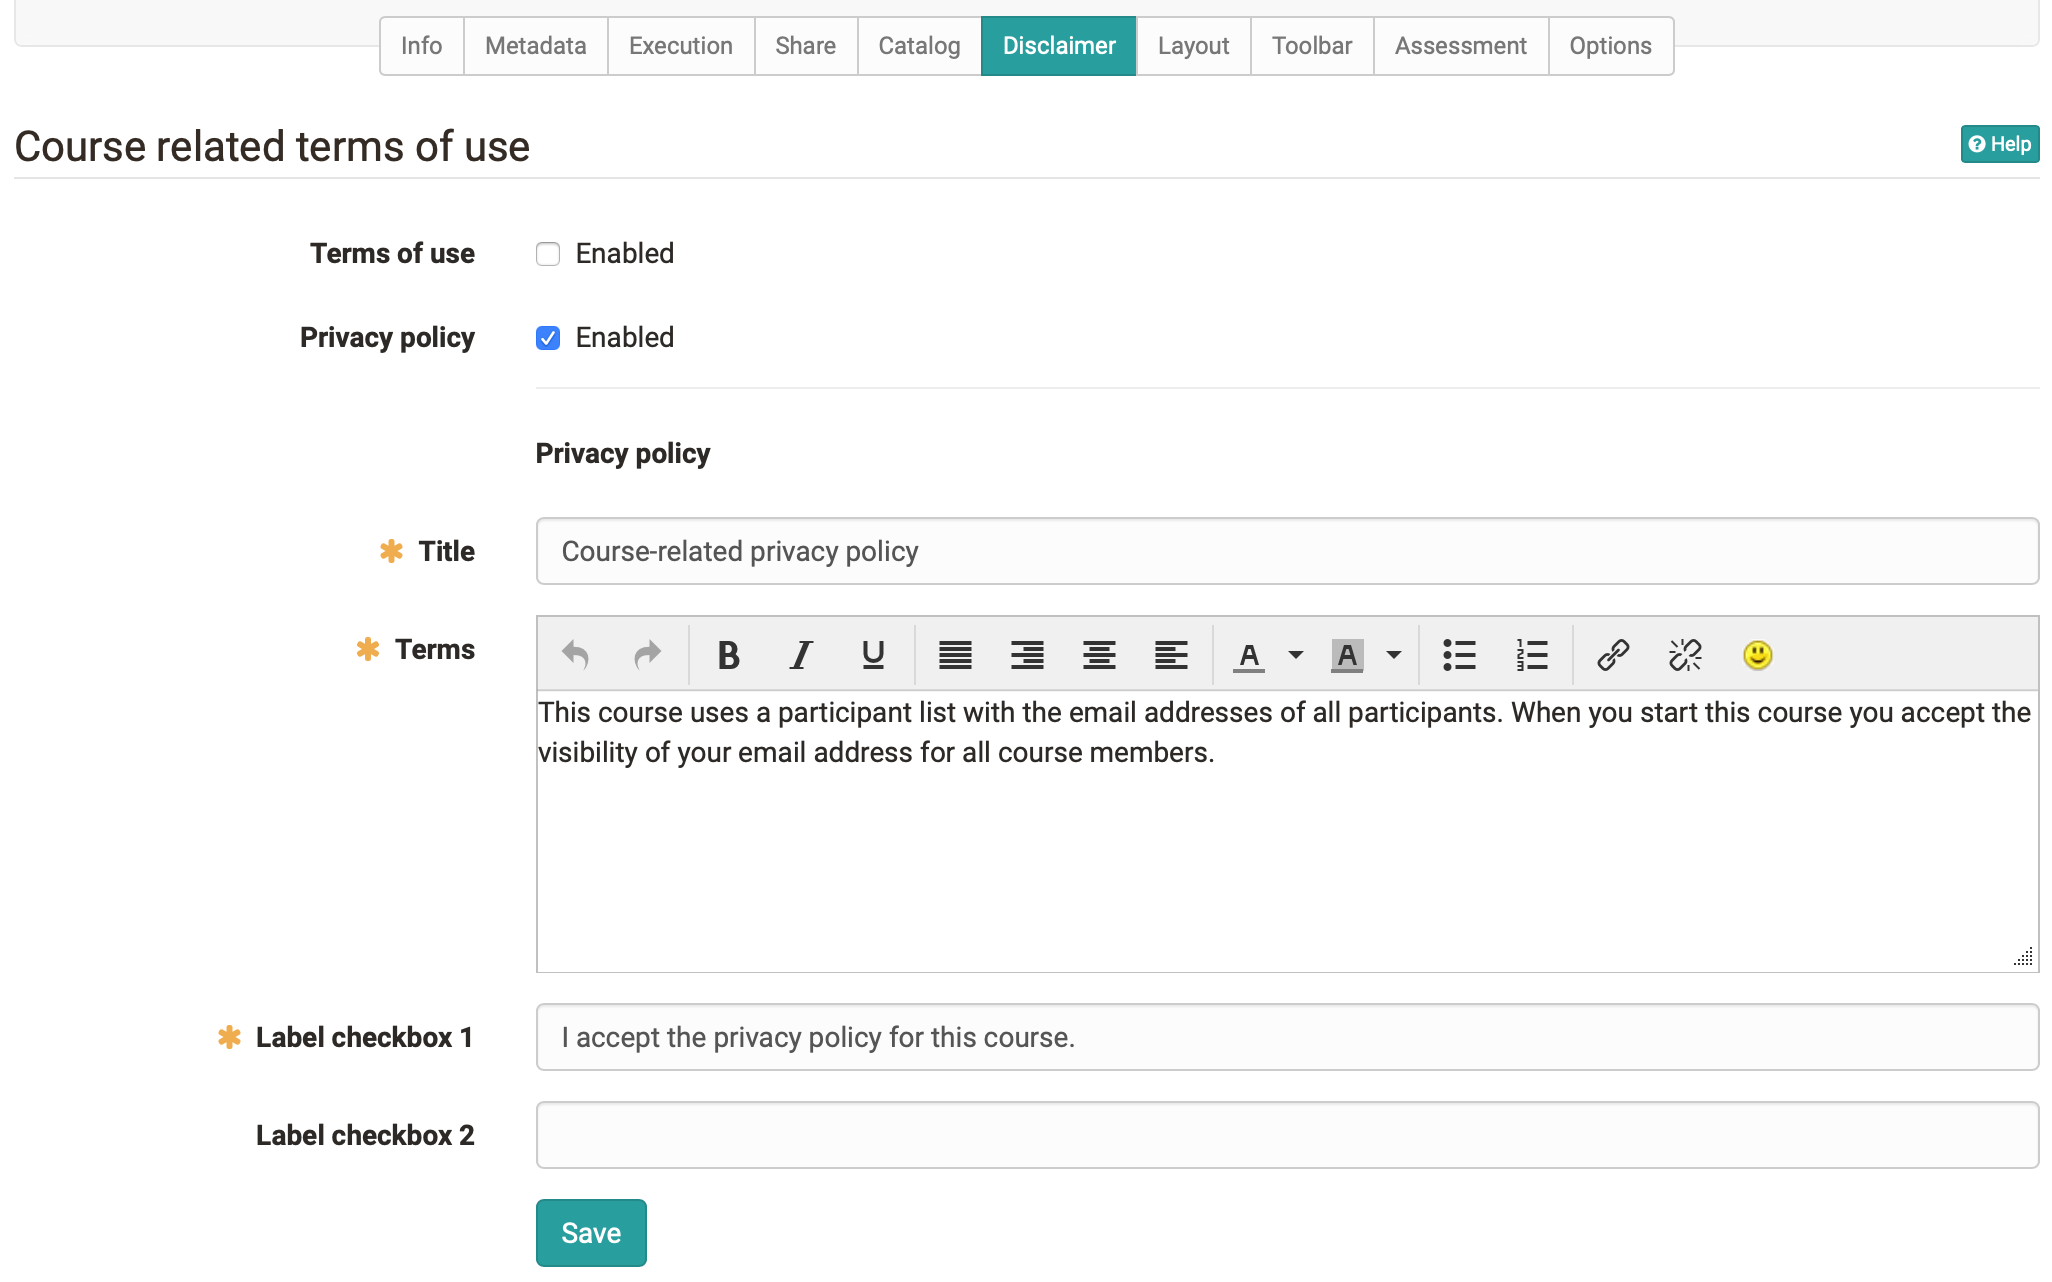
Disclaimer
Here you can activate and set course-related terms of use or a course-related privacy policy. If a person starts the course, he/she must first accept the conditions, otherwise access to the course is not possible. In the member administration you can see in the area "Consents" which persons have already accepted the conditions.
Layout
Under "Layout" you can select a layout template for a course, hide the left course navigation and also the bread-crumb navigation for participants. Depending on the settings by the course administrator, certain layout templates are available, but at least one default template. In addition, you can store your own CSS course templates in the course storage folder and link them in the Layout menu. For example, fonts and colors for texts, headlines, links, the menu and the toolbox can be individually designed and provided with a suitable logo.
In the section "Course element default style" you can define the default presentation of the course elements and, for example, upload a background image and define the style of the image as well as assign a color category. In the preview you can see the effects
Toolbar
Here you switch the toolbar and certain tools of the toolbar on or off. In this way, certain tools that are to be available continuously can be called up at a central location. In addition to course search, glossary and course chat these tools include various tools that can also be called up as course element, e.g. calendar, list of participants, e-mail, blog, wiki, forum, and documents folder. In the case of Wiki and Blog, it is also possible to fall back on learning resources that have already been created. The other tools are similar to the corresponding course elements, but do not offer the further configuration options as they are available in the course elements in the course editor.
The use of the tools in the toolbar is particularly important for linear learning path courses in order to make important tools available continuously and centrally, regardless of the sequential order of the learning steps.

Assessment
In this tab you can activate performance records and have a certificate generated automatically. If you activate the option "Use certificates of achievement", the option "Certificate of achievement" appears in the toolbar menu "My course" and the course participants see an overview of the assessable course elements with their current assessment status. If the option "Generate PDF certificate" was also activated, the received certificate will also appear here as soon as all conditions for a passed course have been fulfilled. You can also activate certificate creation in the "Assessment tool".
The according link will only appear in your course if there is also an assessable course element, and the course participant has received at least one automatic or manual assessment. This could be, e.g., a test attempt or the assessment of a task.
Evidences already existing will then no longer be visible. As soon as you offer this option anew your participants can dispose of their evidences along with new data. If you choose to delete a course that contains evidences of achievement your users will still be able to see their own evidences.
Generate PDF certificate
A PDF certificate can be used to confirm attendance of a course or achievement of course-related activities. A certificate can also be issued without the use of the evidence of achievement. You can choose whether the certificate is issued manually by the coach or automatically after passing the course. The selection "manual" allows you to use certificates in courses without assessable course elements. Whether and when a course participant has passed the course depends on the conditions specified in the course node in the tab "Score". If the certificate is to be issued manually, the coach can do this in the assessment tool in the performance overview of the individual users.
Users automatically receive an email notification as soon as a certificate has been automatically issued.
By default, certificates for a course are issued once only. If for any reason a certificate needs to be re-issued on a regular basis, e.g. for language certification, re-certification can be allowed. Select a given number of days, weeks, months or years for the period of time required before a new certificate can be issued.
To control the validity of a certificate the attribute certificateVerificationUrl needs to be added to the template. It allows to generate the certificate again later on, thanks to a QR code. It can then be compared with the already available version. If both versions are consistent, the certificate can be validated. However, the QR code for validation is only possible if you use an HTML form.
Usually, a systemwide PDF template, specified beforehand by an administrator, should be available. If however, you wish to utilize your own individual template, you can upload one in the Certificate template section. A PDF template though is no ordinary PDF file, but has to be either a PDF form created with e.g. Acrobat Pro or LibreOffice, or a HTML form.
With this certificate bot you can easily and quickly create certificate templates in HTML format. If you want to adapt the bot to your needs, you can use the repository with the public code (MIT license).
The form fields then must contain specific variables, which will be replaced by the system upon certificate creation with the respective values. All attributes can be used as variables. PDF templates use variable names without a $ prefix, HTML forms use a $ prefix.
In order to be able to format date-values there is the"dateFormatter"-object. It offers methods to format the "*Raw" formats. To just format a raw format there is the "formatDate()" function. To add a given period of time there is the formatDateRelative(Date baseLineDate, days, months, years) which adds the period given in days/months/years to the baseLineDate.
Allow re-certification: This enables the issuing of a new certificate after a specified period.
Tab Assessment for Learning Path Courses
For learning path Courses there are further configuration options in the tab Assessment. Here you define when a course is considered passed and whether or what kind of points are displayed.
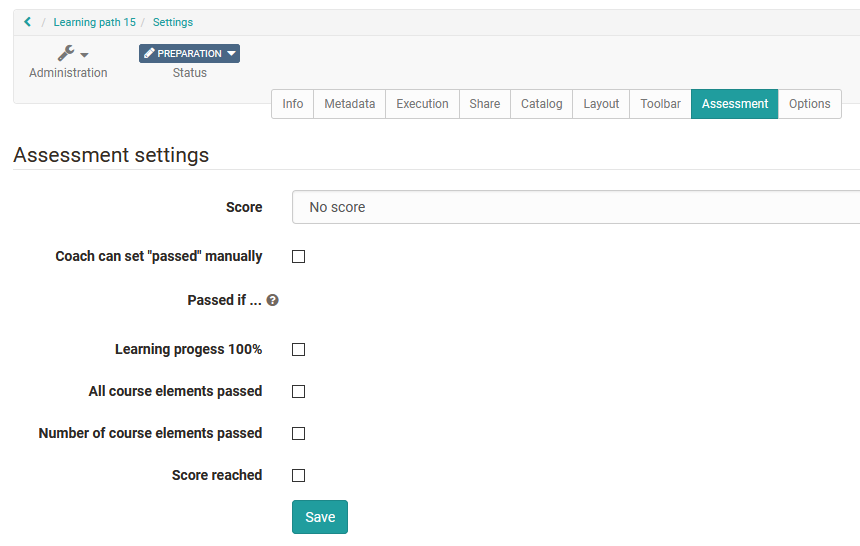
- Score: Here you can define whether or which type of points (total points or average) are displayed in addition to the percentage display in the course.
Define passed manually: In this case the course coach or owner can manually define in the assessment tool whether a course participant has passed or failed the course.
Learning progress 100 %: When all mandatory course elements have been completed and 100 % is displayed the course is automatically considered passed.
All course elements passed: A course is regarded as passed if all assessable course elements marked with "passed/not passed" have been passed, no matter whether the course modules are mandatory or optional. In order to exclude individual course elements you have to tick off "Ignore in course assessment" in the tab "Assessment" of the course element in the course editor.
Number of course elements passed: Here you can define how many course elements have to be passed in order to consider the entire course as passed.
Score reached: Here you can define how many points learners have to achieve in order to consider the entire course as passed.
The individual criteria are an "or-link". It is therefore sufficient if one of the criteria mentioned applies.
Only if sum or average has been selected under "Score," the tab "High Score" can be configured in the course editor.
For conventional courses, the criteria for passing a course are set in the course editor on the top course element and the result is displayed on the course start page.
Options
Here you can activate and configure a course-specific glossary and a resource folder. And so connect with your course as well as create a special folder for Coaches.
Include glossary
You can either connect to your already created glossary here or create a new glossary in the menu that appears. Once a glossary has been selected, it can also be activated in the "Toolbar" tab.
Including Resource Folder
Here you can connect a resource folder (learning resource) to a course and thus access the files stored in the resource folder. Here you can either connect to your already created resource folders or create a new resource folder in the appearing menu. The files of the resource folder then appear in the storage folder of the course in the automatically created subfolder "_sharedfolder".
By default in the course all files of the resource folder are read only and the edit of the files is neither in the storage folder nor in the course editor when embedding into a single page possible. If edit should be possible in the course, this option need to be deselected in the course settings at "Read only".
For more information or the step-by-step instructions on integrating a resource folder, click here.
You can only add one resource folder to a course. We strongly recommend to first define a general strategy: Which files should be stored in an overall resource folder, and which files are preferably stored in a storage folder within a course, respectively.
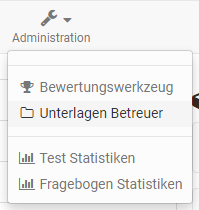
Enable Coach Folder
Furthermore, a course-wide folder for the Coaches of the course can be activated in the "Options" menu. All course coaches can then store, view, edit or delete documents in this folder. It is also possible to create subfolders in the configured area.
As location for the folder, either an already existing folder from the storage folder of the course can be selected or a new folder can be generated especially for the Coaches. If "Automatically generated folder" is selected, the coaches will not have access to any other files located in the storage folder of the course, while course creators or persons with access to the course editor will be able to see the coaches' files in the automatically generated folder "_coachdocuments" in the storage folder. This means that course owners always have access to the files of the Coach folder and can also use them for linking to certain course elements, e.g. a single page. On the other hand, Coaches will not be able to integrate files into the course structure even with the new folder.
In the Administration menu, the new submenu "Coach documents" appears for Coaches as well as for course owners.