Here you get an overview of the course elements that can be used for knowledge testing. For some course elements there are separate pages or chapters here in the manual.
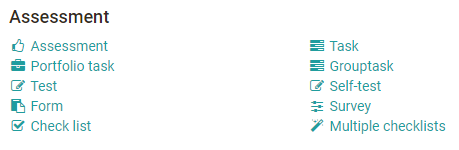
OpenOlat provides various course elements for knowledge testing. The central course elements for this are the two course elements for OpenOlat tests and the two course elements for submission tasks. But also the other elements such as portfolio task, assessments with and without evaluation grid (rubric) or the checklists offer a lot of potential for certain scenarios.
Most course elements in the assessment category can also be given points if required and then will be given the "Highscore" configuration tab. With the allocation of points, further features such as the addition of points or the passing/failing of a course based on the assessments of different course elements can be added. A course element structure is used for this.
Another configuration tab that is available for most assessment course elements (except for self-test and survey) is the tab "Reminder". Here, e-mails can be sent depending on the progress of the respective course element. For example, a mail can be sent if a task has not yet been worked on by a certain date. The possibilities are similar to those in the menu "Reminder" in the course administration for which you can find more information here.
The OpenOlat questionnaire or the course element Survey can also be found in the assessment category.
Course Element: Assessment
![]()
The course element "Assessment" is suitable for evaluating services which are not explicitly submitted electronically, e.g. presence presentations or online websites.
On separate pages you will learn how to set up, perform and configure an assessment.
Course Element: Task
Coaches can use the Task course element to organize actions and submission tasks. Learners upload their submissions to the OpenOlat course and receive feedback or assessment from the teacher. Revisions can also be requested. Sample solutions can also be provided using this course element.
The central configuration of the course element takes place in the first step in the tab "Workflow". Here you determine which of the following options you want to use:
- Is it a mandatory or optional exercise? Mandatory tasks have to be completed and will be collected after the set deadline and handed over to the coach for evaluation. In the case of optional tasks, the user can decide for himself if he wants to work on them. Furthermore, optional tasks are not collected after the deadline.
Task Assignment: assign tasks to course participants or groups.
Submission: Learners should have the opportunity to submit tasks. This is where course participants create their solutions or upload them in a PDF file format.
Review and Correction: this is where course participants will find their tasks corrected as well as requests for revisions.
Revision Period: course participants upload their revised documents in this element. You as a coach can place multiple revision requests until the task is considered completed and the revision process closed.
Sample solution: provide course participants with sample solutions of their tasks. You can either create them directly in OpenOlat or upload files.
- Assessment: create individual assessments for each course participant or for participants of a group as a whole.
How to create tasks step by step and further information on other configuration possibilities can be found in the chapter "Creating Tasks".
Course Element: Portfolio Task
In the tab "Evaluation" you can preconfigure the display of points, status passed/failed and individual comments. In the fields "Note for all users" and "Note for supervisors" you formulate general information for the evaluation to all course participants and coaches.
Further information on how learners can pick up and use a portfolio task can be found in the chapter "Portfolio task and assignment: Collecting and editing". How teachers can evaluate a portfolio task can be found in the chapter "Portfolio assignment: Grading".
How the portfolio component looks like from the students' point of view and how it can be solved can be found in the chapter "Learning activities in the course" under the item "Portfolio task".
General information on the subject of portfolios and e-portfolios can be found here.
Course Element: Group Task
![]()
The course element Group task functions largely like the course element Task. Only the following differences have to be considered:
When creating the group task, one or more groups to which the task is assigned must be selected in the tab "Workflow". Only these groups can then view and edit the task. As long as no group has been assigned, the course element is not visible when the editor is closed.
When the editor is closed, the tab "All participants" does not show the individual persons directly, but the assigned groups are shown, which can then be selected and evaluated. Within the evaluation process it can be decided whether the evaluation is valid for the entire group or whether the evaluation is only valid for a certain group member.
Course Element: Test
![]()
The course element "Test" integrates tests into a course. A test in a course is used to assess achievements and includes various question types. Depending on the choice of question types, it is evaluated automatically or manually. OpenOlat uses the IMS-QTI 2.1 format for tests, which allows exchange with other test systems and learning management systems that also support this standard.
If you have not selected any test yet, there will be a message saying No file chosenunder the tab Test configuration. Click on "Choose, create or import file" to add a test to the course element, or to create a new test, respectively. In case you have already selected a test the name of this learning resource will be displayed after Selected file. Click on the name to open a preview of the test. Click on "Replace file" if you would like to exchange the learning resource with another one. Further information can be found in the chapter "Creating Tests".
The two main tabs for test configuration are "Test configuration" and "Options".
The settings under "Options" are initially being copied from the options of the learning resource. However, the options can be adjusted if needed. To do so, open the tab "Options" and click on "Adjust configuration". You may now set a time limit, limit the number of attempts, allow guests to do the test, choose from various display options, etc. If the option "Show question title" is not selected while menu navigation is allowed, the navigation will only show "anonymised" titles, not the real titles.
Furthermore, you can set up an information text (HTML page) which will be visible at the test start page as "Information", above the "Start" button. To add a file go to the tab "Options" and click on "Select page" or "Create page and open in editor". You can replace the file later if needed.
Once you have selected a file, the security setting field is added to the display and you can allow links to files in the storage folder. This is useful, for example, if you want to link to other HTML files or graphics. However, this setting also means that experienced course participants can view the entire folder of the course.
Any test linked to a course can only be edited in your test-editor as long as there are no users launching and taking it. After that only typing errors can be corrected.
The test results of the participants will be personalised.
Course Element: Self-test
![]()
Like the "Test", the course element "Self-test" uses the learning resource Test and is configured and set up similarly. The main difference is that there is no option "passed/failed" and the tab "Highscore" is omitted.
In contrast to the course element "Test" self-tests are suitable to get practice; results of self-tests will be saved anonymously. Self-tests can be taken as often as needed. The course element "Self-test" contains learning resources of the type "Test." If you have not generated a test before please follow the instructions in the chapter "Four Steps to Your Test or Self-test".
For more information on tests, refer to the chapter "Creating Tests". The chapter "Tests at course level" is particularly relevant here.
Course Element: Form
![]()
Using the course element "Form" you can add the learning resource form to a course. The form works similar to the course element "Survey" and can also be filled out only once. However, with the form it is visible which participant has filled in what in the form. Thus, in contrast to the survey (at least in the standard setting), filling in the form is not anonymous. For the completion of the course element, a last deadline can be defined in the tab "Form". A course reminder can also be linked in addition. In contrast to the survey module, participants automatically receive a confirmation e-mail with the date and time of submission as well as their completed form as a PDF attachment when they submit the completed form.
Coaches can see in the overview table in the course run which participants have already completed the form and which have not. Forms that have already been submitted can be reopened by the coach for further processing by the participant, or they can be completely reset. By clicking on the participant, the completed form can be viewed. The form data of all participants are available as Excel export.
The use of this course element makes sense e.g. if the learners have to fill in certain forms obligatorily, e.g. before starting a laboratory internship or as confirmation for the independent performance of a service.
Course Element: Survey
![]()
With the course element "Survey" you can add an online questionnaire to your course. This can be used to carry out different types of online surveys. You can, for example, determine the expectations of the participants at the beginning of the course or evaluate the course offerings at the end of the course. By default, the results are stored anonymously. A questionnaire must first be created with the learning resource "Form" in the author area. If you have not yet created a questionnaire, follow the instructions in chapter "4 steps to your questionnaire".
Further information on the subject of questionnaires and surveys can be found in the chapter "Creating questionnaires" and the corresponding subchapters.
A formular linked in a course can only be edited completely in the formular editor as long as the page has not been opened. After that only typing errors can be corrected.
Note: If participants are currently running the questionnaire but have not yet completed it, their results will be lost.
Course Element: Checklist
![]()
The course element allows you to embed and evaluate checklists in the course structure. A checklist contains check elements with completed and uncompleted tasks or checks. The checklist can be used as an informational tool that helps users to complete smaller tasks or to keep information secure, for example, by maintaining attendance or to-do lists. It is the only module that the user or course participant can complete as a self-assessment.
You can also add several checklists at once. This procedure is useful if you need several identical checklists. Several (maximum of 12) modules with the same check elements are created and bundled with a structure module. A title is automatically created for each module, but changes are possible. Each module can then be given a specific submission date.
In this way, several checklists with identical check criteria but for different groups, for different objects to be checked, for different event dates or for checking the same object at different times (development) can be created relatively quickly.
Further information can be found here.
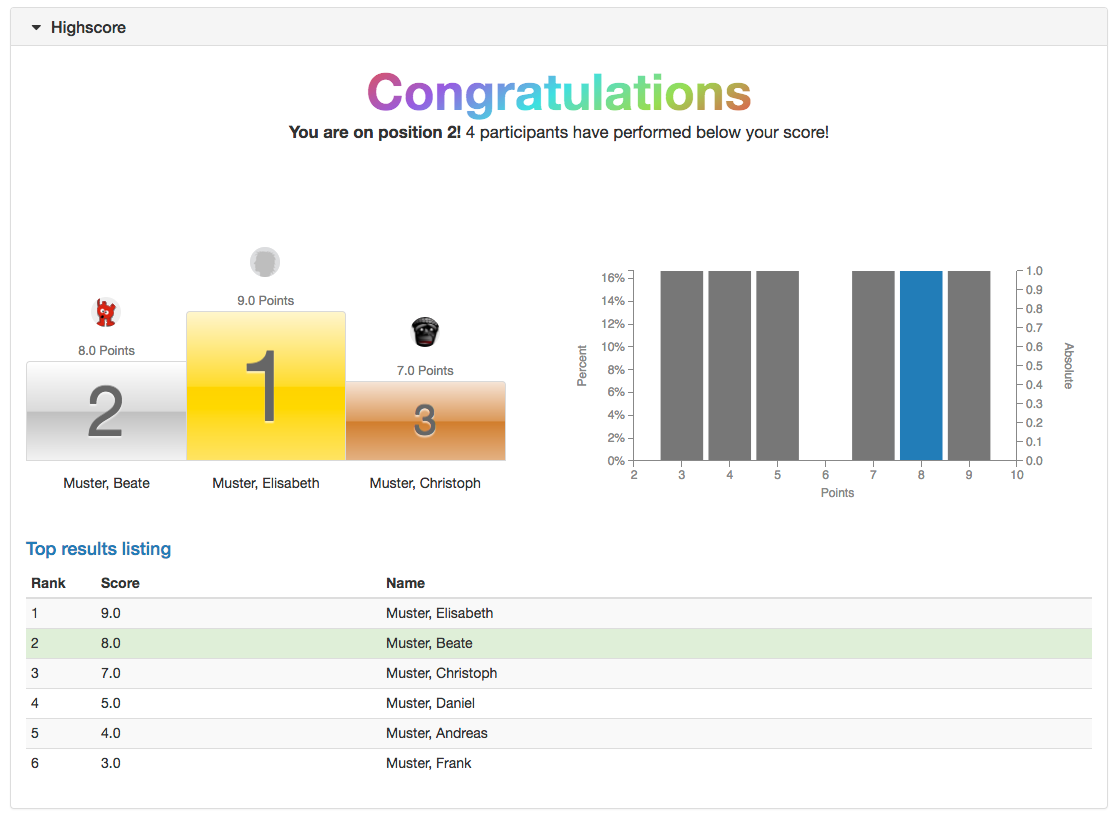
Highscore
The highscore can be added for all assessable course element as well as for structure elements.
The highscore makes a playful comparison between test participants possible and can be seen as motivational factor. The prerequisite for using the "Highscore" tab is that points are awarded for the selected block (e.g. test, task, evaluation).
First "Show Highscore" needs to be enabled. Optional a starting date can be added. Upon this date the highscore will be shown. Otherwise the highscore is shown directly after finishing the test. Afterword it can be defined, if the user data is shown anonymized or with pre and last name. In the next part it can be chosen, which elements of the highscore should be shown. There is the choice between congratulation title, podium, histogram and top result listing. For the listing it can be defined additionally, if all users or only a certain number should be shown. At least one of the above options need to be selected.