Wikis can be used for the cooperative creation of texts. The individual pages are implemented in the form of a hypertext with linked pages.
If a Wiki is used in an OpenOlat course the Wiki menu and further Wiki links will automatically appear in the left course navigation. By clicking on the link "From A-Z" you will call up the table of contents displaying all Wiki pages. This way you can see at a glance which pages have already been created.
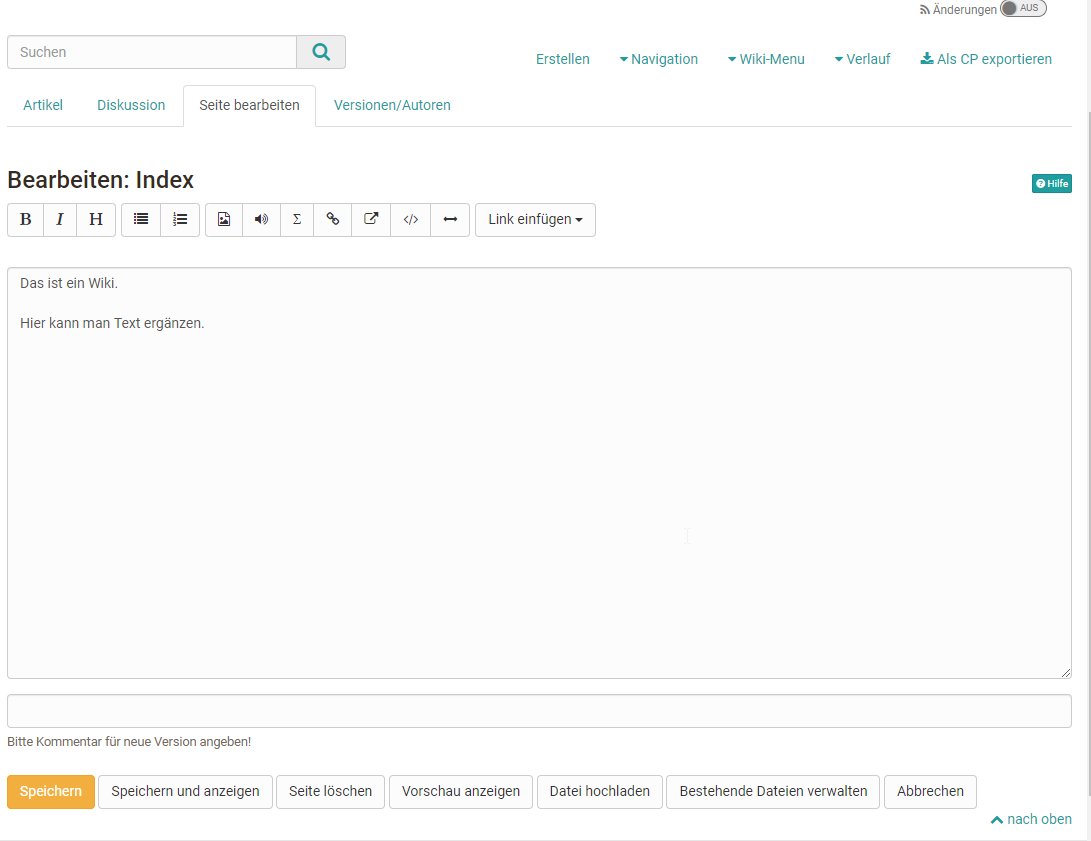
In the main area you will see the respective Wiki contributions (articles), you can edit the Wiki pages (Edit page), lead discussions to the individual Wiki pages, and view the editing history (versions/authors). You can also export a Wiki as a Content Package (CP) and be informed about changes.
Create new Wiki pages
A new wiki page can be created simply by clicking the "Create" button and then filled with content. It should be noted, however, that the page created in this way has no connection to the entire Wiki structure at first. In order to establish a connection, appropriate links should be created in the "Wiki-Menu" and/or on the "Index" page of the Wiki.
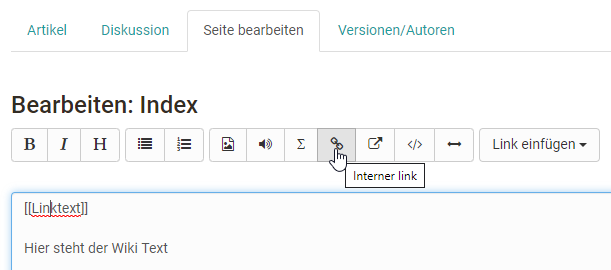
Another way to create a new wiki page is to create an appropriate internal link on the page where the link to the new Wiki page should appear. You can either use the corresponding button of the Wiki editor or enter the appropriate syntax directly.
Wiki syntax for new internal links: Two opening square brackets + page names + two closing square brackets. Example: [[link name]]. The corresponding page will then be created automatically when the link is first called.
Modifying the Content of a Wiki Page
To edit and add content to a Wiki page, select the "Edit page" tab of the desired Wiki page. The Wiki editor appears with various formatting options. Here you can also integrate images, media links, mathematical formulas, internal and external links into your Wiki. In addition to the buttons in the editor, there are further formatting options that you can insert directly in the text as syntax elements.
The Wiki syntax is explained in more detail below.
Wiki Syntax
Your input can be formatted by means of the following Wiki syntax.
Attention:
It is not advisable to use special characters in Wiki words. Not allowed is the colon (:). Please note that a space character at the beginning of a line will be interpreted as formatting command (pre-formatted text).
| Syntax | Result (formatting) | ||||
|---|---|---|---|---|---|
Text design | |||||
| '''Bold text ''' | Bold text | ||||
| ''Italic text'' | Italic text | ||||
| ==Level 2 headline== | Level 2 headline | ||||
| * List |
| ||||
| # Numbered list |
| ||||
Links | |||||
| [[Internal link]] | Internal link | ||||
| [[Link | Text]] | Text | ||||
| An external address will automatically be turned into a link by indicating its complete address: http://www.openolat.org. If you do not want to use a link but a term you have to put the URL along with the term in brackets, separated by a blank. | |||||
| http://www.openolat.org | http://www.openolat.org | ||||
| [http://www.openolat.org The OpenOlat website] | The OpenOlat website | ||||
Tables | |||||
{| | Cell 1 Cell 2 | ||||
{| | Cell 1 Cell 2 Cell 3 Cell4 | ||||
{| border="1" |
| ||||
Images and other files | |||||
| In order to insert e.g. images in your Wiki you have to upload them first in OpenOLAT (by means of the field Upload file). As soon as a Wiki contains at least one file the drop-down menu Insert file will appear. Now you can easily insert images, etc. | |||||
| [[Image:openolat_logo_72.png]] | |||||
| When inserting an image the following options regarding its formatting are possible: | |||||
| Caption: please indicate a caption. [[Image:openolat_logo_72.png|This is the OpenOLAT logo.]] |
| ||||
| Alignment: the add-ons "left" or "right" indicate the image's alignment. [[Image:openolat_logo_72.png|right]] | |||||
| Size: indicate in pixels the image's size. [[Image:openolat_logo_72.png|120px]] | |||||
| Miniature: By selecting the add-on "thumb" along with a small image size your picture will be inserted as miniature. When clicking on that miniature your image will be displayed in full size. [[Image:openolat_logo_72.png|thumb|20px]] | |||||
| It is possible to use more than one of these formatting options at the same time. [[Image:olat_logo.png|right|30px|thumb|This is the OpenOLAT logo. ]] | This is the OpenOLAT logo. | ||||
| [[Media:any.pdf]] | any.pdf | ||||
Mathematic formula (LaTeX) | |||||
| <math>Enter formula here</math> | A syntax of the mathematical notation used in OpenOLAT can be found at: http://meta.wikimedia.org/wiki/Help:Formula | ||||
Unformatted text | |||||
| <nowiki>Enter unformatted text here</nowiki> | Enter unformatted text here | ||||
In order to add a file you have to upload it first via "Upload file" at the bottom of your page. Navigate to the relevant position on the Wiki page. Then select your file via "Insert file" and click "Save." Links to other Wiki pages will be set by means of the button "Insert link". You will find further formatting options one line above.
You can create a link in a Wiki page to files in a folder course element by clicking on the the metadata icon . Copy the External link to this resource in the next step. Please bear in mind that you can only link to files which are located in a subfolder of a folder course element.
The Wiki can be exported and saved as IMS Content Packaging by all participants via the corresponding link. Authors can also re-import an exported CP into OpenOlat.
If a wWiki is to be exported directly as a Wiki, this is only possible by the owner of the Wiki directly in the learning resource via the menus "Copy" or "Export content". Course participants do not have that option.


