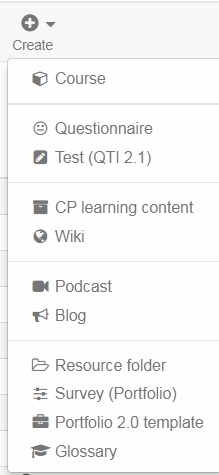
As author you will find two icons on the top left: "Create" and "Import". A mouse click on "Create" opens a drop-down menu.
Create
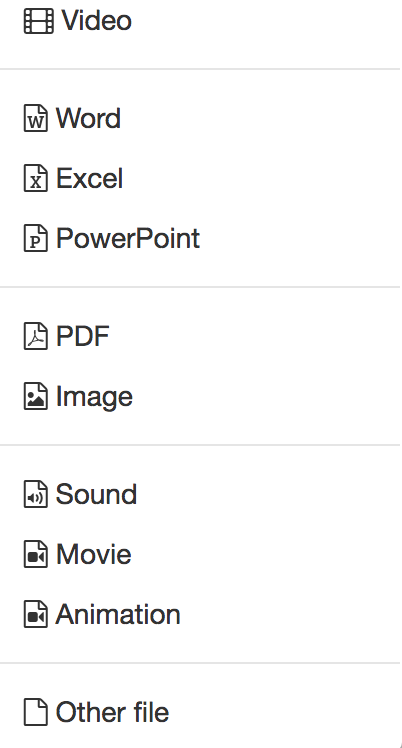
Here new OpenOLAT courses and further learning resources are created. The following learning resources can be created in the authoring directly:
How to use various editors will be further explained in the chapters "Creating Courses", "Creating CP Learning Content", "Creating Wikis", "Creating Podcasts", "Creating Blogs", "Creating Portfolio Tasks", and "Creating Tests and Questionnaires".
Furthermore the listed learning resources can be created directly in the OpenOLAT course, except the survey (Portfolio).
If you build your courses systematically and if you want to use your learning resources in several courses, you should better created the learning resources in the authoring.
Import
Learning resources generated outside of OpenOLAT can be imported if they have a format that is compatible. Suitable formats have been commented on in the section "Various Types of Learning Resources".
You can import into learning resources from your computer. Select "Import" and follow the instructions. If you want to import an entire course you will be asked if you want to import its referenced learning resources (e.g. a Wiki or a test) as well. Select the checkbox if you want to do this. Publish the course to complete the import and make the course available to you and other OpenOLAT users for further use.
Licenses
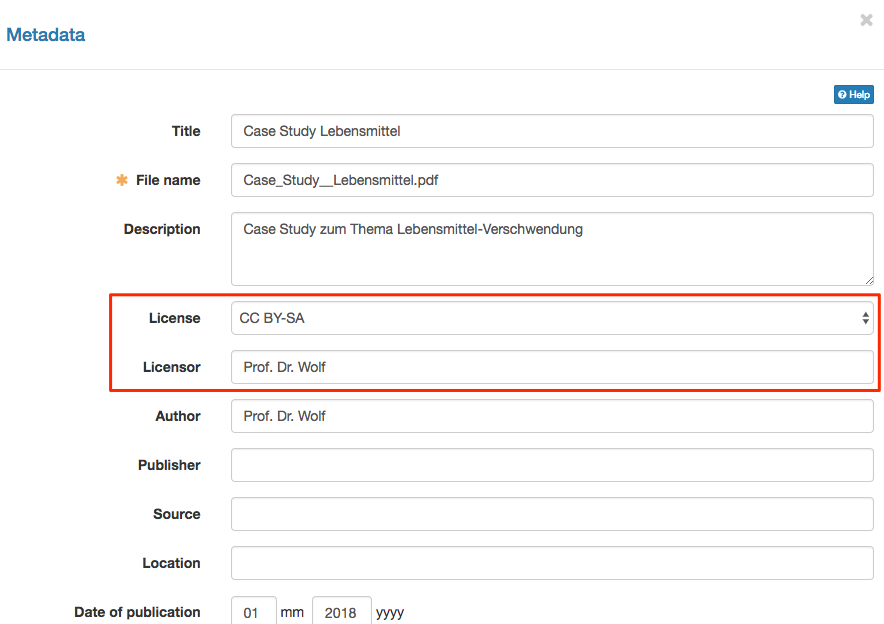
When uploading learning resources such as pictures, text, audio and video files within the authoring section a license and a licensor can be assigned in the metadata. All for the authoring section available licenses are listed.
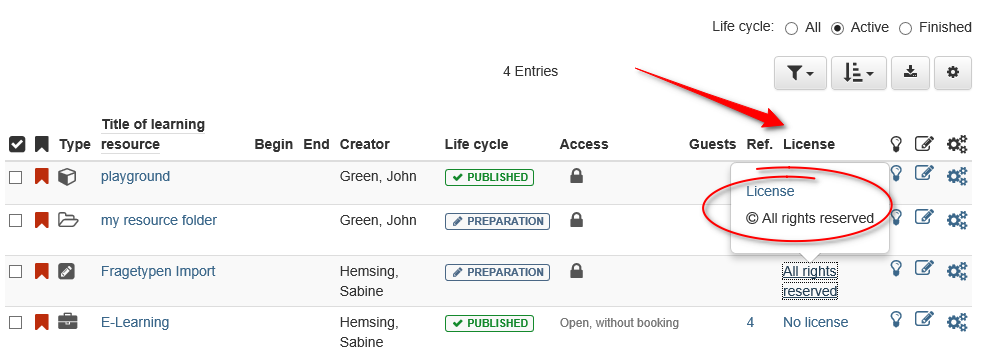
In the corresponding overview in the authoring section all assigned licenses will be shown in the column «license». By clicking on a license, detailed license information will be displayed.
In general, by selecting the desired columns, you can decide which information is displayed under "Favourites" or under "My Entries" in the authoring area.
Edit
You will get to a learning resource by clicking on the title of that learning resource in the list. The infopage opens with . If your learning resources can be edited (e.g. courses, glossaries, CPs, blogs, podcasts, tests or questionnaires) the icon "Edit" will get you to the corresponding editor.
The following actions are available in the "Tools and actions" menu:
Change infopage
Opens the form for changing the content of the info page. For further information please refer to the chapter "Course Settings ", section "Change infopage".
Catalogue entries
Create new catalogue entries or edit existing entries. For further information please refer to the chapter "Course Settings", section "Catalog entries".
Members management
Opens the members management of the respective learning resource. For further information please refer to the chapter "Course Operation", section "Using Course Tools"
Copy
Copy learning resources for re-use in a new semester or create a safety copy. For further information please refer to the chapter "Course Settings", section "Copy".
Export Content
Export your learning resource as ZIP file for example as back-up or for the export in another system. For further information please refer to the chapter "Course Settings", section "Export Content".
Delete
A learning resource can only be deleted if it is not used within a course at that moment, and only by its owner. For further information please refer to the chapter "Course Settings", section "Life cycle: finish/delete".
Further actions
Below the learning resources some actions can be selected automatically. Additionally it is defined, how many entries should be shown per page and it can be switched between the pages when there are many learning resources.
Send E-mail
With this feature e-mails can be sent to members of several courses and learning resources at the same time. Chose the desired learning resources by selecting the checkboxes on the left. A wizard opens. Now it can be defined to whom the e-mail should be sent. Possible recipients are course owners, course coaches and participants. You can send e-mails to all courses visible to you in the authoring. These are for example courses which are visible for all authors. This means you do not need to be a member of this certain course to use this feature.
Add owners
If a user should be added as owner to several courses learning resources this feature can be used. Choose again the desired courses and then search for the desired user. Also severals users can be added as owner at once.
Copy
All learning resources can be copied. Copied learning resources will be found in the tab "My entries" after. The supplement "(Copy)" is added to the title. The title can be changed as desired.
Delete
Learning resources can also be deleted together. Then the learning resources are not deleted definitely. They can be found in the tab "Deleted" and are there only visible for the corresponding owner. The owner of the deleted learning resources can restore the deleted learning resources. The OpenOLAT system administrator can restore deleted learning resources as well and can also delete them definitely.


