The following steps describe how a portfolio template is created.
| Step 1: Create a template | ||
|---|---|---|
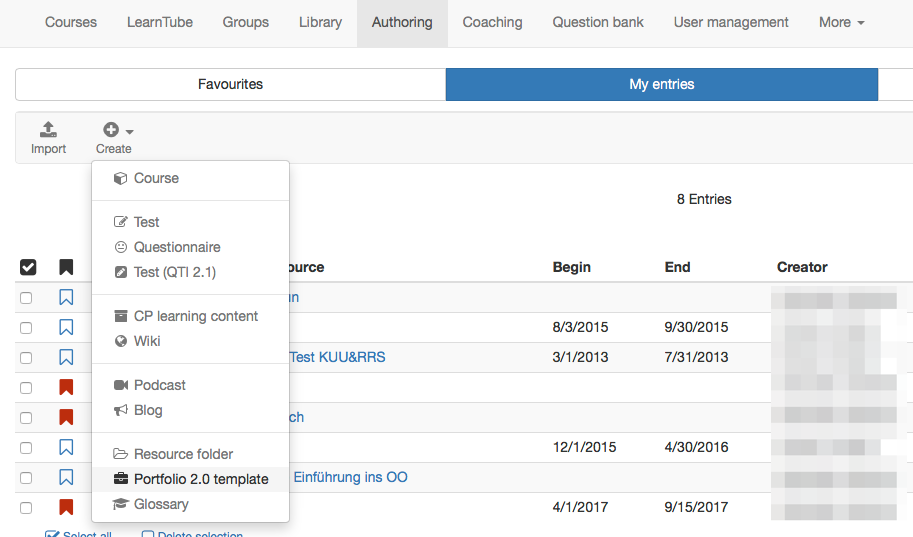
| 1 | Select in authoring "My entries" and "Create" the learning resource "Portfolio 2.0 template".
|
|
| 2 | Insert the title of the learning resource and create. | |
| 3 | The now opened "Change infopage" needs to be closed with X on the top right to start | |
| Step 2: Open course editor and insert the course element Portfolio task | ||
|---|---|---|
| 1 | Search for the corresponding course in authoring "My entries" and open it. |
|
| 2 | Click in the dropdown menu "Tools" on "Course editor". | |
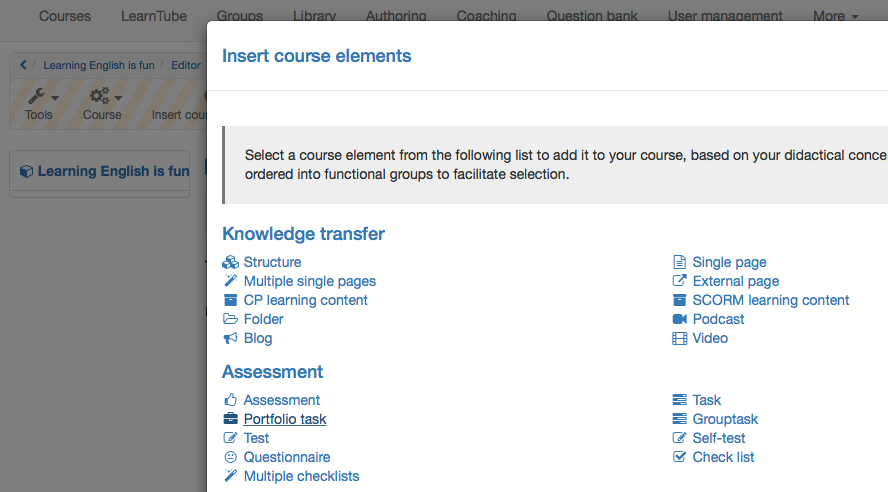
| 3 | In the pop-up "Insert course elements" chose "Portfolio task".
| |
| 4 | Insert a short title in the tab "Title and description" and save. | |
| Step 3: Add template to the course | ||
|---|---|---|
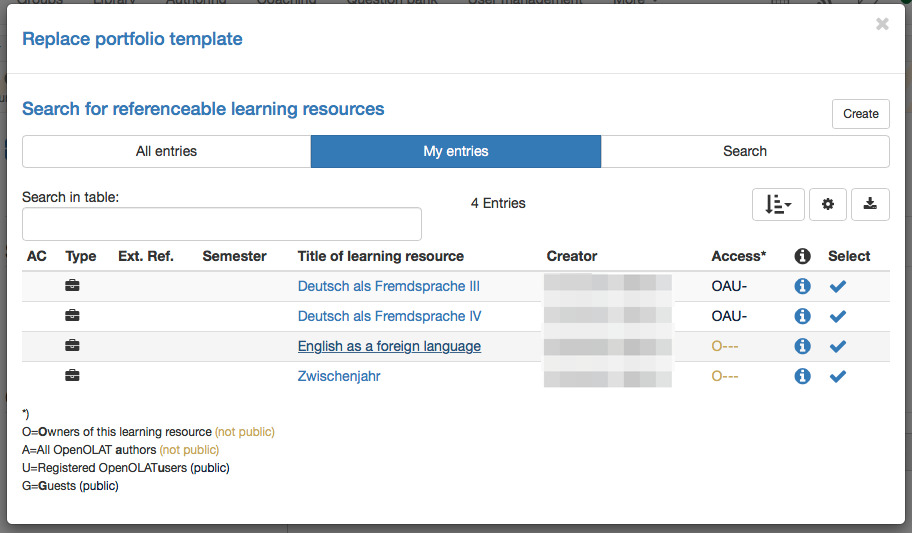
| 1 | In the tab learning content "Select or create portfolio template"
|
|
| 2 | In "My entries" select the template just created before.
| |
| 3 | Alternatively a new template can be "Created". | |
Hint
To assess a portfolio, it needs to be added to a course and the assessment in the course element needs to be activated.
| Step 4: Publish the course | ||
|---|---|---|
| 1 | Select "Publish" on the top in the toolbar.
|
|
| 2 | Review the course element and click "Next".
| |
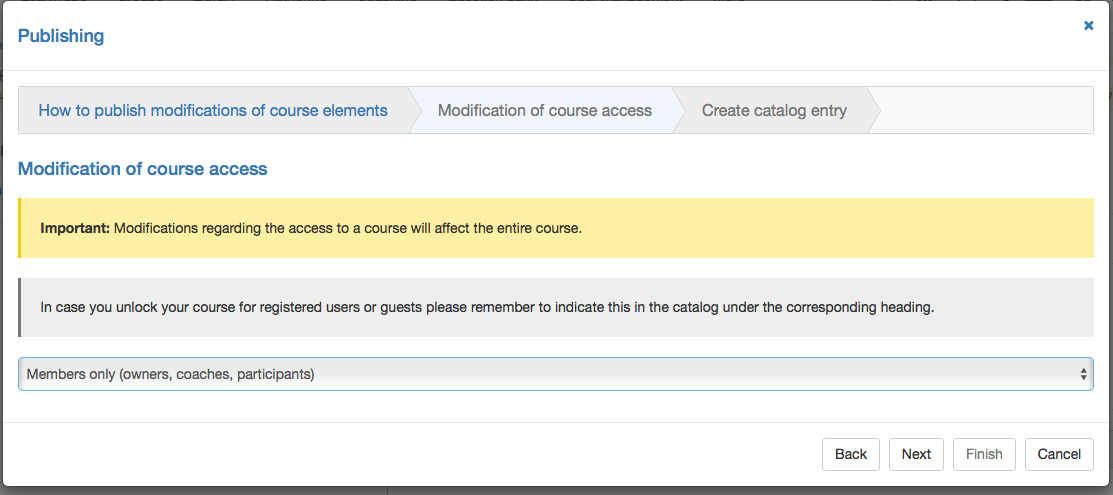
| 3 | In the pulldown in "Modification of course access" chose e.g.
| |
| 4 | Click "Finish". | |
The portfolio template is now embedded and the participants can collect the portfolio task.
