In the personal menu every user gets access to his portfolio via the link "To my binders" to his portfolio folders.

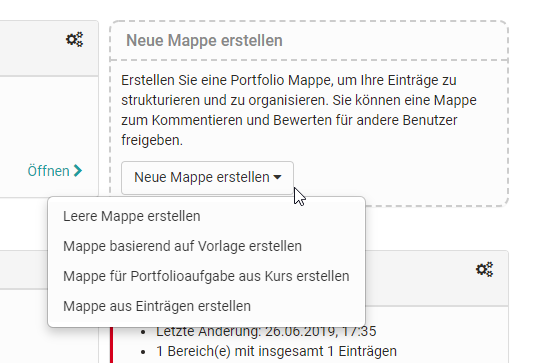
Furthermore, new portfolio folders can be created here under "Create new folders". Via the gear icon the existing folders can be moved or exported as CP. In a folder directly there are also further export options like PDF export and export to a page.
Attention there are two places under "My Folders" where new folders can be created. Once on the top right (see previous screenshot and integrated into the page. This second option offers more creation possibilities for the portfolio folders.
2 types of folders
There are basically two types of folders:
Collected binders
You can recognize the retrieved folders by the red border and the reference to the corresponding course. These folders are based on a "Portfolio 2.0 template" and are usually created by another person, usually the teacher. The collection takes place in the course via the "Portfolio Task". Alternatively, it is also possible to book and collect portfolio templates independently of the price.
As soon as a portfolio folder has been collected by the learner, it appears in the "My binders" area of the respective collector.
When a user opens this folder, he/she can select the tasks stored there (free text or form type) and edit the portfolio activities provided by storing various artefacts (texts, files, etc.) or filling in a form.
Hint
By default it is not possible to create own entries in a collected binder. But all contents of the media center can be inserted into an entry.
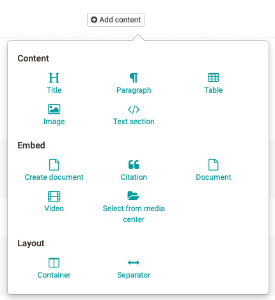
The "Add content" button takes you to the Portfolio Editor. Here various elements can be added and also grouped with the container element. By clicking on the plus sign, further blocks can be added and moved via drag and drop.
As an alternative to adding content, already created portfolio entries can also be linked via the "Reference content" button. Changes to the entries are then possible at all referenced points.
Self created binders
In general, all OpenOlat users are allowed to create their own portfolio binders with sections and entries.
Info
The possibility to create own binders can be restricted by your administrator.
You can find out how to add content to the portfolios in the chapter "Three steps to your portfolio binder" and "The Portfolio Editor".
(move the following content to a sep. file)
Contents
To every entry different contents can be added.
The Portfolio Editor corresponds in large parts to the form editor.
Citation, video and images are added to the media center and can be edited only there. Editing is only possible as long as the entry, to which the media file is linked, is not yet published!
Content
Title
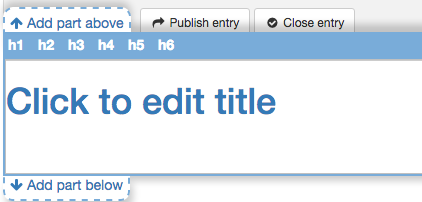
Every entry can contain of several titles and subtitles.
With h1-h6 the heading can be selected. h1 is according to the heading 1 and is therefore the tallest one and h6 is according to heading 6 and thus the smallest one.
Paragraph
Element to add text blocks. The paragraph element contains central formatting and the possibility to distribute the text to columns.

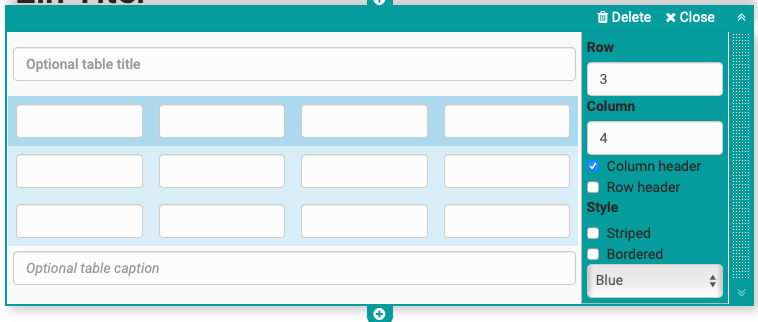
Table
Add a table to your portfolio. Define the number of rows and columns in a table and make further settings.
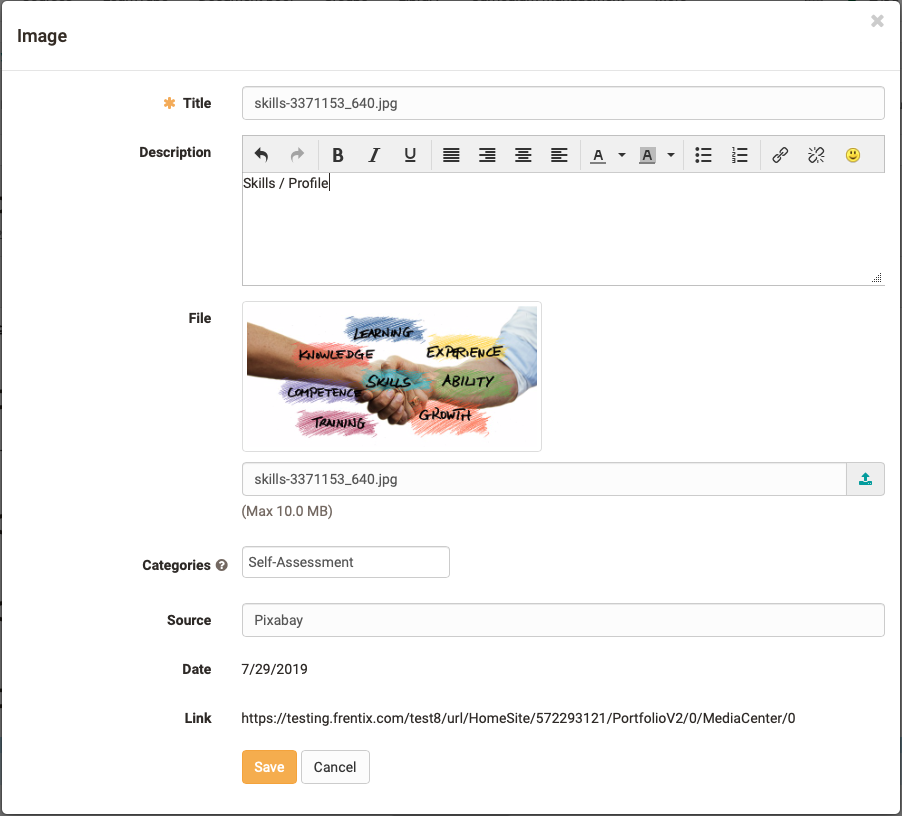
Image
Add picture elements to your portfolio. Upload a suitable graphic file. Then you can further configure the file, e.g. place a title or subtitle and also define the size, placement or border.
The positioning can also be further optimized by using the container element.
Text section
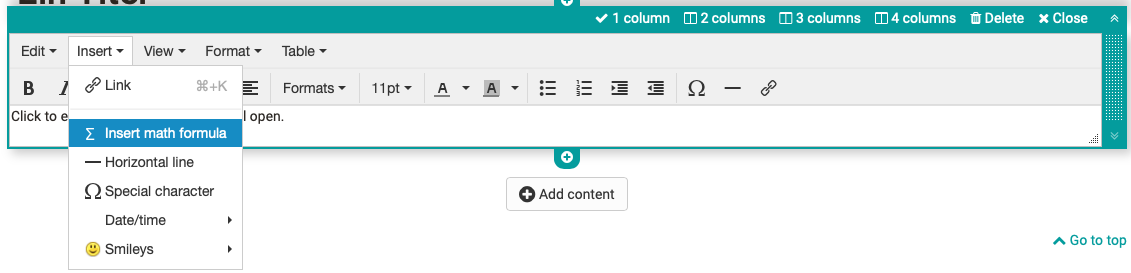
With the help of the html-editor a "normal" text can be added. The common formatting is possible.
With "Insert" a math formula can be inserted as well.
Embed
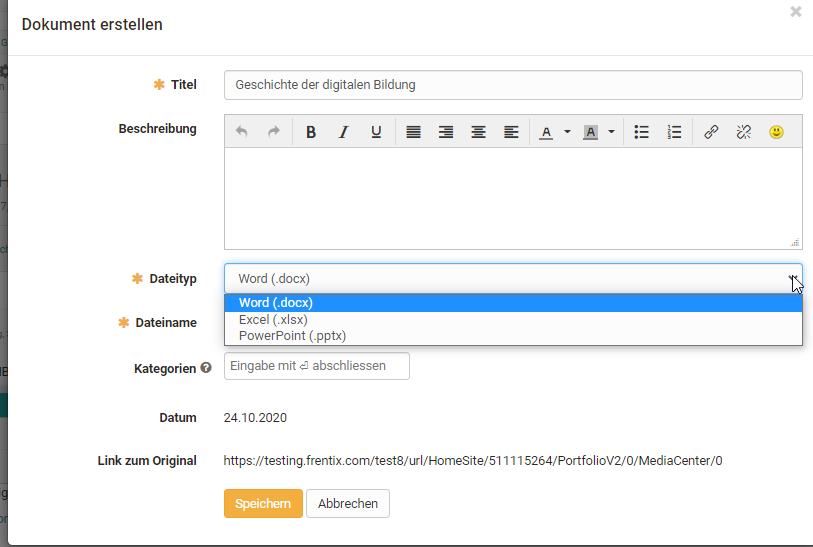
Create document
Here a new document can be created according to the specified file types. If, for example, OnlyOffice is used, the created files can also be edited directly online.
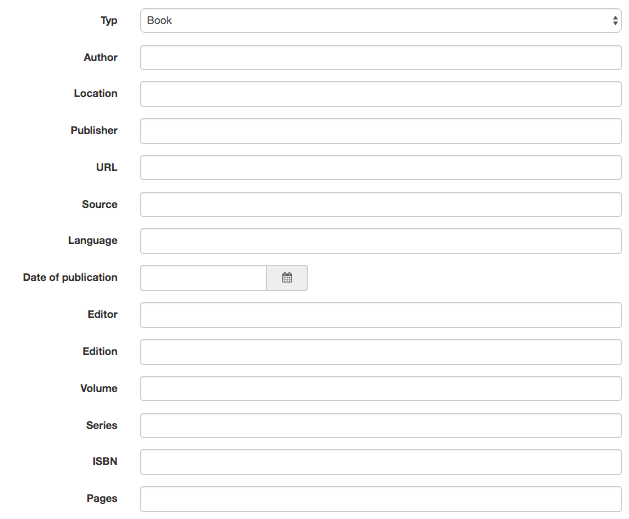
Citation
A quotation can be added directly in the entry, as well as in the media library. First select the appropriate type of quotation and then fill in as many fields as possible.

Document
Various file formats can be uploaded here and provided via link.
If an external document editor is activated and the files are available in a format that is supported by it, the files can also be edited directly online.
Video
Videos can be uploaded to the portfolio via this link.
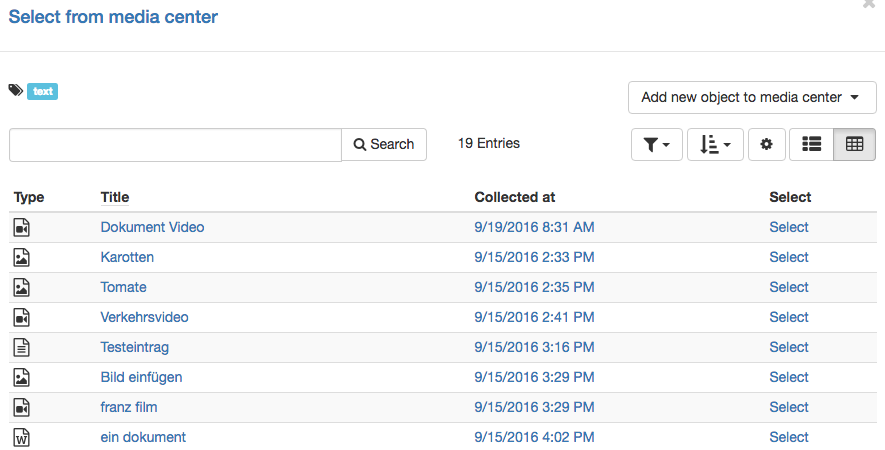
Select from media center
Files, which can be found in the media center, can be added to the entry with this button. The search and filter options help to find the desired files faster.
Layout
Container
Containers can be used to further structure a portfolio. A 1-4 column layout is available. Nesting within a container field is also possible.

Separator
With the help of a separator a page can be divided graphically. A grey line is created, which cannot be formatted.
Further configuration
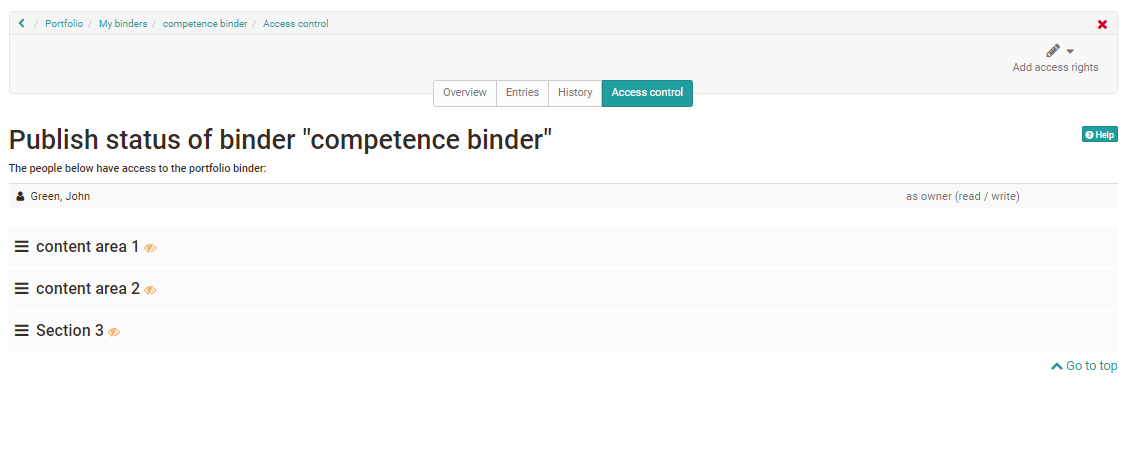
Neben dem Tab "Überblick" enthält die Portfolio Mappe noch die Tabs "Einträge", das "Änderungsprotokoll" sowie die "Freigabe".

Timeline
With the help of the timeline the user gets a graphical overview about his activities in the portfolio. The colored points show the creation date of a section. With a "Left button click" on a point you get details about the corresponding entry. The different colors show the respective status of an entry. The timeline can be helpful if a portfolio is used over a certain time period, e.g. a semester or a year.

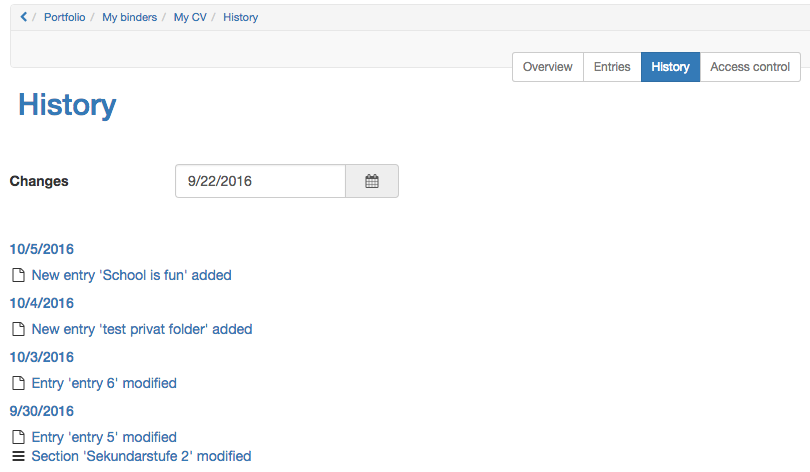
History
All changes are listed in a chronological order in the history. The latest change is always on top.
Access control
Access rights can be added in the access control. Further information can be found here.