Course Element: Enrolment
The course element "Enrolment" is used to let course participants enroll in one or more groups. You can also define the order of the groups in the selection list.
To do this, define in the "Configuration" tab in which and how many groups course participants can enroll. You can also define the order of the groups in the selection list. If you have not yet created any groups or need more, you can do so directly in the "Configuration" tab by clicking on "Select" and "Create". Existing and newly created groups can be edited in the member management.
Use the field "Allow multiple enrolments" in order to allow course participants to enrol in more than one, and if so how many, groups.
In the field "Delisting allowed" you can decide if a registered course participant should have the possibility to delist from a group. In the group management you can determine while editing groups if there should be a waiting list and if moving up automatically from that list should be possible.
If you have previously created one or more learning areas in the administration and assigned groups here, you can also access these learning areas in the "Configuration" tab of the enrollment course element.
Course Element: Notifications
This course element allows you to embed notifications in your course structure. These notifications will be visible in your course as well as in the notifications section of each single user. The message can either be a short info text or an extensive information which is added as attachment (max. 5 MB). During the creation of the notification it can be defined, if the message should be sent by email to certain user groups of the course (subscribers, course owners, coaches, members, groups) additionally.
Display: The maximum number of days determines how long notifications shall be displayed in your course (in days). The maximum number of messages determines how many messages shall be displayed simultaneously in your course.
Subscribe automatically: By default this course element will be automatically subscribed. This option can be deactivated here so that course participants will be able to subscribe to notifications manually.
Messages from notifications course elements can be viewed using the subscriptions tool in the personal menu. Course authors (in a course) can determine the amount of notifications that should be displayed in a course.
By default only course authors and moderators are allowed to create messages. However, all course participants may read messages. In the tab "Notification configuration" you can adjust this setting according to your wishes.
The number of characters for the message is limited to 32,000. You will receive information about the number of characters already used in the lower right corner of the message editor. If the permitted number of characters is exceeded, a corresponding message is displayed. Note: The number of actual characters specified differs from the number of visible characters, as the actual number of HTML code is used.
An element with similar functions, but without specific configuration, can also be found in the toolbar. This is the "Participant Info".
Course Element: E-Mail
By means of the course element "E-Mail" you provide your course participants with the possibility to send an e-mail to pre-defined recipients.
There are two possibilities to send messages. You can either select the pre-defined groups of recipients you want to send a message to in the tab "Recipients" or you directly indicate your e-mail addresses. You can select whether you wish to address owners, coaches and /or participants of either course, groups or both.
Distribution to owners/coaches/participants: By checking this box you those member groups you would like to send a message. When selecting coaches or participants, chose in a second step whether you wish to address all members, or either course or group members. (if no box is checked, no mail is sent).
In the fields "Subject (form)" and "Message (form)" you can optionally pre-define default values to be edited later on by your course participants when sending e-mails.
In addition, the message / subject can be designed with the use of variables personal and course-related.
An element "E-mail" with similar functions, but without specific configuration, can also be found in the toolbar.
Course Element: Calendar
By means of the course element "Calendar" you can embed a course calendar in the course structure. It is also possible to add several instances of the same calendar to the course.
This course element offers an alternative view on the course calendar to be found in the course toolbar (see "Using additional course features"). Only course authors and moderators are allowed to create calendar entries by default. However, all course participants are able to read entries.
In the tab "Calendar configuration" you can define whether participants and tutors of a course may also set and edit calendar entries. Also you can decide which date should be displayed when a course calendar is activated from the course structure. Course calendars will automatically be added to the personal calendars of the course members.
When displaying a certain semester week in your calendar and inserting links on course elements, that calendar will serve as a kind of overview showing all events and tasks of that week.
Check whether the course element "Calendar" is really the optimal choice for you. In many cases, especially with learning path courses, it makes more sense to activate the calendar in the toolbar in the settings.
Course Element: Appointment scheduling
![]()
The course element Appointment Scheduling can be used to organize enrollments for specific appointments as well as to find appointments. In general, you can configure whether multiple appointments can be selected, whether there is a limit to the number of participants, whether participants can see who has registered and whether a BigBlueButton room should be assigned.
In the course editor, the course element is added and it can be determined whether coaches can also edit occasions and appointments or whether this is only possible by the course owners. If the choice of appointments should only be possible within a certain time window, the time specifications in the course editor must be specified accordingly in the tab "Learning path" or, in the case of conventional courses, the visibility or access must be configured appropriately.
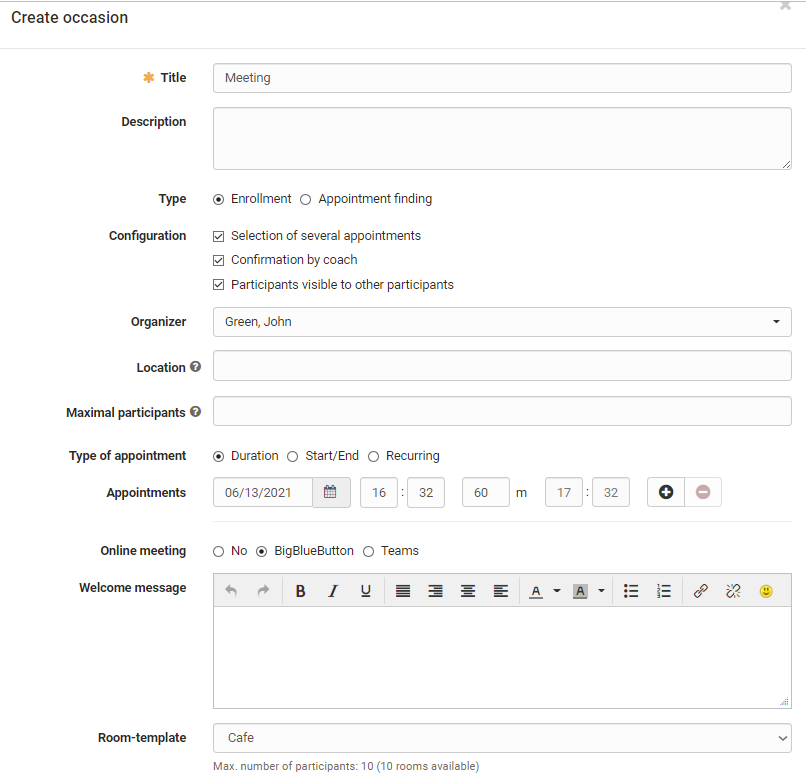
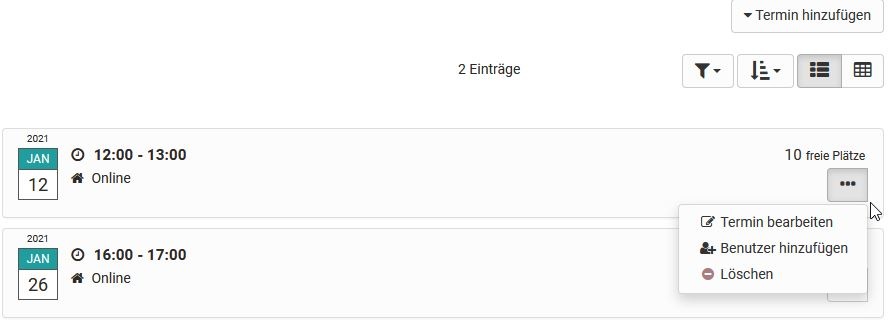
However, the actual configuration and setup of the dates is done in the course run with the editor closed. For this purpose, a new enrollment or appointment is first created via the button "Create occasion" and the basic configuration is carried out as well as appointments are entered.
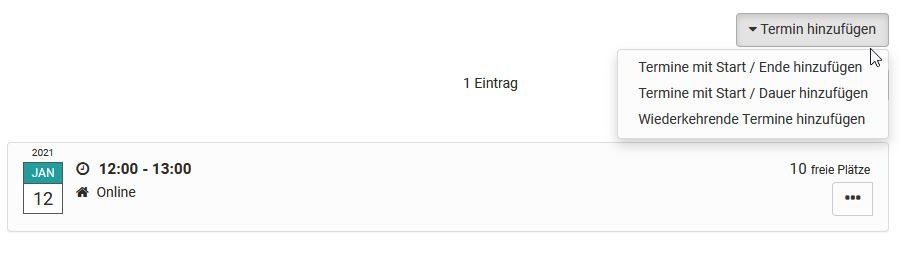
Via the button "Add appointment" you can also add further appointments to this voting later. Also, already created appointments can be revised again via the three-point link.
Menu "Create occasion"
A created "occasion" can later be edited, duplicated or deleted by clicking on the cogwheel. The number of participants for the event can also be restricted to certain groups. An export of the participants for an event is also possible.
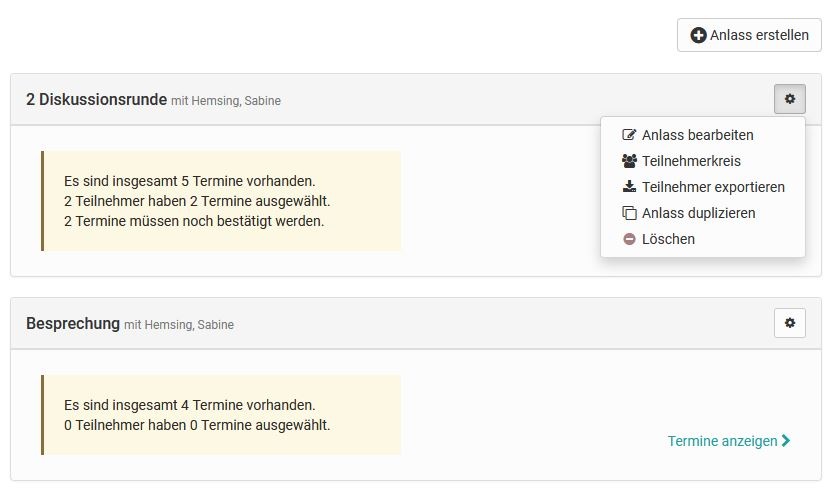
The specific dates of already created schedules can be viewed in more detail via the "View appointments" link and edited by the course owner or coach. Here you can add, delete, rebook participants, adjust the description, change appointments or confirm appointments.
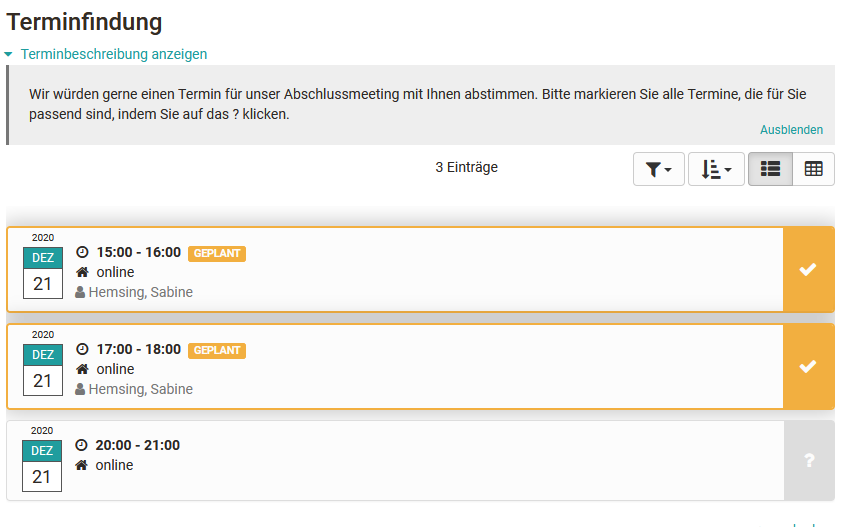
Participants can use the "Select appointments" link to see and select the appointments they want. If an appointment has been confirmed, this is also visible.