In the following you will get a list containing the most important course elements you can use for your course. Perhaps you want to use several course elements of the same type or you want to use other terms for that elements. For your orientation please refer to the icons to recognize the element's type.
Enrolment
In some courses you have to enroll first. There are one or more groups to choose from. Select the link "Enrolment" to become a member of a group. Depending on the configuration, you can either enroll in only one group, or several. Such an enrolment is followed by the appearance of links to the respective groups in the drop-down menu "My course" in the course toolbar.
Perhaps the number of members is limited per group. If there are no more vacancies you can have the possibility to put your name on a waiting list depending on the configuration. You will automatically move up as soon as a group member leaves that group for good.
Most of the time you can delist from a group you have registered before. If this is not the case the group coach has not permitted to delist oneself; you will have to contact that coach if you do not plan to participate any longer.
Forum
![]()
The forum is used for exchanging information among the course participants or discussions with the lecturer about the course content. Also it can be used specifically for asynchron communication.
Upload a photo in your " profile". Instead of a standardized image your personal photo will then appear next to your forum entries.
Opening a Topic
If you want to write a new message in your forum just select "Open new topic." Title and contribution are mandatory. You can also attach a file. It is possible to edit or even delete your message later on--provided that no one has already sent a reply to your message.
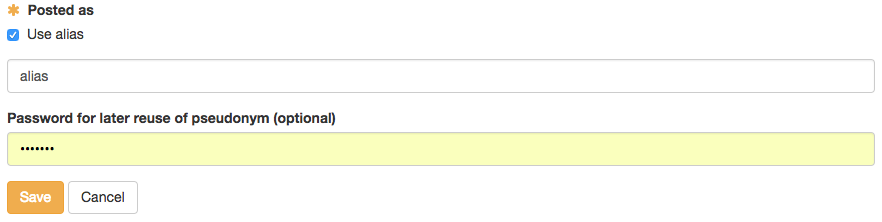
Topics as well as forum entries can be posted using an alias, if the forum is configured accordingly. Each topic or post can thus be posted using a different alias or your real name. A created alias is activated for the selected forum, but can be altered or deactivated if so required. If you want to avoid that anybody else is using the same alias you can protect it with a password. Reset the password or delete an alias can only be done by an administrator.
Answering Forum Contributions
If you want to reply to an existing message in a forum just open its topics by clicking on its title. Then select "Reply with quotation" if you want the original message to appear underneath your contribution. Select "Reply without quotation" if you only want your message to appear. You can attach a file as well. It is possible to edit or even delete your contribution later on.
Mark Forum Message
Forum messages can be marked with a flag. In order to do that, click on the little flag in the right upper corner of a message. The topic overview shows the number of marked messages per topic.
Moderating a Forum
It is possible that the instructor will set up more extensive moderation rights for you. If you have moderation rights in the forum, you can learn more about this aspect in the chapter "Communication and Collaboration".
Archiving a Forum
When archiving a forum any contributions will be zipped along with their attachments before storing them in your personal folder.
Subscribing to a Forum
In order to be kept informed on new forum entries you should select "Subscribe" in the overview of topics. Then you will get a notification by e-mail or in your "Subscriptions" in the "Personal Tools" section. It does not matter whether a new post was posted by a registered OLAT user or a guest.
A notification is only sent if a new post has been created, but not if an existing post has been modified.
File Dialog
In the file dialog course participants can discuss a certain document, e.g. the draft of a seminar paper, a picture or a concept. There is a forum to each uploaded document.
Uploading Files
By default course participants can not upload files. This option must be activated specifically by the course owner. To transfer a file, choose "Upload file". The columns Last name, First name and Date list who uploaded which file and when. To view an uploaded file just click on the file name and it will open in a new window.
Opening Topics and Answering Forum Contributions
In order to take part in discussions just click on the link "Show" next to the file name. Now it is possible to open new topics or to reply to contributions as stated in the section "Forum".
Subscribing to File Dialogs
To be kept informed on new documents in file dialogs just click on "Subscribe" on the overview page. You can also subscribe to each dialog and its corresponding document. Modifications will get to you by e-mail or you will see them in your "Subscriptions".
Test
A test is meant for efficiency controls within a course. Its result will be stored and the course author is able to assign it to the corresponding person.
Click on "Start" to begin with the test. According to its configuration you may pause and continue later on. It depends on the test's settings if you can cancel it without storing any results achieved so far. Finally click "Finish test" to save your results. All these options are available in the form of buttons on your top right.
The course author decides how often you may take that test and how often you may try each single question. According to the configuration of the test it is allowed to use the navigation or not. If not, you will have to respond to one question after the other.
It is also the course author who determines when and how detailed you will get your test results.
When finishing or cancelling your test you should click on the button "Close" on the upper right to get back to that test's homepage.
Self-test
Contrary to tests, results of self-tests will be stored anonymously. Self-tests are suitable for practicing and can be taken as often as you like.
Click "Start" to begin with your self-test. Similar to tests it is the course author who determines the self-test's configuration.
When finishing or cancelling your self-test you should click on the button "Close" on the upper right to get back to that test's homepage.
Questionnaire
Questionnaires are used for evaluations or opinion polls. Each questionnaire can only be filled in once. Its results will be stored anonymously.
Click on "Start" to begin with your questionnaire. Similar to tests it is the course author who determines the questionnaire's configuration.
When cancelling your questionnaire you should click on the button "Close" on your upper right to get back to that questionnaire's homepage.
Wiki
Wikis are suitable for easily creating joint content. Each Wiki has a homepage, the so-called index, a Wiki navigation, as well as the tabs "Article," "Discussion," "Edit page," and "Versions/authors" on top of its content. Further information about the wiki can be found here.
Podcast
A podcast provides information in the form of audio or video files. These so-called episodes can either be accessed directly in OpenOLAT or they can be subscribed to before being uploaded by means of online services such as iTunes. After that you can copy them to your mobile device.
In order to create new episodes you have to be authorized by a course author. Click then on "Add episode" to create a new podcast episode.
Each OpenOLAT user has the right to comment on episodes and to assess them by means of 1 - 5 stars. In order to write a comment or read other comments you should click on the link "Comments."
Subscribe to the RSS Feed of your podcast if you do not want to miss any new episodes.
Blog
Similar to a podcast a blog serves to provide new content. You can include text as well as pictures or movies in your contributions.
Each OpenOLAT user has the right to assess or comment on blog entries. Such entries can be assessed by means of 1 - 5 stars. It is also possible to see assessments of other blog readers. In order to write a comment or read other entries you should click on the link "Comments."
Blog entries can only be created if a course author has provided his authorization. Just click on "Create new entries" to write a new blog entry.
You can either publish this entry directly, determine a date for its publication or save your entry as a draft.
Subscribe the RSS Feed of your blog if you do not want to miss any new entries.
Folder
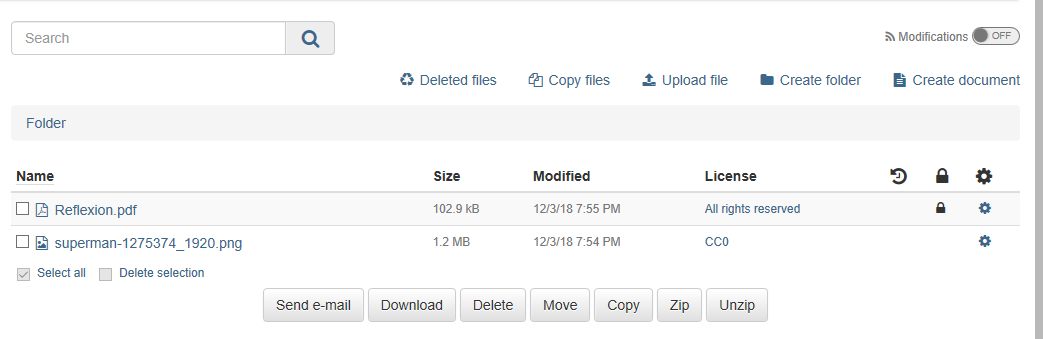
In folders courseware is stored. In general only course authors are allowed to upload files; course participants can only read files stored in folders. Subscribe to a folder to be notified in the case of new documents. Modifications are sent to you by e-mail or can be found in your "Subscriptions".
If course participants are also allowed to upload files they will find a corresponding link on their top right. In order to store those files in a structured way it is possible to create subfolders. If you are allowed to upload files you will also be able to delete files in folders. If you want to prevent others from deleting your files you should click on the icon "Meta data" in the tab containing all files in folders before locking your file. Locked files are marked with a lock.
In addition to course folders, learners also have access to Personal folders, which can be used for individual learning independently of the course.
Assessment
The assessment feature is suitable for evaluating achievements not handed in electronically. The course author or tutor can assess a presentation with passed/failed, a score or with an individual comment.
Task & Group Task
By means of the course elements Task and Group Task you can provide exercises to be handed in electronically before being assessed by a tutor. It may be that you cannot see all the steps mentioned below since it is not necessary to use all features for a task. The workflow interface for both Task and Group Task is the same. The task assignment, submission of documents and grading are performed as a group. A group member selects then - acting as group representative and in agreement with the whole group - a task, and submits the solution as well as any - if so required - revisions.
Download Assigned Task
According to the configuration there are either one or more tasks at your disposal in the step "Assignment" or a task will be assigned to you automatically. If the title of a task file is linked along with several tasks it is possible to first have a look at a task before selecting it. If there is only the „Select" link it is not possible to have a look at it first. If a task has been selected or assigned automatically click on "Download task" to see it on display.
In order for you to get an automatically assigned task, you need to open the respective OpenOLAT course element once before the deadline, if there is one in effect. You can download the task anytime.
Submit Solution
If you have performed a task and have the solution available as PDF file, you can transfer it to the drop box in the „Submit“ step. If so configured though, you will also have an internal editor at your disposal, for creating and saving a solution file directly in OpenOLAT. Click on „Open Solution Editor“ if available. Enter a file name and create your solution content. You can save and edit the document before the final task submission. You will then get an acknowledgment of receipt. The now marked as completed submission step lists all submitted files. You may read all, but not delete any files.
If the task assignment step is configured, you must mandatorily be assigned - either manually or automatically - a task, in order to be able to submit a solution.
Download Review
In the „Return and feedback“ step you will find those files your tutor has returned to you. It is possible that you are required to revise your your work. If so, the next step „Revision phase“ is now activated. If you are not required to revise your solution, you will soon have access to your assessment.
Revise Solution
Once your revised solution is finished, follow the directions from „Submit Solutions“. During the revision phase you may be required to revise your documents multiple times. As soon as your tutor regards the task as completed, he will close the revision phase. You can see and access all documents submitted by you and returned by your tutor at any given point in time.
View Sample Solutions
It is possible to add a sample solution to your task; the course author can determine when that sample solution will be visible. In any case, the sample solution will only be visible after your coach accepted the submission of your solution. Just click on the file name to download a sample solution.
Read Tutor Assessment
Assessments can vary. You can assess by means of passed/failed, by means of a score or by means of an individual comment.
Checklist
As an informational tool, the checklist assists users to complete small tasks or keep valuable information secured. It enbables the coach to keep e.g. attendance or todo lists.
Achievements, unfinished tasks, correct or false answers - checklists make them visible and thus assessable for the coach.
This allows for example to document tasks from outside of OpenOLAT and make them assessable, too. You might find information concerning the assessment on the element page if this is the case.
You find the checklist below the assessment information and the due date. A checklist cannot be edited after its due date. The checklist itself contains the description, the score and possibly files for download. If a checkbox is grayed out, it's either because it can only be checked by your coach or because or the submission date has already expired.
Portfolio Task
In the course element "Portfolio task" you can collect the task assigned by the course author and then edit the provided template and fill it with artifacts (texts, images, reflections, etc.). In this way, learners can, for example, document and reflect on their learning process or make edits over a longer period of time.
Just click on "Collect portfolio task" to have a look at that task before embedding required entries into predefined folders. If a course author does not set any limitations you will be able to configure your folder as you like. It may be that the author has defined a certain deadline that should be kept in mind.
After collecting your portfolio tasks you will find them under "Portfolio 2.0" "My portfolio binders."
To hand in a solution, publish your assignment and give access rights. Further information to the editing of a portfolio task you will find here.
Topic Assignment
In the topic assignment topic authors provide others with topics e.g. for writing term papers. Depending on your configuration you can either select one or more topics, upload files and look at files returned to you by the topic authors. Perhaps you will not be able to see all the sections mentioned below since in your topic assignment not all features are active.
If you are authorized by the course author to act as topic author you can announce a topic. For further information on accepting and supervising participants please go to the chapter "Course Elements and Course Editor," section "Topic author".
Selecting Topics
As course participant you will see any announced topics in a table. When clicking on that topic's title you will get further details regarding dates or links to files attached.
Depending on your configuration you can choose between one or more topics. The course author is the first to determine if your selection should be accepted or if the person in charge has to accept your application as a start. As soon as your selection is definite you will see a corresponding entry in the table. On your top right you will find a link to your group with the title of your topic. You can only deselect a topic if the person in charge allows it for the respective topic. In case of an existing registration deadline, topic deselection will be deactivated after the deadline in any case.
Uploading Files to the Drop Box
Click on the topic's title. In the tab "Folder" you will find the drop box. Depending on your configuration you will only be able to upload files within a certain period of time since there is a deadline to meet. For further information on deadlines please go to the tab "Description."
Downloading Files from the Return Box
In the tab "Folder" you will find files in the section "Return box" the topic author has returned to you.
This function is a kind of contact form. By means of an e-mail you can get in touch with your course author. Just fill in the field "Subject" and "Message" before sending your e-mail via OpenOLAT.
Calendar
The course element "Calendar" offers an alternative view on the course calendar that can be selected on your right in the box "General." A course author can predefine a date for your calendar view, e.g. a particular week, and appoint a time for certain events during that week.
Virtual Rooms
The course elements vitero, OpenMeetings and Virtual Classroom allow you to embed virtual rooms into a course. The type of virtual room element included depends on the system chosen by your administrator. Most likely, only one of the three course elements mentioned above will be available, if any.
A virtual room allows you to work online with multiple individuals simultaneously (synchronal), that are geographically separated. A virtual meeting room facilitates communication via chat, video and audio as well as screen and file sharing. Upon entering or opening a virtual meeting, a new browser window pops open. Depending on the deployed virtual room software, you have either one virtual room for the whole OpenOLAT installation that needs to be managed accordingly, or you have one virtual room for each separate course element at your disposal.
The course element offers the following range of functions
OpenMeetings | vitero | Virtuelles Klassenzimmer | |
|---|---|---|---|
| User | Enter virtual room & View recordings | Open meeting | Open virtual classroom |
| Author | Close room, Manage members & Room configuration | Meeting administration | Moderate virtual classroom, Close meeting & Meeting synchronisieren |
In order for you to be able to make use of the full functional range of the virtual room, you will need a headset and a camera connected to your computer. You might need additional software to be installed temporarily.
Participant Folder
Here learners can make files available to the instructors and also receive feedback from the instructor via the return folder. Points or passed/not passed will not be processed.
