Just follow the instructions below to create a simple test in no time before embedding it in your course and activating it for your participants.
Starting with version OpenOLAT 13, questionnaires created with the questionnaire editor up to OpenOLAT version 12.x can only be imported. The new learning resource "Survey" is now available for creating new questionnaires.
| Step 1: Open course editor and insert course element | ||
|---|---|---|
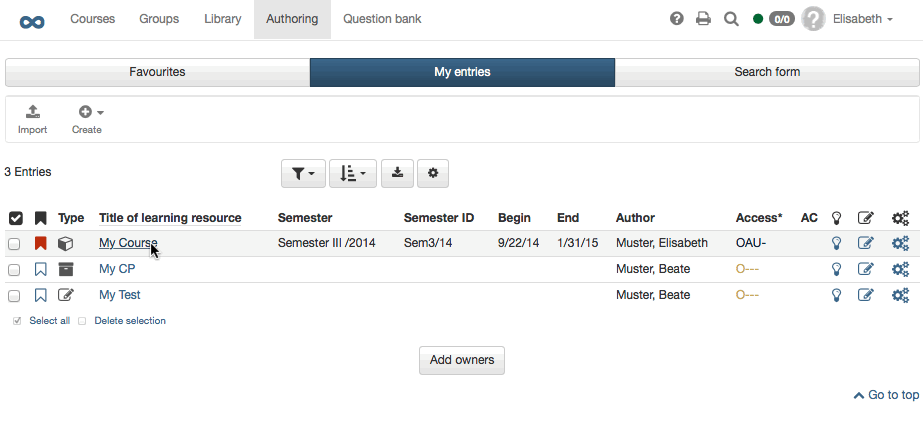
| 1 | Search for your course in "Authoring", section "My entries," and open it. | |
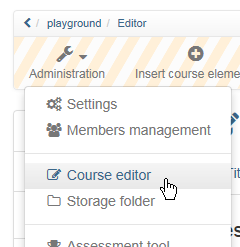
| 2 | Click "Course Editor" at the top of the Administration drop-down menu. | |
| 3 | Select position at which your test, self-test or questionnaire course element should be inserted by clicking on it. | |
| 4 | Select "Test," "Self-test" or "Questionnaire" in the pop-up "Insert course elements" in the toolbar. | |
| 5 | Indicate a short title for your course element in the tab "Title and description" and save your settings. | |
| Step 2: Create a test or questionnaire file | ||
|---|---|---|
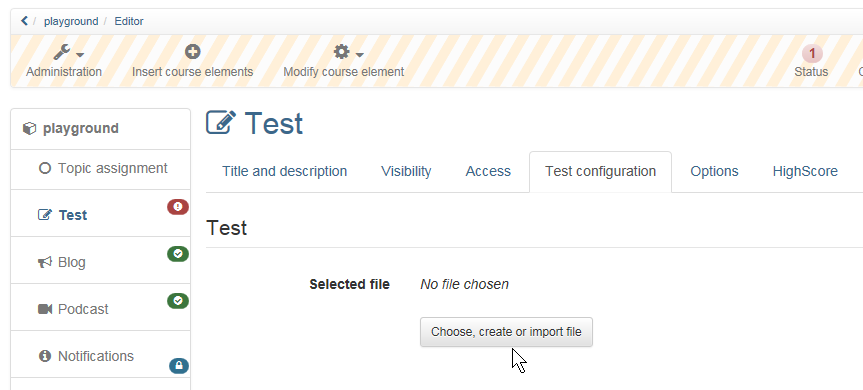
| 1 | Click on "Choose, create or import file" in the tab "Configuration test/self-test/questionnaire." | |
| 2 | Click on "Create." | |
| 3 | Indicate the title of your test and click on "Create". | |
Your file is now created and consists of one section as well as one single-choice question by default. If there are no such questions in your test you can delete that default single-choice question as soon as you have added any other question.
| Step 3: Edit test or questionnaire and add new question (e.g. multiple choice) | ||
|---|---|---|
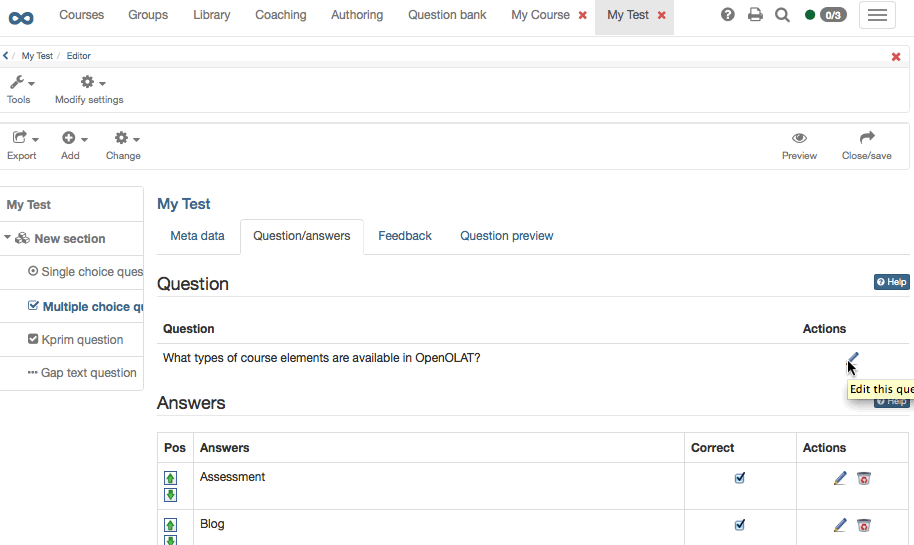
| 1 | Click on "Edit" in the tab "Test Configuration" of the course and go directly to the learning resource "Test". | |
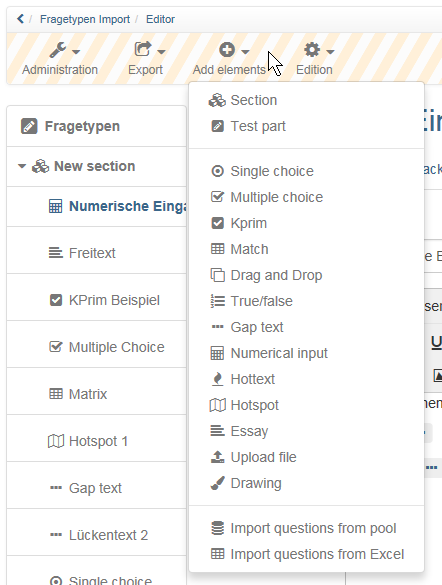
| 2 | Select your type of question (e.g. multiple choice) in the drop-down menu "Add" in the toolbar. | |
| 3 | Enter the title of the question in the first tab (obligatory field) | |
| 4 | Then enter the question and the possible answers. Depending on the type of question, further settings can also be made. | |
| 5 | For MC, SC and Matrix questions, new answers or lines can be added several times depending on the number of possible answers. | |
| 6 | Now "save" the entries and settings by clicking on the corresponding button. This also applies to further changes in the tabs "Points" and "Feedback". | |
| 7 | In the tab "Points" set up the distribution of points. | |
| 8 | If required, a feedback can be added to the tab "Feedback", which appears under certain conditions. | |
| 9 | You can use the "Preview" or "Preview with solution" tabs to view the display of a question. | |
| 10 | Close the Test Editor by leaving the Test Editor. For example, click on the title of the test in the crumb navigation. | |
In following the same pattern you can now add additional questions of your favored type. Use sections to organize your questions.
| Step 4: Publish and activate your course | ||
|---|---|---|
| 1 | Navigate back to your course editor. | |
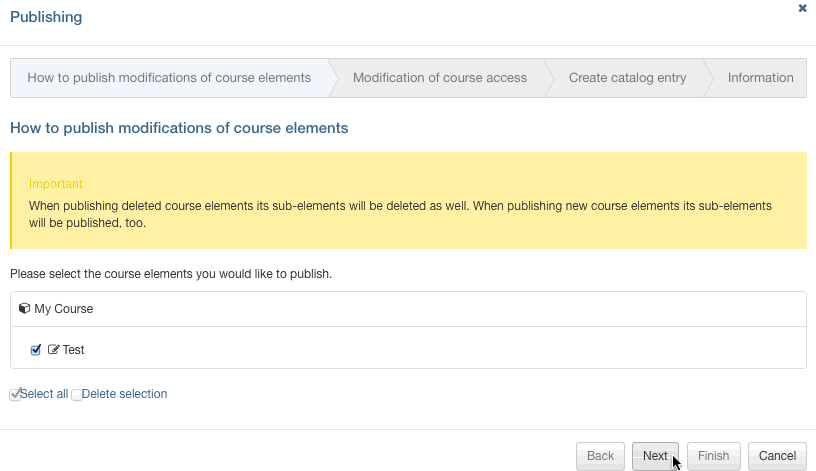
| 2 | Select "Publish" in the toolbar on top. | |
| 3 | Check course element before clicking on "Next." | |
| 4 | Under "Change of course access" select "Published" and if necessary set up the "Access for participants of the organisation". | |
| 5 | Click on "Finish." | |
Your test or questionnaire is now embedded and can be used by your course participants.
