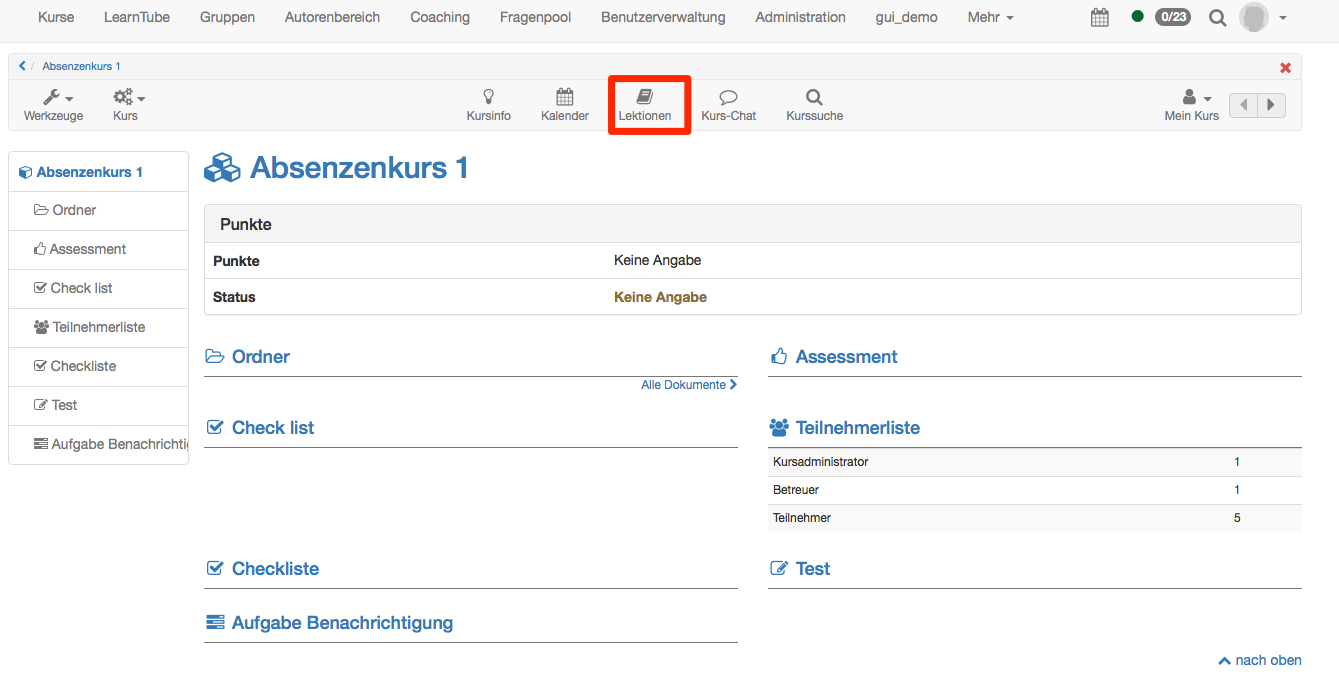
Coaches open the roll call (absence check) from a course's toolbar.
If, at login, there is an active lecture block in the course, the roll call can be opened directly. By clicking on "Start" the roll call will be opened as desktop view, by clicking on "Start wizard" the mobile view will be displayed.
Overview lecture blocks
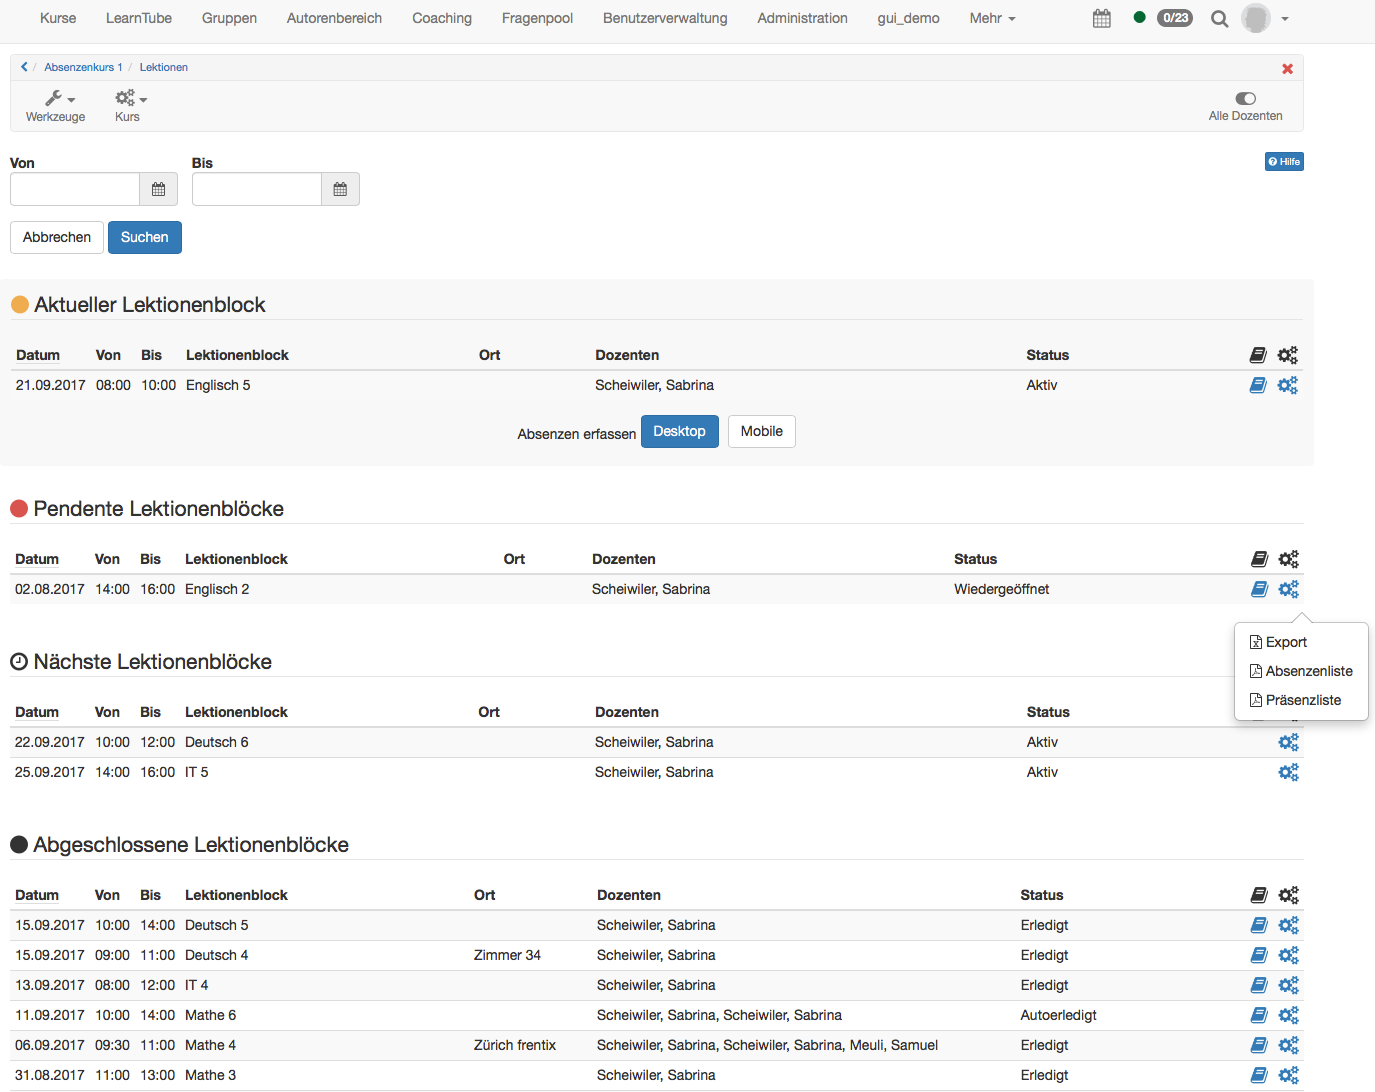
By clicking on the icon in the toolbar an overview will open, showing all current, pending, next and closed lecture blocks.
Current lecture blocks: The roll call can also be started from here by clicking on the icon. Again, you can choose between desktop and mobile view.
Pending lecture blocks: These are lecture blocks for which a roll call is pending. These lecture blocks are either active or reopened.
Next lecture blocks: Lecture blocks with a future starting date cannot be edited, the icon is thus missing. Planned absences, e.g. due to injuries, cannot be entered in advance.
Closed lecture blocks: Lecture blocks which have been manually closed or "auto-closed". A lecture block is automatically closed when the blocking period is over. Before the end of the blocking period, coaches will get a reminder to do the roll call. The blocking period is defined system-wide under Administration.
By clicking on you may generate various documents. "Export" will generate an Excel list of all participants, including their absences, reasons of absence, and comments, respectively. The "Absence list" comes as a PDF and has a similar content to the Excel list - without reasons for absence, though. Furthermore, you can create a PDF of the "Attendance list". The print out can be signed by the participants if needed.
How to do a roll call
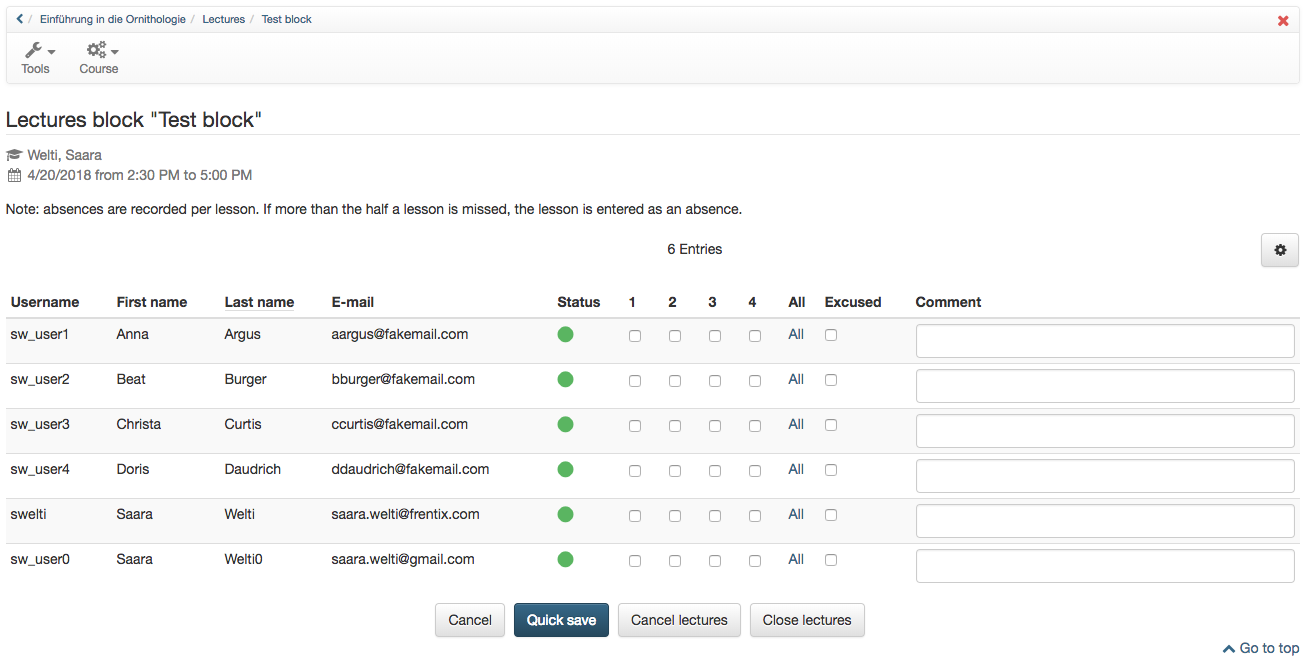
Open the roll-call view as explained above. Here, you can change the status of the lectures of a block. By default the status is green, meaning that the participants attended all lectures. Absences of a specific participant are marked by clicking on the checkbox of the corresponding lecture. If this participant missed all lectures, click on "All". If it was an excused absence, tick off the corresponding checkbox (optional, to be activated under Administration). Excused absences must be added a reason. Furthermore, you may add a comment which will be visible to teachers (coaches) in the roll call and in the absence list (PDF). Participants will not see these comments. Course owners can access such information through the Archive (Excel).
You can quick save, cancel, or close lectures. By clicking on "Quick save" the current state of the roll call will be saved and can be continued at a later time point. "Cancel lectures" should be chosen if the teacher could not hold to lecture, e.g. due to illness. Cancelling a lecture requires a reason which are to be added system-wide under Administration. Teachers cannot add these comments themselves.
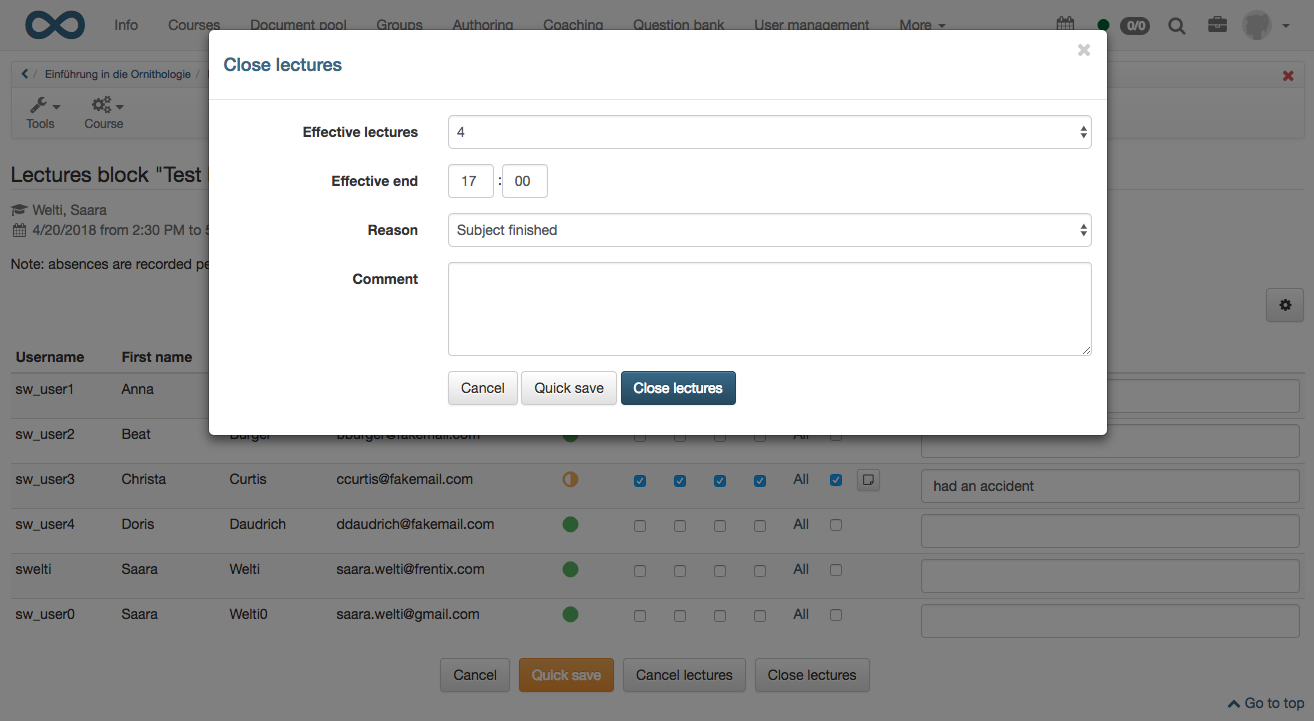
When the roll call is done click on "Close lectures". Enter the real end date (default is the planned end date) and select a reason (e.g. "Subject finished"). For example, if a course ended earlier than expected, the reason could be that no breaks were needed. This allows the course owner to see whether lecture blocks tend to be finished on time or not.
You may also add comments which will only be visible to the course owner through the Archive (Excel).
When a lecture block has been closed, the participants will have a time frame to appeal. If an appeal is accepted, e.g. by handing in a doctor's note, the lecture block can be reopened and the roll call edited. Afterwards, the lecture block must be closed again.
Coaching Tool
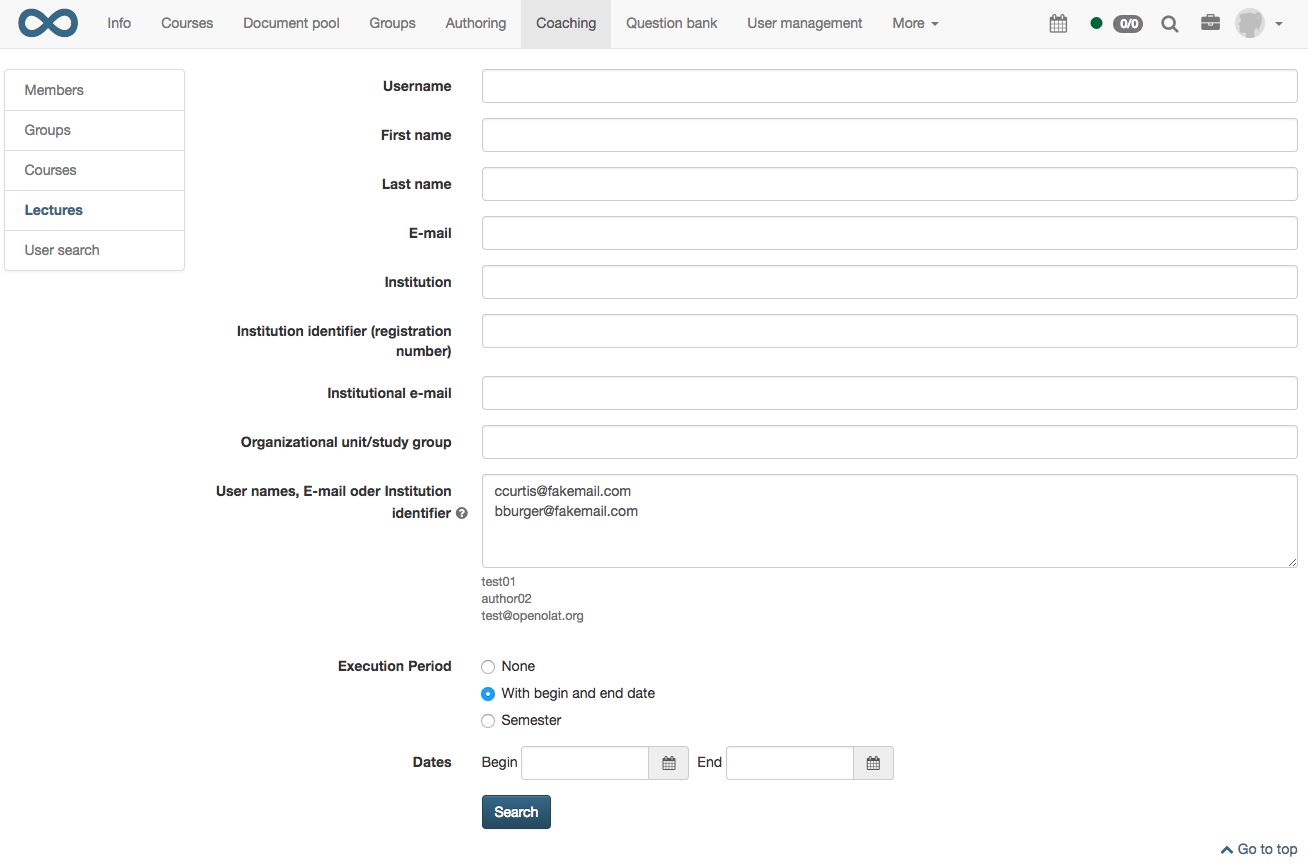
Use the coaching tool to get an overview of absences in multiple courses, or in a complete semester. Select "Lectures" from the menu on the left-hand side. Now you can, for example, search for a specific participant. A list of the participant's courses with absence management will be shown.
You can also search for a specific class. From a class list copy the column of the user names or the e-mails and paste it into the field named "User names, E-mail or Institution identifier".
As execution period "Semester" can be selected. However, this only works if semesters have been defined under Administration. Otherwise, set a start and end date for your search. This allows you, for example, to read out the data required to issue certificates.
