Just follow the instructions below to create a simple test or questionnaire in no time before embedding it in your course and activating it for your participants.
| Step 1: Open course editor and insert course element | ||
|---|---|---|
| 1 | Search for your course in "Authoring", section "My entries," and open it. | 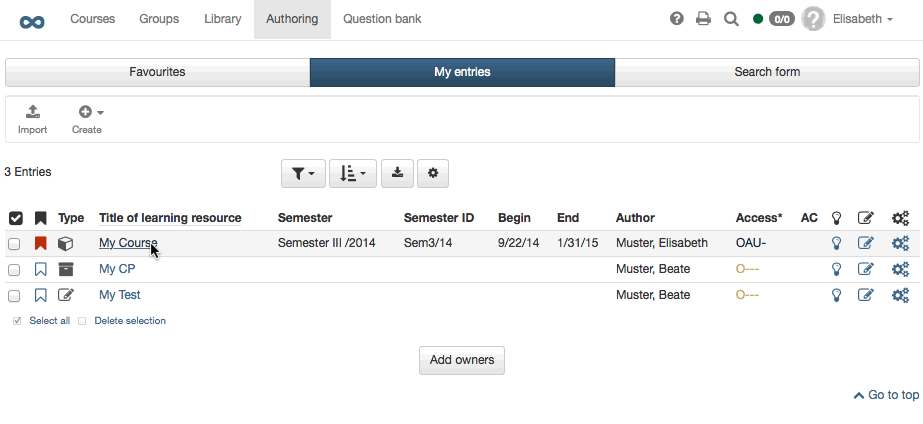 |
| 2 | Click on "Course editor" in the drop-down menu "Tools" in the toolbar. | |
| 3 | Select position at which your test, self-test or questionnaire course element should be inserted by clicking on it. | |
| 4 | Select "Test," "Self-test" or "Questionnaire" in the pop-up "Insert course elements" in the toolbar. | |
| 5 | Indicate a short title for your course element in the tab "Title and description" and save your settings. | |
| Step 2: Create a test or questionnaire file | ||
|---|---|---|
| 1 | Click on "Choose, create or import file" in the tab "Configuration test/self-test/questionnaire." | 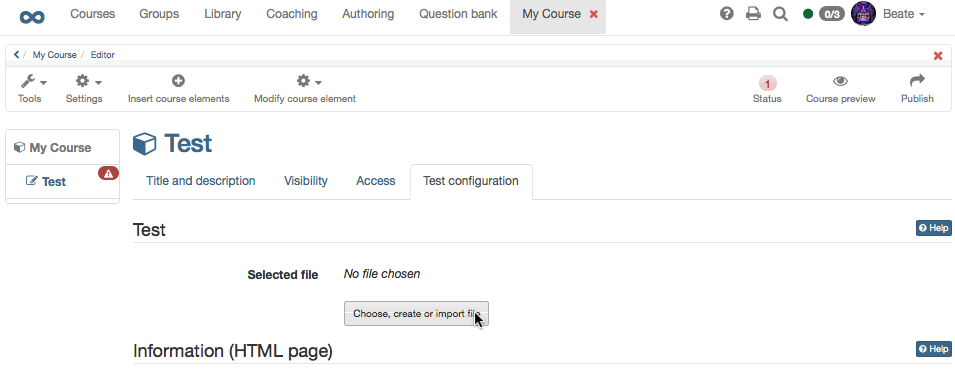 |
| 2 | Click on "Create." | |
| 3 | Indicate the title of your test and click on "Create". | |
Your file is now created and consists of one section as well as one single-choice question by default. If there are no such questions in your test you can delete that default single-choice question as soon as you have added any other question.
| Step 3: Edit test or questionnaire and add new question (e.g. multiple choice) | ||
|---|---|---|
| 1 | Click on "Edit." | 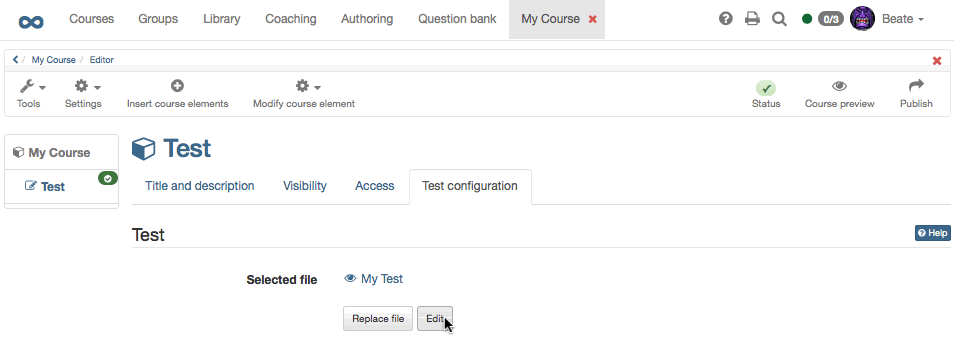 |
| 2 | Select your type of question (e.g. multiple choice) in the drop-down menu "Add" in the toolbar. | |
| 3 | Select position at which your new question should be inserted and save your settings. | |
| 4 | Indicate title and configuration (optional) in the tab "Meta data" and save your settings. | |
| 5 | Click on the pencil icon next to "New question" in the tab "Question/answers" before editing your question and saving your settings. | 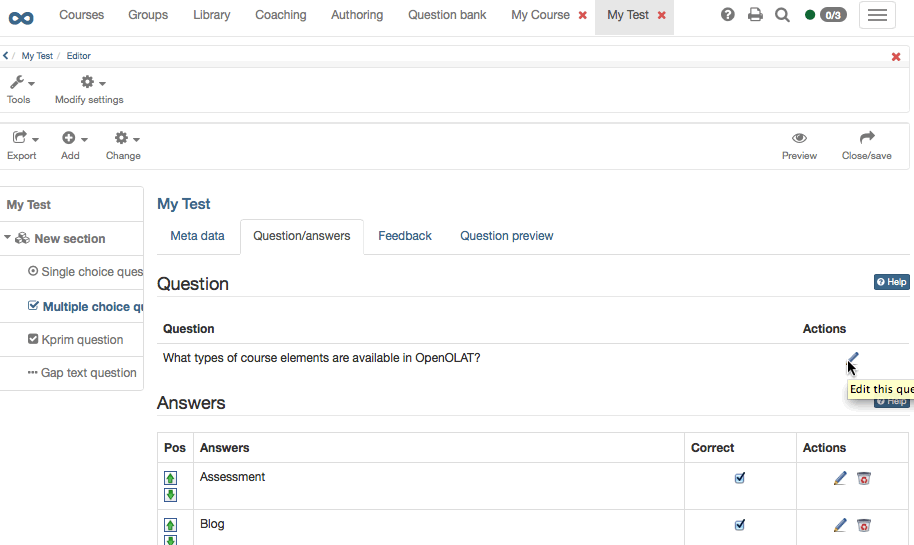 |
| 6 | Select "Add new answer" several times (number depending on possibilities) before editing your answers and saving your settings. | |
| 7 | In your test check all answer options that are correct and save your settings. | |
| 8 | Modify assessment method (optional) and save your settings. | |
| 9 | Indicate feedback in the next tab (optional) and save your settings. | |
In following the same pattern you can now add additional questions of your favored type. Use sections to organize your questions.
| Step 4: Save test or questionnaire | ||
|---|---|---|
| 1 | Click on "Close/Save" in the right corner of the toolbar. | 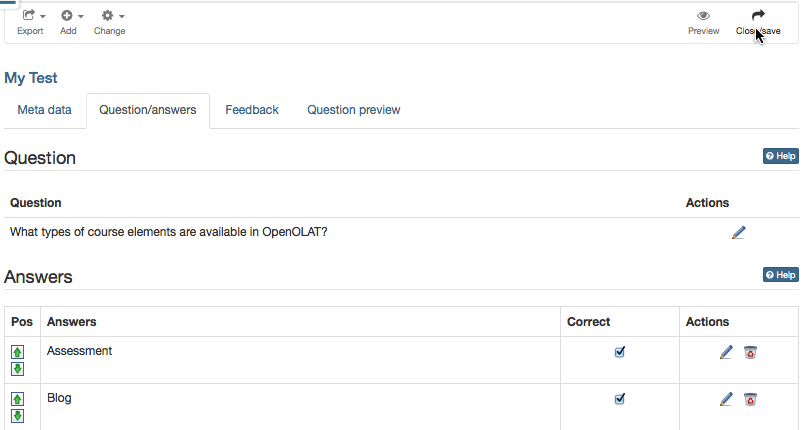 |
| 2 | Save your settings. | |
| Step 5: Publish and activate your course | ||
|---|---|---|
| 1 | Navigate back to your course editor. | 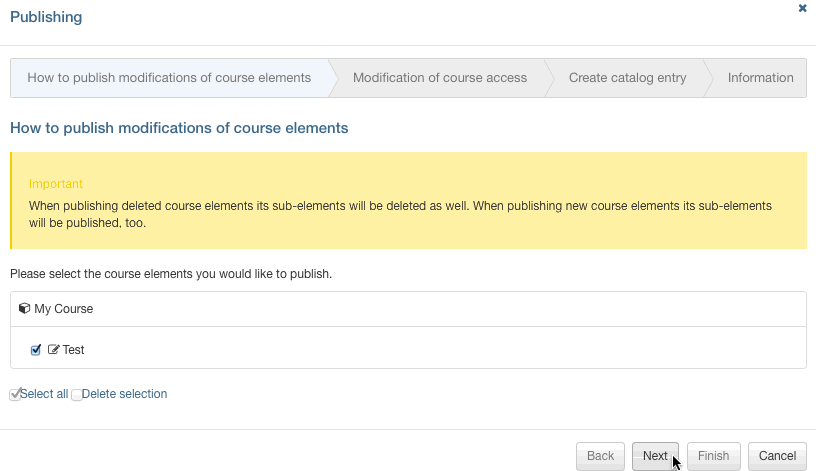 |
| 2 | Select "Publish" in the toolbar on top. | |
| 3 | Check course element before clicking on "Next." | |
| 4 | Select "All registered OpenOLAT users" from the pull-down menu, section "Modify course access." | |
| 5 | Click on "Finish." | |
Your test or questionnaire is now embedded and can be used by your course participants.
